Chocolate Cherry Almond Granola

Chocolate Cherry Almond Granola (Healthy Vegan Recipe)

Jump To Recipe

Chocolate Cherry Almond Granola (Healthy Vegan Recipe)

Chocolate Cherry Almond Granola (Healthy Vegan Recipe)

Featuring Perfect Date Chocolate from Goodness Tea.

Chocolate, Cherry, and Almond….this magical trio of flavors tastes good in everything from ice cream to baked items. It also makes one delicious granola. If you’ve had a browse around the blog, you may notice I’m hooked on this flavor combination. So I had to make a chocolate cherry almond granola recipe (of course!) but with a healthy vegan twist.

The best thing about homemade granola is that it’s easy to make and you have full control over the ingredients. It’s also economical, low waste, and sooo much better than store-bought. If you’re curious about the many health benefits of chocolate, (cacao) dried cherries, and almonds, click on the links.

You can make healthy homemade granola in just a few steps:

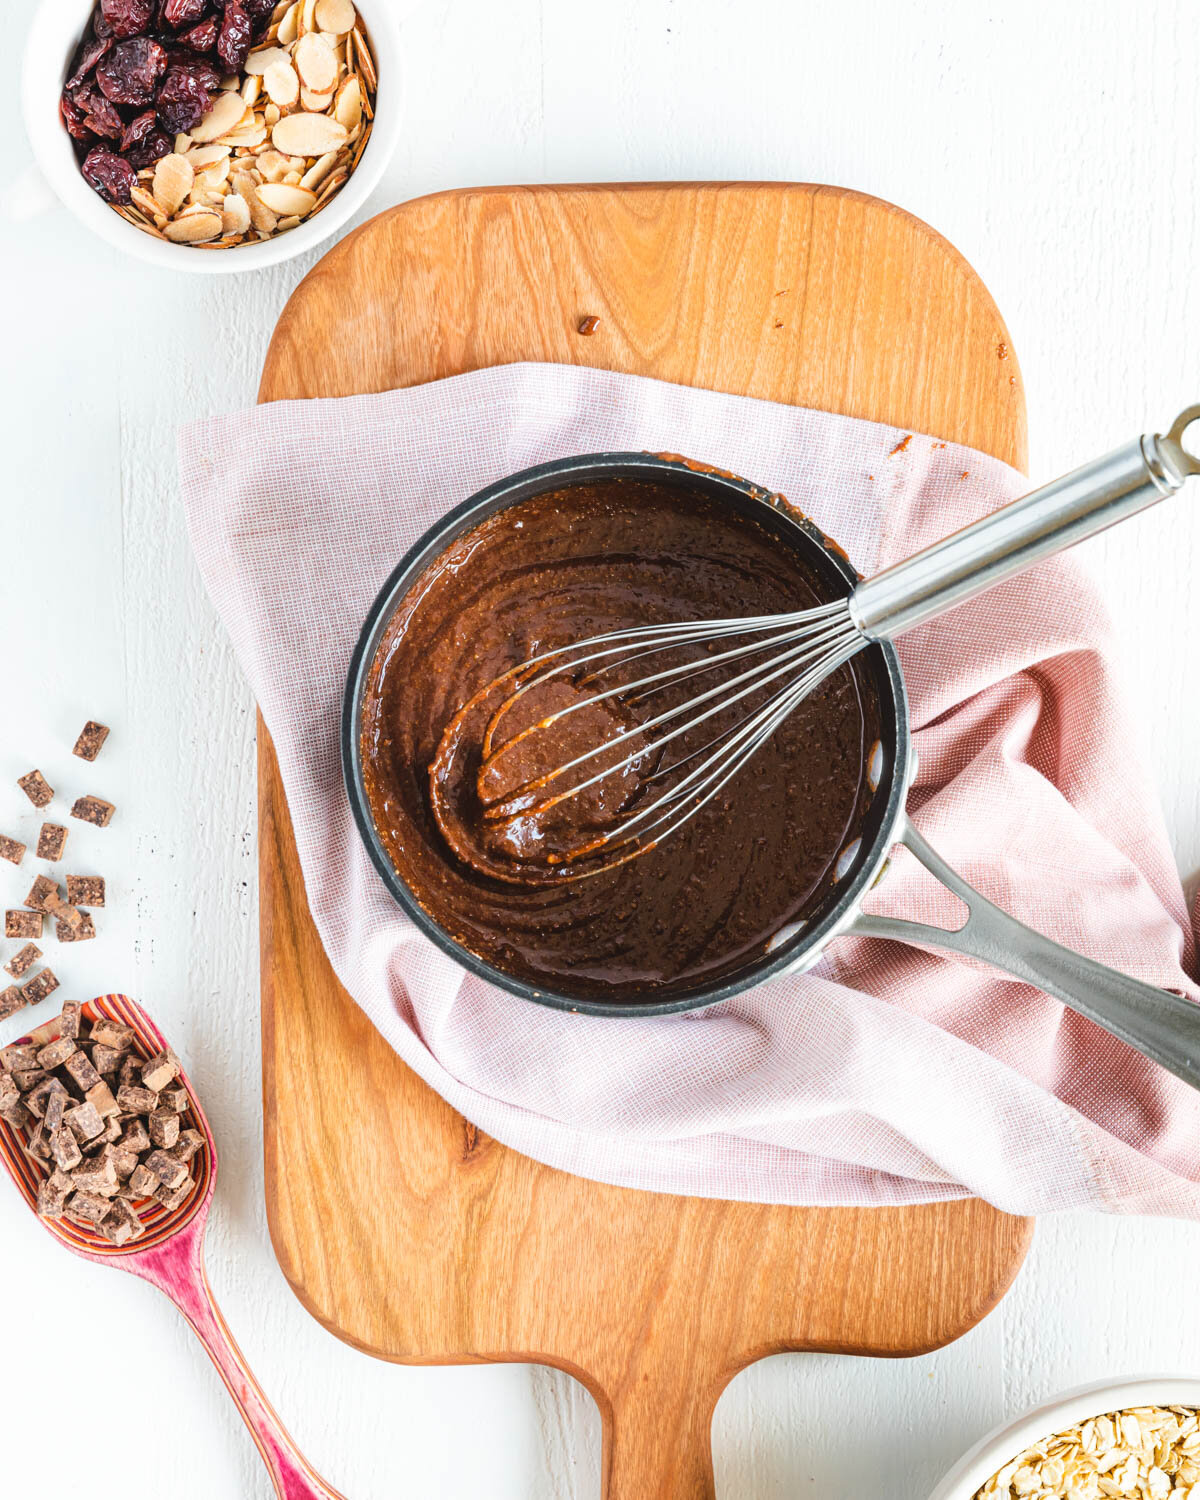
1. Melt all the of ingredients together, except the oats and mix-ins, in a small saucepan over medium heat.

2. Stir this mixture into the oats, until well coated, leaving lots of yummy clumps.

3. Add your mix-ins and bake! (I mix the chocolate chunks in after baking and cooling, so they don’t melt.)

Scroll down for step-by-step instructions and photos!

The ingredient that really takes this chocolate cherry almond granola over the top is the Perfect Date Chocolate from Goodness Tea. It’s bittersweet chocolate with the texture of fudge. Organic, fair-trade, and fruit-sweetened, it also comes in completely compostable packaging. I have to hold myself back from eating more than one bar, it’s that good!

If you make this recipe, I’d love to hear how you enjoyed it in the ratings and comments below. And be sure to share your creations on Instagram and tag me @vegeta.full.


Ingredients for Chocolate Cherry Almond Granola

Ingredients for Chocolate Cherry Almond Granola

Ingredients:

o   3 cups (270 grams) of regular rolled oats (GF if desired)

o   ½ cup (4 oz.) of almond butter, no-oil-added

o   ½ cup (4 oz.) of maple syrup

o   2 tablespoons of raw cacao powder

o   2 teaspoons of almond extract

o   ¾ teaspoon of fine sea salt

 Mix ins:

o   ½ cup (69 grams) of sliced toasted almonds

o   ½ cup of dried cherries

o   1 bar (2.3 oz. / 65 grams) of Perfect Date Chocolate, chopped into chocolate chip sized chunks

Makes 4 cups of granola (click on the ingredients in bold to see what I use in this recipe)


Method for making Chocolate Cherry Almond Granola

Chocolate Cherry Almond Granola syrup

Steps One-Two:

1.  Pre-heat oven to 350 F (180 C)

 2. In a small saucepan over medium-high heat, combine almond butter, maple syrup, almond extract, cacao powder, and salt.  Stir continuously until melted and well combined. This will take a few minutes.


Chocolate Cherry Almond Granola ingredients ready for mixing

Step Three:

3.  Add the rolled oats to a large mixing bowl.  Pour the almond butter/maple syrup mixture over the oats.


Chocolate Cherry Almond Granola oats and syrup mixed together

Step Four:

4.  Using a wooden spoon or spatula, mix the warm sauce into the oats, making sure that all the oats are well coated. Leave some different sized clumps for a fun variety of textures.


Chocolate Cherry Almond Granola mixed with cherries and almonds

Step Five:

5.  Stir in the sliced almonds and dried cherries until evenly mixed.


Chocolate Cherry Almond Granola ready to bake

Step Six:

6.  Spread in an even layer on a large baking sheet.


Chocolate Cherry Almond Granola ready to eat

Steps Seven-Nine:

7.   Bake at 350 F / 180 C for 10 minutes. Remove from the oven and flip the granola over, in sections, using a metal spatula. Bake for an additional 10 minutes. Remove from the oven and stir.  Bake for a final 5 minutes until nice and golden. This three-step bake creates the perfect texture.

 8. Let cool and mix in the Perfect Date Chocolate chunks.

9.  Store in an airtight container for up to a month. You can also freeze it for future use.  Just let frozen granola thaw to room temperature before enjoying.


Printable Recipe Card:

Chocolate Cherry Almond Granola (Healthy Vegan Recipe)

Chocolate Cherry Almond Granola (Healthy Vegan Recipe)

Yield: 8 (½ cup) Servings
Author: Carol Clayton
Prep time: 15 MinCook time: 25 MinTotal time: 40 Min
Chocolate, Cherry and Almond….this magical trio of flavors tastes good in everything from ice cream to baked items. It also makes one delicious granola. So I created a chocolate cherry almond granola recipe with a healthy vegan twist. Featuring Perfect Date Chocolate from Goodness Tea.

Ingredients

Instructions

  1. Pre-heat oven to 350 F (180 C)
  2. In a small saucepan over medium-high heat, combine almond butter, maple syrup, almond extract, cacao powder, and salt. Stir continuously until melted and well combined. This will take a few minutes.
  3. Add the rolled oats to a large mixing bowl. Pour the almond butter/maple syrup mixture over the oats.
  4. Using a wooden spoon or spatula, mix the warm sauce into the oats, making sure that all the oats are well coated. Leave some different sized clumps for a fun variety of textures.
  5. Stir in the sliced almonds and dried cherries until evenly mixed.
  6. Spread in an even layer on a large baking sheet.
  7. Bake at 350 F / 180 C for 10 minutes. Remove from the oven and flip the granola over, in sections, using a metal spatula. Bake for an additional 10 minutes. Remove from the oven and stir. Bake for a final 5 minutes until nice and golden. This three-step bake creates the perfect texture.
  8. Let cool and mix in the Perfect Date Chocolate chunks.
  9. Store in an airtight container for up to a month. You can also freeze it for future use. Just let frozen granola thaw to room temperature before enjoying.

Calories

394.52

Fat (grams)

17.19

Sat. Fat (grams)

2.80

Carbs (grams)

52.85

Fiber (grams)

6.64

Net carbs

46.21

Sugar (grams)

24.31

Protein (grams)

9.66

Sodium (milligrams)

249.82

Cholesterol (grams)

0.65

Nutritional information is provided as a courtesy and is an estimate only. This information comes from online calculators.

Did you make this recipe?
Tag @vegeta.full on instagram and hashtag it #letsblendvegan
Created using The Recipes Generator

Maple Tempeh Bacon

Maple Tempeh Bacon (oil-free vegan bacon)

Maple Tempeh Bacon (oil-free vegan bacon)

Maple Tempeh Bacon (oil-free vegan bacon)

Jump To Recipe

When my daughter, Lizzy, first went vegan, she came home with a very simple way to cook tempeh that solves the “funky taste” that some people experience when eating it plain. And that was to cook sliced tempeh in tamari. GF tamari, is similar to soy sauce, but has a richer, milder flavor. (Click here to read more about the difference between tamari and soy sauce.)

The tempeh soaks up all that umami flavor like a sponge, transforming it into a salty, meaty slice that’s full of plant-based protein. Liquid smoke seemed like a natural companion to add along with savory tamari. And, boom, tempeh bacon became a staple in our household. It’s pretty hard to improve on tempeh bacon, but brushing the sides with maple syrup definitely gives it a sweet finishing touch.  

This oil-free recipe uses water instead of oil to keep the tempeh from drying out in the pan. Don’t worry, your vegan bacon will be packed full of flavor, as the tamari and liquid smoke absorb completely into the tempeh, even without marinating. Once you discover how easy and delicious it is to make, I have a feeling it will be come a staple in your household too!

The beautiful cookware set in the photos was kindly gifted by Phantom Chef

Ingredients for Maple Tempeh Bacon

maple tempeh bacon ingredients

Ingredients:

8 oz. (227 grams) of tempeh

3 tablespoons of GF tamari

3 tablespoons of water (divided)

2 teaspoons of hickory liquid smoke (all natural concentrated)

1 tablespoon of maple syrup (more if desired)

Makes 18 strips of maple tempeh bacon

Method for making Maple Tempeh Bacon

maple tempeh bacon slices before cooking

Step One:

1. Cut your block of tempeh into ¼ inch slices (horizontally). This is the perfect thickness for tempeh bacon. If it’s cut too thin, it will break as you flip it over and move it around. If it is too thick, the flavors won’t absorb all the way through.

maple tempeh bacon with tamari sauce

Step Two:

2. Add your strips of tempeh to a large, non-stick frying pan, over medium-high heat. Combine the tamari with 1 tablespoon of water. Pour the tamari over the tempeh, making sure that all the pieces are well coated.

maple tempeh bacon tamari sautee

Step Three:

3. Sauté until all the liquid is absorbed, about 3 minutes.  Flip the tempeh strips over and sprinkle with the remaining 2 tablespoons of water.

maple tempeh bacon, cooking the second side

Step Four:

4. Continue to sauté until all the liquid is absorbed, but the tempeh is not dried out, about 3 more minutes.  If the liquid absorbs too quickly, sprinkle on a bit more water. This method will help the tamari reach the center of the tempeh.

maple tempeh bacon with liquid smoke

Step Five:

5. Now your tempeh is ready for the liquid smoke. Sprinkle 1 teaspoon of liquid smoke on each side for 2 teaspoons total. Test for smokiness and add more, if you like, for a deeper smokey flavor. Liquid smoke is a heavy-handed flavoring, so go lightly at first.

maple tempeh bacon brushed with maple syrup

Step Six:

Brush the tempeh with maple syrup or skip this step for a sugar free tempeh bacon.

Enjoy as a savory, flavorful addition to any recipe or all by itself!

Phantom Chef Cookware

Phantom Chef Cookware

More savory recipes to fall in love with:

Classic Tofu Scramble

Tomato Basil Spaghetti Sauce

Creamy Cashew Chickpea Curry

Did you make this recipe? Share it with a friend and lemme know how you liked it in the comments below! I also love seeing your creations on Instagram. You can tag me @vegeta.full.

Printable Recipe Card:

Maple Tempeh Bacon

Maple Tempeh Bacon

Yield: 18 strips of tempeh bacon
Author: Carol Clayton
Prep time: 5 MinCook time: 10 MinTotal time: 15 Min
Vegan bacon? Yes please! Tempeh soaks up all the umami flavor of the tamari and liquid smoke like a sponge, transforming it into a salty, meaty slice that’s full of plant-based protein. Brush the sides with maple syrup to give it a sweet finishing touch.

Ingredients

Instructions

  1. Cut your block of tempeh into ¼ inch slices (horizontally). This is the perfect thickness for tempeh bacon. If it’s cut too thin, it will break as you flip it over and move it around. If it is too thick, the flavors won’t absorb all the way through.
  2. Add your strips of tempeh to a large, non-stick frying pan, over medium-high heat. Combine the tamari with 1 tablespoon of water. Pour the tamari over the tempeh, making sure that all the pieces are well coated.
  3. Sauté until all the liquid is absorbed, about 3 minutes. Flip the tempeh strips over and sprinkle with the remaining 2 tablespoons of water.
  4. Continue to sauté until all the liquid is absorbed, but the tempeh is not dried out, about 3 more minutes. If the liquid absorbs too quickly, sprinkle on a bit more water. This method will help the tamari reach the center of the tempeh.
  5. Now your tempeh is ready for the liquid smoke. Sprinkle 1 teaspoon of liquid smoke on each side for 2 teaspoons total. Test for smokiness and add more, if you like, for a deeper smokey flavor. Liquid smoke is a heavy-handed flavoring, so go lightly at first.
  6. Brush the tempeh with maple syrup or skip this step for a sugar free tempeh bacon.

Calories

29.27

Fat (grams)

1.44

Sat. Fat (grams)

0.43

Carbs (grams)

1.87

Fiber (grams)

0.02

Net carbs

1.85

Sugar (grams)

0.72

Protein (grams)

2.82

Sodium (milligrams)

170.46

Cholesterol (grams)

0.00
Did you make this recipe?
Tag @vegeta.full on instagram and hashtag it #letsblendvegan

Seed the Day Bar

Seed the Day Bar (raw, vegan energy bar)

Seed the Day Bar (raw, vegan energy bar)

Seed the Day Bar (raw, vegan energy bar)

Jump To Recipe

Fudgy, sweet and full of nutrients, this raw vegan energy bar will help you seize the day. It’s packed full of small, yet mighty, seeds. These tasty little powerhouses contain all the nutrients needed to grow a healthy, complex plant. Those nutrients, and healthy fats, are so good for our bodies too.

The sweetener of this plant-based bar is dates. You may be wondering if dates are good for you. And the answer is YES! (yay) Dates are a very healthy fruit, and one of the few unprocessed sweeteners you can find readily available today. (Click here for a fun little video on dates.) They are sweet and sticky and make a wonderful base for energy bars.

For successful results: blend the first group of ingredients in a food processor (not a blender). The sticky mixture will hold all those lovely seeds in place. Then scoop the date mixture into a bowl and add the seeds and oats. It’s important to mix these ingredients in by hand, or with a spatula, for best texture. Follow the rest of the directions below and you’ll have the tastiest healthy energy bars you can make at home!

Ingredients for Seed the Day Bar

Seed the Day Bar ingredients

Ingredients:

First Group:

1 tablespoon chia seeds, soaked in:

3 tablespoons water

1½ cups (8 oz.) of dates, pitted

½ cup tahini

2 teaspoons vanilla

¼ teaspoon fine sea salt

Second Group:

1 cup rolled oats

¼ cup raw pumpkin seeds

2 tablespoons hemp hearts

1 tablespoon of flax seeds (or 2 tablespoons of flax meal)

1 tablespoon of sesame seeds

 Makes 12 bars or 24 energy bites

Method for making Seed the Day Bars

Seed the Day Bar date paste in food processor

Steps One-Four:

1.  Whisk the chia seeds and water in a small dish and set aside to gel. This will take 5-7 minutes.

 2. Line all sides of an 8x8 inch pan with parchment paper to prevent sticking.

 3. Grind the flax seeds in a spice grinder or use flax meal (which is ground flax seed).

 4. Add the dates, tahini, vanilla and salt to a food processor, followed by the gelled chia seeds. Blend these ingredients together until a date paste forms, scraping down the sides of the food processor as necessary. The mixture will be very sticky.

Seed the Day Bar date paste and seeds ready to mix

Step Five:

5.  Transfer the date paste to a mixing bowl and add in oats, pumpkin seeds, hemp hearts and ground flax. Using your hands or a wooden spatula, mix the seeds and oats into the date paste. This is sticky business but well worth the effort.

Seed the Day Bars pressed in a pan

Steps Six-Seven:

6. Scoop the dough into the parchment lined pan and press down with your hands or spatula. Sprinkle the top with sesame seeds.

7.  Lay a piece of parchment paper on top (to prevent sticking) and use the back side of a metal spatula to press and smooth out any lumps.


Seed the Day Bar cut into 12 bars

Steps Eight-Nine:

8.  Refrigerate for 2 hours or until firm and cut into 12 bars.

 9. Store in the fridge between pieces of parchment paper.

Fun variation: Make fudgy energy bites by rolling the dough into 24 equal sized balls (about 1 full tablespoon) and then rolling them in 3 tablespoons cacao powder mixed with 1 tablespoon of sesame seeds.

Seed the Day Bar (raw, vegan energy bar)

Seed the Day Bar (raw, vegan energy bar)

Other healthy desserts and snacks you may enjoy:

Raw Vegan Cookie Dough

Almond Cacao Biscotti

Lemon Poppy Seed Loaf

Printable Recipe Card:

Yield: 12 bars (or 24 energy bites)
Author: Carol Clayton
Seed The Day Bar

Seed The Day Bar

Fudgy, sweet and full of nutrients, this raw vegan energy bar will help you seize the day. It’s packed full of small, yet mighty, seeds. These tasty little powerhouses contain all the nutrients needed to grow a healthy, complex plant. Those nutrients, and healthy fats, are so good for our bodies too.
Prep time: 20 MinInactive time: 2 HourTotal time: 2 H & 20 M

Ingredients

Instructions

  1. Whisk the chia seeds and water in a small dish and set aside to gel. This will take 5-7 minutes.
  2. Line all sides of an 8x8 inch pan with parchment paper to prevent sticking.
  3. Grind the flax seeds in a spice grinder or use flax meal (which is ground flaxseed).
  4. Add the dates, tahini, vanilla, and salt to a food processor, followed by the gelled chia seeds. Blend these ingredients together until a date paste forms, scraping down the sides of the food processor as necessary. The mixture will be very sticky.
  5. Transfer the date paste to a mixing bowl and add in oats, pumpkin seeds, hemp hearts, and ground flax. Using your hands or a wooden spatula, mix the seeds and oats into the date paste. This is sticky business but well worth the effort.
  6. Scoop the dough into the parchment-lined pan and press down with your hands or spatula. Sprinkle the top with sesame seeds.
  7. Lay a piece of parchment paper on top (to prevent sticking) and use the backside of a metal spatula to press and smooth out any lumps.
  8. Refrigerate for 2 hours or until firm and cut into 12 bars.
  9. Store in the fridge between pieces of parchment paper.

Notes:

For step-by-step instructions with photos, see blog post!


Fun variation: Make fudgy energy bites by rolling the dough into 24 equal-sized balls (about 1 full tablespoon) and then rolling them in 3 tablespoons cacao powder mixed with 1 tablespoon of sesame seeds.

Nutrition Facts

Calories

166.56

Fat (grams)

7.83

Sat. Fat (grams)

1.05

Carbs (grams)

22.28

Fiber (grams)

3.58

Net carbs

18.70

Sugar (grams)

11.84

Protein (grams)

4.27

Sodium (milligrams)

49.33

Cholesterol (grams)

0.00

Nutritional information is provided as a courtesy and is an estimate only. This information comes from online calculators.

Did you make this recipe?
Tag @vegeta.full on instagram and hashtag it #feedpeopleplants
Created using The Recipes Generator

Peanut Butter Cacao Granola

Peanut Butter Cacao Granola

Peanut Butter Cacao Granola

Peanut Butter Cacao Granola

Jump To Recipe

Granola. My mouth waters just thinking about it. Those crunchy sweet clusters of oats always mixed with something fun. It’s simple to make and tastes good on just about anything. Oil-free peanut butter cacao granola is super healthy too, with minimal ingredients and no refined sugar.

I like to leave some different sized clusters when mixing the ingredients together for a variety of textures and just the right amount of crunch. Use regular GF rolled oats which are sturdier than quick cook oats and chewier than steel cut oats.

This is a recipe that you can really build on. Experiment with different mix-ins like nuts, seeds, and dried fruit. Once you discover how easy it is to make your own homemade granola, you’ll never go back to store bought!  

Peanut Butter Cacao Granola Ingredients

Ingredients

3 cups of GF rolled oats

1/2 cup of peanut butter

1/2 cup of maple syrup

2 teaspoons of vanilla

1 teaspoon of fine sea salt

1/3 cup of cacao nibs

 Makes about 3½ cups of granola (click on the ingredients in bold to learn more)

Method for making Peanut Butter Cacao Granola

Peanut Butter Cacao Granola Ready to Mix

Peanut Butter Cacao Granola Ready to Mix

1.  Pre-heat oven to 350 F.

 2.  Add rolled oats to a large mixing bowl.

 3. In a small saucepan, over medium heat, combine peanut butter, maple syrup, vanilla and salt. Wisk until melted and smooth. This will take a few minutes.

Peanut Butter Cacao Granola Mixed

Peanut Butter Cacao Granola Mixed

4. Pour the peanut butter mixture over the oats. Using a spatula, mix until the oats are well coated and there are some different sized clusters.

5. Add in the cacao nibs and mix until evenly distributed.

6. Spread the coated oats on a large baking sheet in an even layer.

Peanut Butter Cacao Granola Ready to Bake

Peanut Butter Cacao Granola Ready to Bake

7.  Bake at 350 F for 10 minutes. Then remove from the oven and, using a metal spatula, flip the granola over. Bake for an additional 10 minutes.

 8. Remove granola from the oven again and give it a stir. Cook for 5 additional minutes until golden.

 9. Let cool completely and store in an airtight container.

Peanut Butter Cacao Granola in Container

Other pantry staples you might have fun making!

Printable Recipe Card

Yield: 7 servings (makes 3 ½ cups)
Author: Carol Clayton
Peanut Butter Cacao Granola

Peanut Butter Cacao Granola

Granola. My mouth waters just thinking about it. Those crunchy sweet clusters of oats always mixed with something fun. It’s simple to make and tastes good on just about anything. Oil-free peanut butter cacao granola is super healthy too, with minimal ingredients and no refined sugar.
Prep time: 10 MinCook time: 25 MinTotal time: 35 Min

Ingredients

Instructions

  1. Pre-heat oven to 350 F.
  2. Add rolled oats to a large mixing bowl.
  3. In a small saucepan, over medium heat, combine peanut butter, maple syrup, vanilla, and salt. Wisk until melted and smooth. This will take a few minutes.
  4. Pour the peanut butter mixture over the oats. Using a spatula, mix until the oats are well coated and there are some different-sized clusters.
  5. Add in the cacao nibs and mix until evenly distributed.
  6. Spread the coated oats on a large baking sheet in an even layer.
  7. Bake at 350 F for 10 minutes. Then remove from the oven and, using a metal spatula, flip the granola over. Bake for an additional 10 minutes.
  8. Remove granola from the oven again and give it a stir. Cook for 5 additional minutes until golden. Let cool completely and store in an airtight container.

Notes:

For step-by-step instructions with photos, see blog post!

Nutrition Facts

Calories

347.45

Fat (grams)

14.97

Sat. Fat (grams)

4.33

Carbs (grams)

45.56

Fiber (grams)

5.69

Net carbs

39.87

Sugar (grams)

15.73

Protein (grams)

9.60

Sodium (milligrams)

396.45

Cholesterol (grams)

0.14
Did you make this recipe?
Tag @vegeta.full on instagram and hashtag it #feedpeopleplants
Created using The Recipes Generator

Classic Tofu Scramble

Classic Tofu Scramble

Classic Tofu Scramble

Classic Tofu Scramble

Jump To Recipe

If you miss scrambled eggs, you’ll love scrambled tofu. Tofu’s customizable taste and texture perfectly mimic that American diner-style breakfast favorite.

A key ingredient to “eggy” tofu scrambled is kala namak salt or black salt. Black salt, which is actually a pinkish-grey color, has a mild sulfurous taste and smell, just like eggs.  Turmeric’s golden hue, along with nutritional yeast, gives scrambled tofu its classic yellow color while adding savory flavor.

This recipe, adapted from the first vegan cookbook I ever bought, Vegan 100 by Gaz Oakley, is super versatile too. You can add in your favorite vegetables and spices to the base and make it all your own.

Classic Tofu Scramble Ingredients

Ingredients

2 tablespoons of vegetable stock or water (more if needed)

12 oz. (340 grams) block of extra firm tofu

1 medium yellow onion, finely chopped

½ teaspoon of kosher salt

¼ cup of almond milk (or oat milk)

½ teaspoon of turmeric powder

½ teaspoon of ground black pepper

¼ teaspoon of kala namak salt (black salt)

¼ cup of nutritional yeast

1 cup of cherry tomatoes, halved

Method for making Classic Tofu Scramble

Classic Tofu Scramble Pan

1.  Heat a large non-stick frying pan over medium-high heat.

Classic Tofu Scramble Onions

Add your veggie stock or water, onions and kosher salt. Cook the onions until soft and translucent, 5-7 minutes, adding additional liquid as needed so the onions don’t dry out.

Classic Tofu Scramble (3 of 8).jpg

2.  While the onions are cooking crumble the tofu by pressing it between your fingers. Add the tofu to the cooked onions along with the milk, turmeric, pepper, kala namak salt and nutritional yeast.

Classic Tofu Scramble Cooked

3.  Using a spatula, mix all the ingredients together.  Keep stirring until it becomes an even yellow color and resembles scrambled eggs.

Classic Tofu Scramble with Tomato and Spinach

4.  Mix in the tomatoes and spinach. Cook until the tomatoes are soft, and the spinach is wilted. Add salt and pepper to taste.

Scrambled tofu makes the best savory breakfast but also tastes delicious for a quick weeknight dinner!

Printable Recipe Card:

Classic Tofu Scramble

Classic Tofu Scramble

Yield: 4 Servings
Author: Carol Clayton
Prep time: 10 MinCook time: 15 MinTotal time: 25 Min
If you miss scrambled eggs, you’ll love scrambled tofu. Tofu’s customizable taste and texture perfectly mimic that American diner-style breakfast favorite.

Ingredients

  • 2 tablespoons of vegetable stock or water (more if needed)
  • 12 oz. (340 grams) block of extra firm tofu
  • 1 medium yellow onion, finely chopped
  • ½ teaspoon of kosher salt
  • ¼ cup of almond milk (or oat milk)
  • ½ teaspoon of turmeric powder
  • ½ teaspoon of ground black pepper
  • ¼ teaspoon of kala namak salt (black salt)
  • ¼ cup of nutritional yeast
  • 1 cup of cherry tomatoes, halved
  • 1 cup of fresh baby spinach

Instructions

  1. Heat a large non-stick frying pan over medium-high heat. Add your veggie stock or water, onions and kosher salt. Cook the onions until soft and translucent, 5-7 minutes, adding additional liquid as needed so the onions don’t dry out.
  2. While the onions are cooking crumble the tofu by pressing it between your fingers. Add the tofu to the cooked onions along with the milk, turmeric, pepper, kala namak salt and nutritional yeast.
  3. Using a spatula, mix all the ingredients together. Keep stirring until it becomes an even yellow color and resembles scrambled eggs.
  4. Mix in the tomatoes and spinach. Cook until the tomatoes are soft, and the spinach is wilted. Add salt and pepper to taste.

Calories

123.02

Fat (grams)

5.39

Sat. Fat (grams)

0.91

Carbs (grams)

9.26

Fiber (grams)

4.03

Net carbs

5.23

Sugar (grams)

3.24

Protein (grams)

13.31

Sodium (milligrams)

834.32

Cholesterol (grams)

0.16
Did you make this recipe?
Tag @vegeta.full on instagram and hashtag it #letsblendvegan


Lemon Poppy Seed Loaf

Lemon Poppy Seed Loaf (GF bread that you can make in a blender)

Lemon Poppy Seed Loaf

Lemon Poppy Seed Loaf

Jump To Recipe

The sweet citrusy smell of fresh lemon poppy seed loaf, makes you feel like you’ve walked into your favorite bakery. It’s moist and tender, packed with delicious lemony flavors and just the right amount of poppy seeds.

The best part about this heathy gluten-free loaf is that it can be made in a blender. No bowl required! The trick to non-gummy GF blender bread is to blend your dry ingredients into flour first. Then add your wet ingredients and do an initial mix with a spatula to get the dry ingredients at the bottom of the blender container incorporated into the wet ingredients. This way, you only have to blend the whole mixture for about 10 seconds, since oats become gummy when over mixed. I really like using 2 mini loaf pans instead of a traditional sized loaf pan. This gives the loaves a cute shape and helps with even cooking.

Top with Tangy Lemon Sauce (recipe below) for a not-to-sweet breakfast treat. Your tea and coffee with thank you!

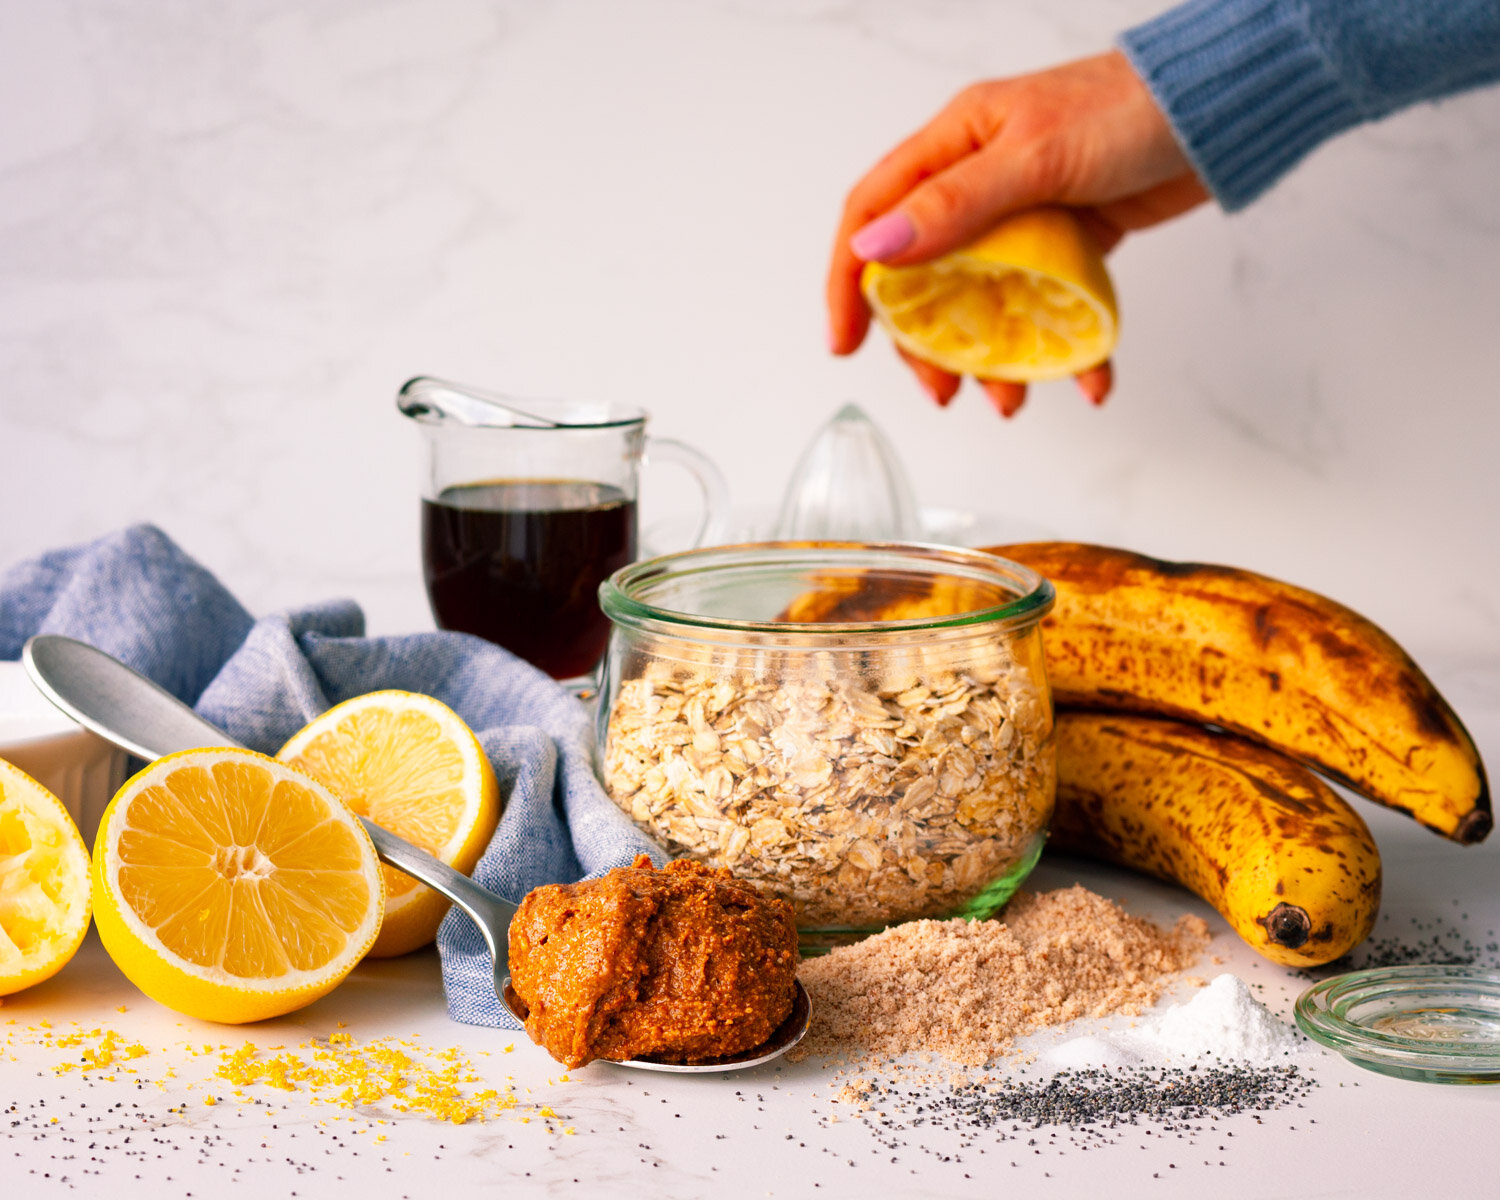
Ingredients

lemon poppy seed loaf ingredients

Dry Ingredients

1½ cups of rolled oats (140 grams)

¾ cup of almond flour (48 grams)

2 teaspoons of baking powder

½ teaspoon of fine sea salt

lemon poppy seed loaf pre-pared pans

Wet Ingredients

1 cup of banana pulp (use very ripe banans)

1/3 cup of maple syrup (or date syrup)

¼ cup of almond butter

2 tablespoons of freshly squeezed lemon juice

1 tablespoon of lemon zest

1 teaspoon of almond extract

lemon poppy seed loaf batter unbaked in pans

Mix In

2 tablespoons of poppy seeds

Method for making Lemon Poppy Seed Loaf

1. First, pre-heat your oven to 375 F. Prepare 2 mini sized bread pans or 1 regular sized bread pan by lining the sides and bottom with parchment paper. You can do this by tearing off a sheet of parchment that is the same width of your pan. Then line the long sides and the bottom with a single piece, making handles that hang over the edge of the pan. If you are using non-stick pans, greasing them won’t be necessary, otherwise rub a small amount of oil on the non-parchment covered surfaces.

 2. Next, add all of the dry ingredients; the oats, almond flour, baking powder and salt, to a blender container. Securely attach the lid and blend on medium speed for 30 seconds or until the oats have turned into oat flour. Oat flour and almond flour will be more course in texture than standard flour.

 3. Use a fork to mash 2 very ripe medium bananas in a bowl or measuring cup. Add 1 cup of the banana pulp to the blender container, followed by the maple syrup, almond butter, lemon juice & zest and almond extract.  Adding to much wet ingredients can make your bread gummy, so if you have extra banana pulp just save it for another purpose. Give the whole mixture a stir with a spatula to help ensure quick even blending.

 4. Securely attach the lid and blend on medium speed for 10 seconds. Oats become gummy when overmixed, so blend just until the ingredients are incorporated.

 5. Using a spatula, mix in the poppy seeds.

 6. Scoop the batter into the prepared bread pan(s).  Place on the middle rack in the oven and bake for 45 minutes at 375 F. You’ll know they are done when a toothpick inserted comes out clean. Cool for 3 minutes only (to prevent steam from forming in the pan which can create gumminess). Then remove from pan(s) and remove the parchment paper, then transfer to a wire rack. Let cool before slicing for best texture.

 Note: If using a single loaf pan, additional cooking time (5 min.) may be necessary.

Lemon Poppy Seed Loaf with Tangy Lemon Sauce

Lemon Poppy Seed Loaf with Tangy Lemon Sauce

lemon poppy seed loaf sliced and stacked

Tangy Lemon Sauce

12 oz. (340 grams) of extra firm silken tofu

¼ cup of freshly squeezed lemon juice

¼ cup of powdered sugar or date sugar

 Blend all ingredients in a blender until smooth and creamy.

Other GF bread recipes that you can make in a blender:

Orange Tahini Banana Bread

Chocolate Cherry Almond Bread

Gingerbread

Pumpkin Spice Bread

Printable Recipe Card:

Lemon Poppy Seed Loaf (GF bread that you can make in a blender)

Lemon Poppy Seed Loaf (GF bread that you can make in a blender)

Yield: 12 total slices (makes 2 mini loaves)
Author: Carol Clayton
Prep time: 15 MinCook time: 45 MinTotal time: 1 Hour
The sweet citrusy smell of fresh lemon poppy seed loaf, makes you feel like you’ve walked into your favorite bakery. It’s moist and tender, packed with delicious lemony flavors and just the right amount of poppy seeds. The best part about this heathy gluten-free loaf is that it can be made in a blender. No bowl required!

Ingredients

Instructions

  1. First, pre-heat your oven to 375 F. Prepare 2 mini sized bread pans or 1 regular sized bread pan by lining the sides and bottom with parchment paper. You can do this by tearing off a sheet of parchment that is the same width of your pan. Then line the long sides and the bottom with a single piece, making handles that hang over the edge of the pan. If you are using non-stick pans, greasing them won’t be necessary, otherwise rub a small amount of oil on the non-parchment covered surfaces.
  2. Next, add all of the dry ingredients; the oats, almond flour, baking powder and salt, to a blender container. Securely attach the lid and blend on medium speed for 30 seconds or until the oats have turned into oat flour. Oat flour and almond flour will be more course in texture than standard flour.
  3. Use a fork to mash 2 very ripe medium bananas in a bowl or measuring cup. Add 1 cup of the banana pulp to the blender container, followed by the maple syrup, almond butter, lemon juice & zest and almond extract. Adding to much wet ingredients can make your bread gummy, so if you have extra banana pulp just save it for another purpose. Give the whole mixture a stir with a spatula to help ensure quick even blending.
  4. Securely attach the lid and blend on medium speed for 10 seconds. Oats become gummy when overmixed, so blend just until the ingredients are incorporated.
  5. Using a spatula, mix in the poppy seeds.
  6. Scoop the batter into the prepared bread pan(s). Place on the middle rack in the oven and bake for 45 minutes at 375 F. You’ll know they are done when a toothpick inserted comes out clean. Cool for 3 minutes only (to prevent steam from forming in the pan which can create gumminess). Then remove from pan(s) and remove the parchment paper, then transfer to a wire rack. Let cool before slicing for best texture.

Notes:

If using a single loaf pan, additional cooking time (5 min.) may be necessary.

Calories

145.80

Fat (grams)

6.30

Sat. Fat (grams)

0.58

Carbs (grams)

20.08

Fiber (grams)

2.96

Net carbs

17.12

Sugar (grams)

7.94

Protein (grams)

3.92

Sodium (milligrams)

172.46

Cholesterol (grams)

0.00

Nutritional information is calculated before adding toppings.

Did you make this recipe?
Tag @vegeta.full on instagram and hashtag it #letsblendvegan
Created using The Recipes Generator