Homemade Cinnamon Raisin Granola

Homemade Cinnamon Raisin Granola / Oil-Free

Jump To Recipe

You’re sure to fall in love with this homemade cinnamon raisin granola recipe. It’s warmly spiced, perfectly sweet, and every bite has just the right amount of crunchy clusters. Best of all it’s full of plant-based protein and super simple to make!


homemade cinnamon raisin granola with milk

This is a sponsored post written by me on behalf of O3 Superfoods. The opinions, text, and recipe are my own creation. Thank you so much for creating the ultimate flax butter and for the support!

If you’re new to homemade granola, I want you to brace yourself because it’s going to change your life. I’m not kidding! Picture yourself breezing through the grocery store, and passing right on by that overpriced, underwhelming, store-bought granola, knowing that you can make an addictively delicious batch at home. And here’s the kicker…. it’s super easy!

Homemade granola is not only simple to make it’s also really healthy, using ingredients you probably have in your pantry right now. I like to think of it as breakfast cookie’s crunchy cousin because it’s sweet, loaded with nuts/seeds and dried fruit, and tastes like you’re eating dessert. So, let’s unpack homemade granola so you can be the hero in your own breakfast story.

homemade cinnamon raisin granola

What’s in Homemade Cinnamon Raisin Granola?

Oats -

Use regular rolled oats, not quick-cooking oats which will make for gummy granola. To make gluten-free granola, use gluten-free rolled oats.

Almond butter and flax butter –

Full of healthy fats and protein, they also help the granola stick together and make it rich and satisfying.

One of the healthiest fats outs there is flax butter. It’s got all the power of flaxseed but in creamy butter form and I love to tuck it into granola. You can read all about the health benefits of flax butter here.

Maple Syrup –

Sticky sweet maple syrup mixed with the nut/seed butter adds just the right amount of sweetness and helps the oats stick together to form clusters.

Vanilla, cinnamon, and salt –

These essential ingredients add warmth, zing, and give the granola that can’t stop at one bite flavor.

Raisins and sliced almonds –

Mixed in before baking, this combination of sweet and savory ingredients takes homemade granola to the next level!

homemade cinnamon raisin granola

Tips and tricks for perfect homemade granola

I’ve made a lot of granola over the years and have learned, through trial and error, a few tricks that can be summed up in 4 simple steps.

Clusters are key to mouthwatering granola. You want a nice variety of big (about the size of a walnut) and small (almond to pea size) clusters. Make clusters as you’re mixing the syrup into the oats by breaking up the lumps into different sizes with your wooden spoon. The thicker your almond butter is the larger clumps you will have.

Mix-ins add extra flavor and texture that make you want to eat granola by the handful. I like a balance of sweet and savory mix-ins like raisins and sliced almonds. You can customize this to what you have on hand in your pantry and what tantalizes your tastebuds. Add these after you’ve mixed the syrup into the rolled oats but before you bake it. If your mix-ins will melt, like chocolate chips, stir those in after the granola is baked and cooled.

homemade cinnamon raisin granola

Flip the granola after 10 minutes of baking and then stir after 20 minutes in the oven. Then let it bake for an additional 5 minutes. (25 minutes total) This exposes all sides of the clusters to heat, making them irresistibly crunchy with a touch of chewiness. It’s a good idea to stick close to the oven when baking. I’ve lost a batch or two from losing track of time and letting it burn! So, set a timer to avoid this tragedy.

Let it cool completely before storing in an air-tight container. Warm granola will create condensation in the jar leaving you with sad, soggy clusters.

homemade cinnamon raisin granola

How do I use Homemade Cinnamon Raisin Granola?

Enjoy it, just like cereal, with plant-based milk

Sprinkle it over smoothie bowls or nice cream

Mix it into your favorite yogurt

Snack on it by the handful!

homemade cinnamon raisin granola

I’m confident this homemade granola recipe is going to become a frequent flyer in your breakfast rotation, it’s:

  • Healthy

  • Vegan

  • Easy to make

  • Loaded with plant-based protein

  • Crunchy and sweet

  • Can’t stop at one bite delicious!

Keep scrolling for step-by-step instructions and photos!

homemade cinnamon raisin granola

Ingredients for Homemade Cinnamon Raisin Granola

homemade cinnamon raisin granola
  • 3 cups (270g) of regular rolled oats (use gluten-free if needed)

  • ½ cup (120 grams) of almond butter

  • ½ cup (4 oz.)  of maple syrup

  • 2 tablespoons of maple 03 Superfoods maple flax butter (see note)

  • 2 teaspoons of vanilla

  • 2 teaspoons of cinnamon

  • 1 teaspoon of fine sea salt

  • ½ cup (80g) of raisins

  • ½ cup (35g) of sliced almonds

Makes 4 cups of granola

Note: If you don’t have any flax butter on hand, feel free to skip this ingredient or add 2 tablespoons of your favorite nut/seed butter.


How to make Homemade Cinnamon Raisin Granola

syrup mixture for homemade cinnamon raisin granola

Steps 1-3:

1. Pre-heat oven to 350 F / 180 C / gas mark 4, and have a rimmed baking sheet ready.

2.  Add the rolled oats to a large mixing bowl. 

 3. In a small mixing bowl, combine the almond butter, maple syrup, flax butter, vanilla, cinnamon, and salt. Stir until it resembles a thick, sticky syrup.

syrup for making homemade cinnamon raisin granola

making homemade cinnamon raisin granola

Step 4:

4. Pour the syrup mixture over the oats. Use a wooden spoon or spatula to mix the syrup into the oats, making sure that all the oats are well coated. Leave some different-sized clumps for a fun variety of textures.

homemade cinnamon raisin granola in a bowl

mixing homemade cinnamon raisin granola

Step 5:

5. Gently mix in the raisins and sliced almonds.


homemade cinnamon raisin granola on a cookie sheet

Step 6:

6. Spread the granola in an even layer on a rimmed baking sheet, using your wooden spoon to evenly distribute the clumps.


homemade cinnamon raisin granola

Steps 7-8:

7. Bake at 350 F / 180 C for 25 minutes total: After 10 minutes, remove from the oven and flip the granola over, in sections, using a spatula. Bake for an additional 10 minutes. Remove from the oven, stir, and bake for a final 5 minutes. The granola will crisp up as it cools.

 8. Let cool completely and store in an airtight container for up to a month. You can also freeze granola for future use.  Just let frozen granola thaw to room temperature before enjoying.

homemade cinnamon raisin granola

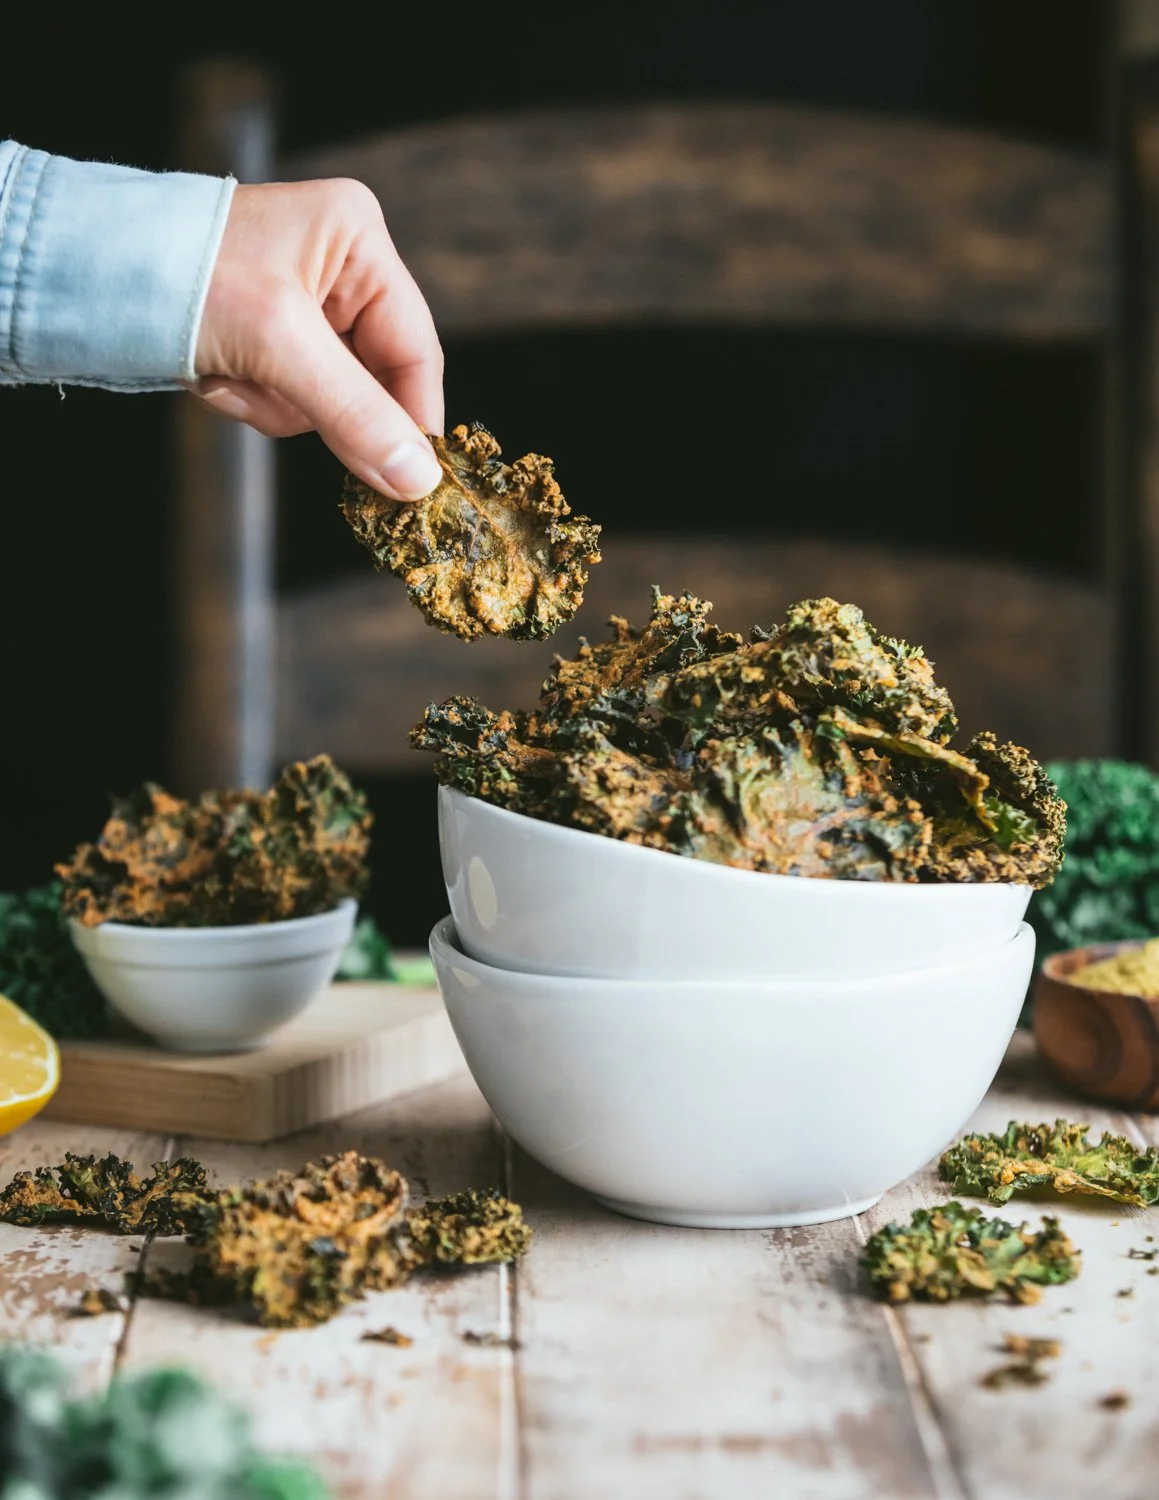
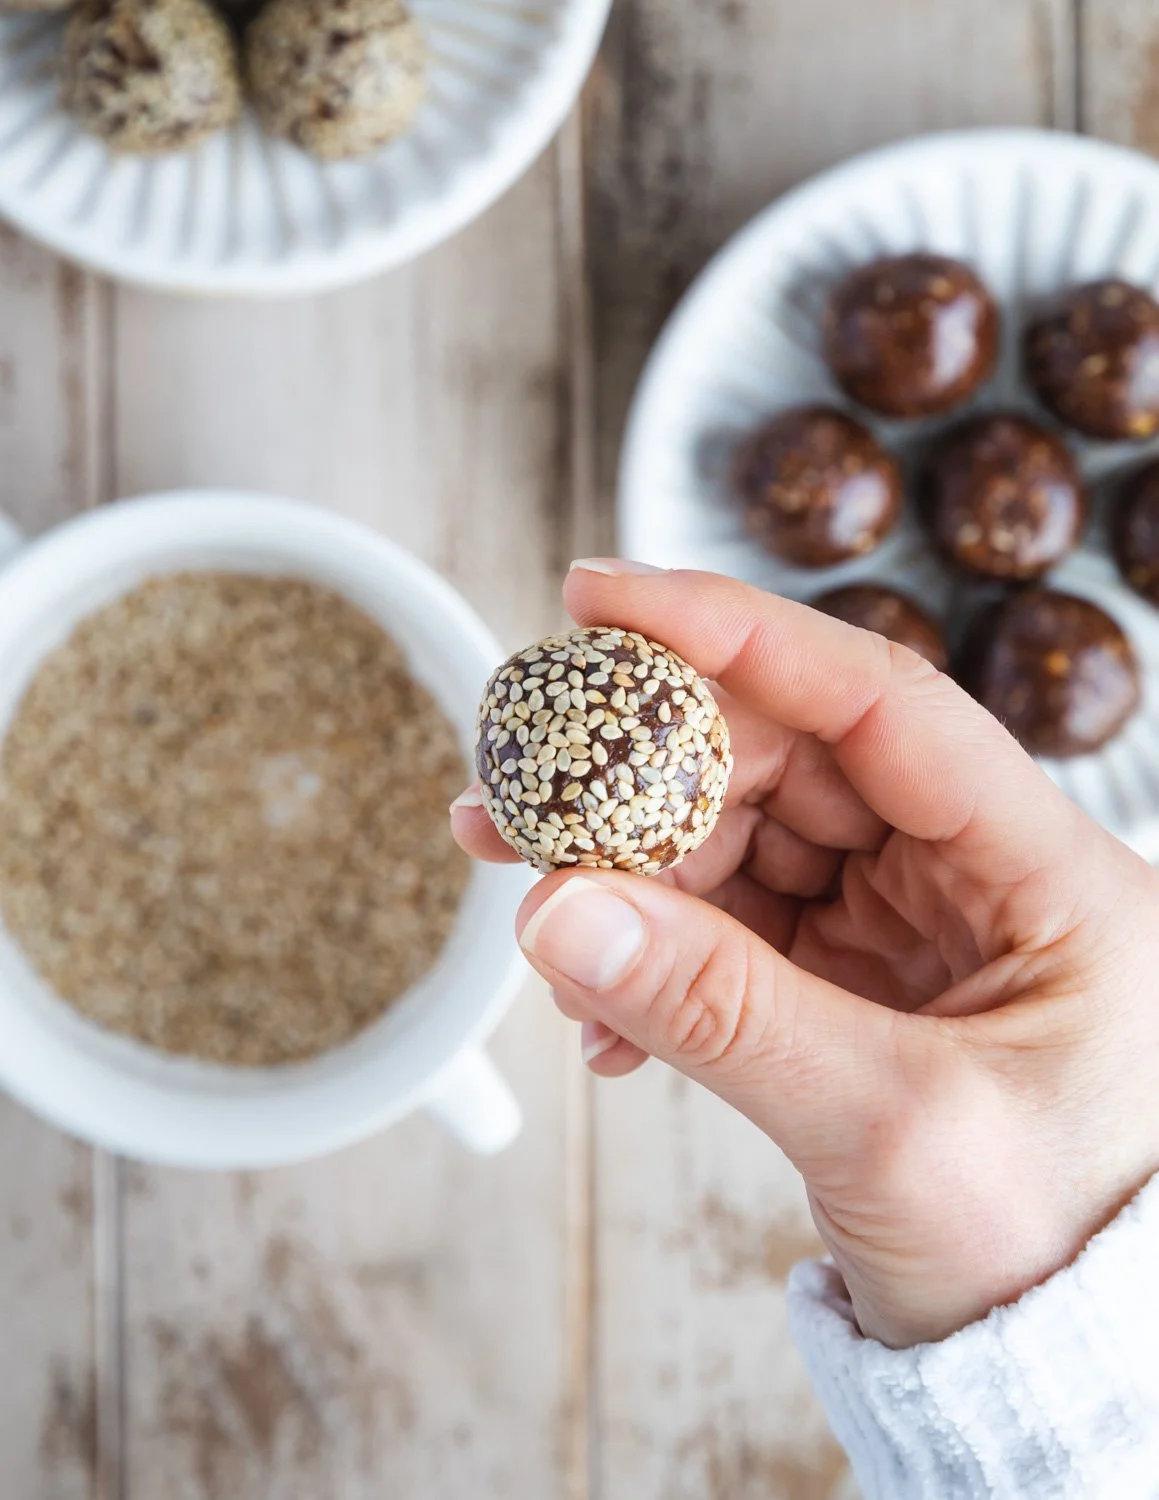
Now that you’re a granola sav, try these delicious recipes!

 Chocolate Cherry Almond Granola

 Peanut Butter Cacao Granola

homemade cinnamon raisin granola

If you like this recipe, please leave a 5-star rating on the recipe card below. I always appreciate your feedback and hearing about your creations! For more yummy vegan recipes, you can follow along on Instagram, Pinterest, Facebook, and Tiktok. I also send out a weekly newsletter with my latest recipes and upcoming cooking classes. Subscribe here to receive a FREE e-cookbook!

Yield: 8 (½ Cup) Servings
Author: Carol Clayton
Homemade Cinnamon Raisin Granola / Oil-Free

Homemade Cinnamon Raisin Granola / Oil-Free

( 0 reviews )
You’re sure to fall in love with this homemade granola. It’s warmly spiced, perfectly sweet, and every bite has just the right amount of crunchy clusters. Best of all it’s full of plant-based protein and super simple to make!
Prep time: 10 MinCook time: 25 MinTotal time: 35 Min

Ingredients

Instructions

  1. Pre-heat oven to 350 F / 180 C / gas mark 4, and have a rimmed baking sheet ready.
  2. Add the rolled oats to a large mixing bowl.
  3. In a small mixing bowl, combine the almond butter, maple syrup, flax butter, vanilla, cinnamon, and salt. Stir until it resembles a thick, sticky syrup.
  4. Pour the syrup mixture over the oats. Use a wooden spoon or spatula to mix the syrup into the oats, making sure that all the oats are well coated. Leave some different-sized clumps for a fun variety of textures.
  5. Gently mix in the raisins and sliced almonds.
  6. Spread the granola in an even layer on a rimmed baking sheet, using your wooden spoon to evenly distribute the clumps.
  7. Bake at 350 F / 180 C for 25 minutes total: After 10 minutes, remove from the oven and flip the granola over, in sections, using a spatula. Bake for an additional 10 minutes. Remove from the oven, stir, and bake for a final 5 minutes. The granola will crisp up as it cools.
  8. Let cool completely and store in an airtight container for up to a month. You can also freeze granola for future use. Just let frozen granola thaw to room temperature before enjoying.

Notes

If you don’t have any flax butter on hand, feel free to skip this ingredient or add 2 tablespoons of your favorite nut/seed butter.


For step-by-step instructions and photos, see blog post!

Nutrition Facts

Calories

334.99

Fat (grams)

12.87

Sat. Fat (grams)

1.17

Carbs (grams)

49.02

Fiber (grams)

6.09

Net carbs

42.93

Sugar (grams)

16.36

Protein (grams)

8.45

Sodium (milligrams)

298.58

Cholesterol (grams)

0

Nutritional information is provided as a courtesy and is an estimate only. This information comes from online calculators.

Did you make this recipe?
Tag @vegeta.full on instagram and hashtag it feedpeopleplants
homemade cinnamon raisin granola

Crispy Cheesy Kale Chips

Crispy Cheesy Kale Chips / Vegan & Gluten-Free

Jump To Recipe

These vegan kale chips are super crispy and full of cheesy flavor. Coated with nutritional yeast and healthy fats, it’s savory snacking you can feel good about. This addictively delicious snack is baked in the oven. No dehydrator is needed!


crispy cheesy kale chips in a bowl

This is a sponsored post written by me on behalf of O3 Superfoods. The opinions, text, and recipe are my own creation. Thank you so much for creating the ultimate flax butter and for the support!

Let’s face it, kale can be a little underwhelming or a little intimidating. Just the word “kale” evokes images of bitter and “healthy” tasting smoothies and tough salads. Whether you love or avoid this proud member of the cabbage family I think we can all agree on one thing: chips, in all forms, are amazing!

Crispy, cheesy, salty, can’t stop at one bite chips?...Now we’re talking! Enter, kale. Those tough, unruly leaves are actually the perfect flavor deliver unit for a cheesy topping. And because kale can stand up to salt and heat without shriveling into nothingness (sorry spinach!) they make killer crispy chips.

crispy cheesy kale chips in a bowl

The first time I made kale chips I was a little skeptical, I mean c’mon, how can you turn kale into a chip that doesn’t taste like….kale. The key is the cheesy topping. We start with good ‘ol nutritional yeast for a powerful cheesy flavor and mix it into a paste with flax butter, tahini, lemon juice, olive oil, and spices. Then you massage this mixture into the curly leaves, making sure the leaves are well coated on both sides so that they become crispy in the oven.

It's actually rather therapeutic giving kale a massage. I find this is a good time to catch up with a friend or a podcast or just enjoy getting your hands nice and messy. Once they’re baked and cooled, kale chips are irresistible in the same way potato chips and popcorn are, making them perfect for all around snacking or movie night. You might just find yourself munching through the entire batch in one go. Not that I’ve ever done that! (lol)

crispy cheesy kale chips served in a bowl

What do Crispy Cheesy Kale Chips taste like?

These crispy kale chips taste very similar to store-bought kale chips without the processed aftertaste. I promise, you really can’t taste the kale! They have an addictive delicate crispiness and a powerful cheesy flavor. Basically, what you are tasting is the topping and not the kale.

crispy cheesy kale chips on a table

What’s in these Crispy Cheesy Kale Chips?

Curly Kale

When shopping for kale you might see 3 different varieties, curly kale, lacinato kale (aka dinosaur kale), and Russian red kale. You want to use curly kale for kale chips. They have stubbornly curly leaves that grab onto the cheesy topping and can stand up to being rubbed all over without ripping into a bunch of little pieces.

Prep your curly kale by rinsing it off and then drying it carefully. It needs to be dry so that the cheesy topping can stick to it. Then, using a sharp knife, cut out the tough stems or ribs, leaving the kale in 2 large pieces. This makes it easier to spread the topping on and massage it in.

Flax Butter, Tahini, and Olive Oil

These healthy fats help the cheesy topping bind to the kale and make the chips flavorful and satisfying. The oil in these fats is what makes the kale turn crispy. Without oil, the kale will steam instead of crisp, leaving you with sad, soggy chips. You can make the chips oil-free by swapping out the olive oil for more tahini. The naturally occurring oil in tahini and flax butter will still make a crispy chip.

One of the healthiest fats outs there is flax butter.  I love it because it’s got all the power of flaxseed but in creamy butter form. If you’re curious, you can read all about the health benefits of flax butter here.

crispy cheesy kale chips in a bowl

Nutritional Yeast

Fondly called, nooch or golden flakes, nutritional yeast has a unique savory flavor that tastes like cheese. It’s an inactive yeast that is grown on blackstrap molasses, whey, or sugar beets.

You’ll find this plant-based ingredient popping up in all sorts of vegan recipes for added umami and cheesy flavor like my Easy Vegan Cheese Sauce, Vegan Egg Salad, and Creamy Vegan Corn Chowder.

Lemon Juice, and Spices

Lemon juice combined with garlic powder, onion powder, and salt complete the cheesy topping and make it super flavorful. You can also add a splash of hot sauce which I totally recommend! Take the heat up a notch by adding more hot sauce for nacho cheesy kale chips.

crispy cheesy kale chips held in a bowl

If you’re a savory snacker, you need to give these crispy cheesy kale chips a try! They’re:

  • Crispy

  • Cheesy

  • Healthy

  • Savory

  • Vegan

  • Gluten-Free

  • Addictively Delicious!

crispy cheesy kale chips in a bowl

Keep scrolling for step-by-step instructions and photos!


Ingredients for Crispy Cheesy Kale Chips

ingredients for crispy cheesy kale chips
  • 1 head (6 oz. with stems on) of curly kale

  • 2 tablespoons of tahini

  • 2 tablespoons of lemon juice

  • 2 tablespoons of olive oil (use 2 tablespoons of tahini for oil-free)

  • 1 tablespoon of O3 Superfoods Flax Butter (see note)

  • ¼ cup (15g) of nutritional yeast

  • ½ teaspoon of garlic powder

  • ½ teaspoon of onion powder

  • ½ teaspoon of kosher salt

  • ¼ teaspoon of your favorite hot sauce (more for spicy)

Note: If you don’t have flax butter on hand, use tahini instead.


How to make Crispy Cheesy Kale Chips

washed kale for kale chips

Steps 1-2:

1. Preheat your oven to 275 F / 135 C / gas mark 1. Line 2 baking sheets with parchment paper.

2. Rinse and carefully dry your kale leaves. It’s important that the leaves are dry so that the cheese sauce will stick to them, and they will crisp instead of steam in the oven. If they’re organic, I just wipe them dry with a kitchen towel. Using a sharp knife, remove the hard stems in the middle while leaving the leaves in 2 halves. (Don’t rip them up yet!)


cheese sauce for crispy cheesy kale chips

Step 3:

3. In a small bowl, mix all the ingredients (except the kale) into a paste.


coating for crispy cheesy kale chips

Step 4:

4. Spread the top side (curly side) of each kale leaf with the cheese paste. You can “paint” it on with a fork or butter knife.


unbaked kale chips

Step 5:

5. Take a large leaf and massage the cheese mixture into the leaf until it is well coated and oily all over. You want the top and the bottom of each leaf to be massaged with your oily fingers so that it will crisp in the oven. Then rip potato chip-sized pieces off the large leaf to create the kale chips.

unbaked kale chips

unbaked kale chips

Step 6:

6. Lay each kale chip in a single layer on your prepared baking sheets. Make sure they are not overlapping. One head of kale will completely cover 2 baking sheets.


baked kale chips

Step 7:

7. Bake for 30 minutes. Remove the chips from the oven and, using your fingers, carefully flip each piece over. Switch the placement of the baking trays in the oven and bake for an additional 30 minutes. (60 minutes total)


crispy cheesy kale chips in a bowl

Step 8:

8. Let cool completely before storing in an airtight container. The chips will become even crispier as they cool down and will keep their crispy texture for up to 2 weeks.


Enjoy Crispy Cheesy Kale Chips for all around snacking, movie night, or game day. They also make a great salad topping!

crispy cheesy kale chips served in a bowl

Notes:

If you have a very large bunch of kale and don’t use it all, that’s okay! You just want to be sure each piece is nicely coated.

Rip the leaves into pieces that are slightly larger than regular potato chip size because the kale leaves will shrink some as they dehydrate in the oven.

Cooking time: It takes 60 minutes (30 minutes on each side), in my vintage oven from 1952, for the kale to get crispy. But it may take less time in a modern convection oven.

crispy cheesy kale chips in bowls

crispy cheesy kale chips in a bowl

If you like this recipe, please leave a 5-star rating on the recipe card below. I always appreciate your feedback and hearing about your creations! For more yummy vegan recipes, you can also follow along on Instagram, Pinterest, Facebook, and Tiktok. I also send out a weekly newsletter with my latest recipes and upcoming cooking classes. Subscribe here to receive a FREE e-cookbook!

Yield: 6 servings
Author: Carol Clayton
Crispy Cheesy Kale Chips / Vegan & Gluten-Free

Crispy Cheesy Kale Chips / Vegan & Gluten-Free

( 0 reviews )
These vegan kale chips are super crispy and full of cheesy flavor. Coated with nutritional yeast and healthy fats, it’s savory snacking you can feel good about. This addictively delicious snack is baked in the oven. No dehydrator is needed!
Prep time: 30 MinCook time: 1 HourTotal time: 1 H & 30 M

Ingredients

Instructions

  1. Preheat your oven to 275 F / 135 C / gas mark 1. Line 2 baking sheets with parchment paper.
  2. Rinse and carefully dry your kale leaves. It’s important that the leaves are dry so that the cheese sauce will stick to them, and they will crisp instead of steam in the oven. If they’re organic, I just wipe them dry with a kitchen towel. Using a sharp knife, remove the hard stems in the middle while leaving the leaves in 2 halves. (Don’t rip them up yet!)
  3. In a small bowl, mix all the ingredients (except the kale) into a paste.
  4. Spread the top side (curly side) of each kale leaf with the cheese paste. You can “paint” it on with a fork or butter knife.
  5. Take a large leaf and massage the cheese mixture into the leaf until it is well coated and oily all over. You want the top and the bottom of each leaf to be massaged with your oily fingers so that it will crisp in the oven. Then rip potato chip sized pieces off the large leaf to create the kale chips.
  6. Lay each kale chip in a single layer on your prepared baking sheets. Make sure they are not overlapping. One head of kale will completely cover 2 baking sheets.
  7. Bake for 30 minutes. Remove the chips from the oven and, using your fingers, carefully flip each piece over. Switch the placement of the baking trays in the oven and bake for an additional 30 minutes. (60 minutes total)
  8. Let cool completely before storing in an airtight container. The chips will become even crispier as they cool down and will keep their crispy texture for up to 2 weeks.

Notes:

If you don’t have flax butter on hand, use tahini instead.


If you have a very large bunch of kale and don’t use it all, that’s okay! You just want to be sure each piece is nicely coated.


Rip the leaves into pieces that are slightly larger than regular potato chip size because the kale leaves will shrink some as they dehydrate in the oven.


Cooking time: It takes 60 minutes (30 minutes on each side), in my vintage oven from 1952, for the kale to get crispy. But it may take less time in a modern convection oven.


For step-by-step instructions and photos, see blog post!

Nutrition Facts

Calories

106.59

Fat (grams)

8.31

Sat. Fat (grams)

1.12

Carbs (grams)

5.88

Fiber (grams)

2.68

Net carbs

3.20

Sugar (grams)

0.50

Protein (grams)

4.32

Sodium (milligrams)

118.99

Cholesterol (grams)

0.11

Nutritional information is provided as a courtesy and is an estimate only. This information comes from online calculators.

Did you make this recipe?
Tag @vegeta.full on instagram and hashtag it #feedpeopleplants

Super Seed Energy Bites

Super Seed Energy Bites

Jump To Recipe

These Super Seed Energy Bites are loaded with nutrients and make the perfect healthy snack, all while tasting like a chocolate treat! This easy-to-make recipe comes together in just 20 minutes and is vegan, gluten-free, and oil-free!


super seed energy bites stacked on a plate

This is a sponsored post written by me on behalf of O3 Superfoods. The opinions, text, and recipe are my own creation. Thank you so much for creating the ultimate flax butter and for the support!

super seed energy bites with flax butter

I have a confession to make. Before creating this recipe, I had never tried energy bites. Maybe this is because I grew up with a concoction that my mom fondly named “Peanut” which was a cover for emptying random old pantry items into a bowl, mixing them with peanut butter, and forming them into balls. Everyone in the house loved them, which was always a curiosity to me. Now that I’m older, (much older) I see what a fantastic and convenient idea it is to combine nutrient-dense pantry staples with nut or seed butter, and then roll them into tasty bite-sized balls. Hello energy bites!

super seed energy bites

Energy bites taste like a fudgy dessert but are full of healthy fats and protein making them perfect for snack attacks! They are also super filling and portable. I’ll often make a double batch and stash them in the freezer, then pull a few out in the morning to look forward to between meals or after a run.

super seed energy bites with flax butter

What’s in Super Seed Energy Bites?

Seeds

Seeds are some of nature’s best superfoods and they’re so cute! These ‘lil nutritional powerhouses add a fun crunch to the bites and make them really filling. This recipe has hemp hearts and sesame seeds, but you can add chia seeds or raw pumpkin seeds too. Rolling the balls in sesame seeds also makes them less sticky to handle and beautiful at the same time.

Seed butter

Flax butter is a new to me superfood that has been used by ancient cultures as part of their training regimen and as a snack food. A little goes a long way so you only need 1 tablespoon for the whole batch of energy bites. Click here to learn more about flax butter!

Tahini, which is ground up toasted sesame seeds that have been blended into butter, has a creamy, silky consistency that helps the bites stick together.

super seed energy bites rolled in sesame seeds

Dates and rolled oats

Sweet sticky dates hold all those lovely seeds and oats together. They are naturally very sweet without tasting like some crazy dessert. If your dates feel dry and firm, pop them in the microwave for 5-10 seconds (they burn quickly!) to soften them.

Raw cacao powder

Raw cacao powder makes the bites taste rich and fudgy and I love finding ways to tuck this superfood into recipes. For a different flavor profile, you can swap out the cacao powder for 2 teaspoons of cinnamon.

super seed energy bites with flax butter

Can I mix in other ingredients?

Yes! Adding chia seeds, raw pumpkin seeds, chopped nuts, or cacao nibs will bump up the nutrient level of the bites and give them an extra crunch. You can add up to ¼ cup of additional ingredients and the balls will still stick together.

super seed energy bites

I should definitely thank my mother for introducing my young self to “Peanut” and planting the seed for this fun and versatile recipe!

Did you know that you can turn the crust of my Vegan Dark Chocolate Tart into energy bites? Yup! Just make the dough and roll it into bite sized balls for a healthy chocolate treat!

super seed energy bites

Keep scrolling for step-by-step instructions and photos!


Ingredients for Super Seed Energy Bites

ingredients for super seed energy bites
  • ¾ cup (110 grams) of medjool dates, pitted (about 6 large dates)

  • ½ cup (45 grams) of rolled oats

  • 3 tablespoons of tahini

  • 2 tablespoons of maple syrup

  • 2 tablespoons of raw cacao powder

  • 2 tablespoons of hemp hearts

  • 1 tablespoon of O3 Superfoods Flax Butter (see note)

  • 1 teaspoon of vanilla

  • ¼ teaspoon of fine sea salt

  • 2 tablespoons of sesame seeds (for rolling the bites in)

Makes 14 (1) tablespoon sized energy bites


How to make Super Seed Energy Bites

super seed energy bite dough in a food processor

Steps 1-2:

1. First, give your dates a squeeze. You want them to be nice and soft. If they feel stiff, pop them in the microwave for 5-10 seconds until soft and almost sticky.

2. Add the dates and the rest of the ingredients to a food processor (not a blender). Using the pulse setting, process the mixture until it begins to look like coarse sand. Continue to process until a tablespoon of the dough can be rolled into a smooth ball. You may have to stop a time or two and scrape the sides of the container.


super seed energy bite dough rolled into balls

Step 3:

3. Scoop out 14 tablespoon-sized balls and roll them between your palms until smooth.


super seed energy bites rolled in sesame seeds

Steps 4-5:

4. Pour the sesame seeds into a small dish and roll the energy bites around in the seeds so they are coated all over. Press the seeds into the bites by rolling them between your palms.

5. Store in the refrigerator for firm energy bites or in the pantry for “fudgy” energy bites. They also freeze really well.


Enjoy anytime you need a tasty pick-me-up. Energy bites also make great travel snacks!

Notes:

If you don’t have flax butter on hand, use tahini or your favorite creamy/drippy style nut butter.

super seed energy bites

Craving healthy snacks?! Check out these scrumptious recipes!

Chocolate Covered Chickpea Clusters

Tangy Tofu Yogurt

Oatmeal Breakfast Cookies

super seed energy bites stacked on a plate

If you like this recipe, please leave a 5-star rating on the recipe card below. I always appreciate your feedback and hearing about your creations! For more yummy vegan recipes, you can also follow along on Instagram, Pinterest, Facebook, and Tiktok. I also send out a weekly newsletter with my latest recipes and upcoming cooking classes. Subscribe here to receive a FREE e-cookbook!

Chocolate Covered Chickpea Clusters

Chocolate Covered Chickpea Clusters / Vegan Protein-Rich Treat

Jump To Recipe

Chocolate Covered Chickpea Clusters are an easy to make and delicious protein-rich treat! They are made with only 3 ingredients and are vegan, gluten-free, and oil-free. This fun, healthy candy has a rich chocolate taste and a satisfying crunch!


chocolate covered chickpea clusters

Welp, it’s the last week of 2021 and despite having my fair share of chocolate over the holidays, I’m looking forward to the new year and getting excited about all the fun ways to create with my favorite superfoods, like chocolate and chickpeas.

Have you ever tried chocolate-covered chickpeas? At first glance, it may seem odd to pour melted chocolate over beans. But when you think about it, chocolate can turn even the most humble ingredients into something special. And…this is one of the easiest to make and healthiest treats out there!

chocolate covered chickpea clusters

Roasting Chickpeas:

Roasting chickpeas is a pretty simple process. Drain and rinse a can of chickpeas and then dry the beans using a kitchen towel. Spread the chickpeas evenly on a parchment lined baking sheet and roast at 350 F/ 180 C until they are hard and crunchy.

chickpeas on a baking sheet

How long does it take to roast chickpeas?

In a standard oven, it takes about 60 minutes, and you’ll want to move the beans around every 20 minutes to ensure even roasting. My oven is from 1952 and it takes the full hour at 350 F. If you have a convection oven, the beans will roast much faster, only 35-40 minutes, with no stirring.

dry roasting chickpeas

When are the chickpeas done roasting?

You’ll know they are finished roasting when they are hard on the outside and crunch between your teeth. The best way to test if they are done is to eat one!


Melting Chocolate:

Melting chocolate is also super easy. You can melt the chocolate chips in the microwave or on the stove top.

melted chocolate chips in a glass bowl

In the microwave: 

Place your chocolate chips in a bowl and microwave at 30-second intervals, stirring in between, until smooth and glossy.

On the stovetop:

Pour your chocolate chips into a small saucepan and melt, while stirring, over medium heat until smooth and glossy.


Sprinkle with coarse sea salt:

This is the ultimate finishing touch. Sprinkle the clusters with coarse flakey sea salt, while the chocolate is still soft, so it will stick.

chocolate covered chickpea clusters sprinkled with coarse sea salt

Can I add other ingredients?

Absolutely! Try mixing in ¼ cup of your favorite nuts with the chickpeas for a fun variation. Peanuts taste amazing!

chocolate covered chickpea clusters

These Chocolate Covered Chickpea Clusters are: 

  • Semi-sweet

  • Protein-rich

  • Crunchy

  • Satisfying

  • Vegan, gluten-free, and oil-free

Once you’ve made these tasty clusters, I promise, they will become a staple in your kitchen. They’re so easy to make, you can get the kids involved too!

Keep scrolling for step-by-step instructions with photos!


Ingredients for Chocolate Covered Chickpea Clusters

ingredients for chocolate covered chickpea clusters

Makes about 15 clusters


How to make Chocolate Covered Chickpea Clusters

Steps 1-2:

1. Preheat your oven to 350 F / 180 C / gas mark 4. Line a rimmed baking sheet with parchment paper for roasting the chickpeas. Then line another baking sheet with parchment paper for the clusters.


2. Drain and thoroughly rinse the chickpeas so they don’t taste “beany”. Then dry them with a kitchen towel and spread them evenly on the baking sheet.

chickpeas on a baking sheet

Step 3:

3. Roast the chickpeas until they are hard and crunchy. This will take about 60 minutes in a standard oven. You’ll need to stir the chickpeas every 20 minutes to ensure even roasting. If you have a convection oven, this will take 35-40 minutes. The best way to test if they’re done is to eat one!

Step 4:

4. Place the chocolate chips in a microwave safe bowl or a small saucepan. Melt in the microwave at 30 second intervals, stirring in between, until smooth and glossy. Or, melt on the stovetop over medium heat, stirring until smooth.


roasted chickpeas on top of melted chocolate chips in a bowl

Step 5:

5. Pile the roasted chickpeas into the melted chocolate and stir until well coated. If you’re adding ¼ cup of chopped nuts, (optional) stir those in as well.

roasted chickpeas covered in melted chocolate

chocolate covered chickpea clusters

Step 6:

6. Using a spoon, scoop about 1 tablespoon of chocolate-covered chickpeas onto the parchment-lined baking sheet, forming a cluster shape. Leave a bit of space between clusters so they can settle. Sprinkle with coarse sea salt and let cool until firm. You can place them in the fridge or freezer to speed this up.


chocolate covered chickpea clusters

Step 7:

7. Once the chocolate is firm, they are ready to eat! Store in an airtight container in the pantry or in the fridge if there is a chance the chocolate might melt.


chocolate covered chickpea clusters
chocolate covered chickpea clusters stacked on a dish

If you like this recipe, please leave a 5-star rating on the recipe card below. I always appreciate your feedback and hearing about your creations! For more yummy vegan recipes, you can also follow along on Instagram, Pinterest, Facebook, and Tiktok. I also send out a weekly newsletter with my latest recipes and upcoming cooking classes. Subscribe here to receive a FREE e-cookbook!

Yield: 15 Clusters
Author:
Chocolate Covered Chickpea Clusters / Vegan Protein-Rich Treat

Chocolate Covered Chickpea Clusters / Vegan Protein-Rich Treat

These tasty little clusters are an easy-to-make protein-rich treat! They are made with only 3 ingredients and are vegan, gluten-free, and oil-free. This fun, healthy candy has a rich chocolate taste and a satisfying crunch!
Prep time: 15 MinCook time: 1 HourInactive time: 20 MinTotal time: 1 H & 35 M

Ingredients

Instructions

  1. Preheat your oven to 350 F / 180 C / gas mark 4. Line a rimmed baking sheet with parchment paper for roasting the chickpeas. Then line another baking sheet with parchment paper for the clusters.
  2. Drain and thoroughly rinse the chickpeas so they don’t taste “beany”. Then dry them with a kitchen towel and spread them evenly on the baking sheet.
  3. Roast the chickpeas until they are hard and crunchy. This will take about 60 minutes in a standard oven. You’ll need to stir the chickpeas every 20 minutes to ensure even roasting. If you have a convection oven, this will take 35-40 minutes. The best way to test if they’re done is to eat one!
  4. Place the chocolate chips in a microwave-safe bowl or a small saucepan. Melt in the microwave at 30-second intervals, stirring in between, until smooth and glossy. Or, melt on the stovetop over medium heat, stirring until smooth.
  5. Pile the roasted chickpeas into the melted chocolate and stir until well coated. If you’re adding ¼ cup of chopped nuts, (optional) stir those in as well.
  6. Using a spoon, scoop about 1 tablespoon of chocolate-covered chickpeas onto the parchment-lined baking sheet, forming a cluster shape. Leave a bit of space between clusters so they can settle. Sprinkle with coarse sea salt and let cool until firm. You can place them in the fridge or freezer to speed this up.
  7. Once the chocolate is firm, they are ready to eat! Store in an airtight container in the pantry or in the fridge if there is a chance the chocolate might melt.

Notes:

For step-by-step instructions, with photos, see blog post!

Nutrition Facts

Calories

78.49

Fat (grams)

2.73

Sat. Fat (grams)

1.26

Carbs (grams)

12.03

Fiber (grams)

2.55

Net carbs

9.49

Sugar (grams)

4.99

Protein (grams)

2.79

Sodium (milligrams)

41.48

Cholesterol (grams)

0.00

Nutritional information is provided as a courtesy and is an estimate only. This information comes from online calculators.

Did you make this recipe?
Tag @vegeta.full on instagram and hashtag it #feedpeopleplants

Chocolate Cherry Almond Granola

Chocolate Cherry Almond Granola (Healthy Vegan Recipe)

Jump To Recipe

Chocolate Cherry Almond Granola (Healthy Vegan Recipe)

Chocolate Cherry Almond Granola (Healthy Vegan Recipe)

Featuring Perfect Date Chocolate from Goodness Tea.

Chocolate, Cherry, and Almond….this magical trio of flavors tastes good in everything from ice cream to baked items. It also makes one delicious granola. If you’ve had a browse around the blog, you may notice I’m hooked on this flavor combination. So I had to make a chocolate cherry almond granola recipe (of course!) but with a healthy vegan twist.

The best thing about homemade granola is that it’s easy to make and you have full control over the ingredients. It’s also economical, low waste, and sooo much better than store-bought. If you’re curious about the many health benefits of chocolate, (cacao) dried cherries, and almonds, click on the links.

You can make healthy homemade granola in just a few steps:

1. Melt all the of ingredients together, except the oats and mix-ins, in a small saucepan over medium heat.

2. Stir this mixture into the oats, until well coated, leaving lots of yummy clumps.

3. Add your mix-ins and bake! (I mix the chocolate chunks in after baking and cooling, so they don’t melt.)

Scroll down for step-by-step instructions and photos!

The ingredient that really takes this chocolate cherry almond granola over the top is the Perfect Date Chocolate from Goodness Tea. It’s bittersweet chocolate with the texture of fudge. Organic, fair-trade, and fruit-sweetened, it also comes in completely compostable packaging. I have to hold myself back from eating more than one bar, it’s that good!

If you make this recipe, I’d love to hear how you enjoyed it in the ratings and comments below. And be sure to share your creations on Instagram and tag me @vegeta.full.


Ingredients for Chocolate Cherry Almond Granola

Ingredients for Chocolate Cherry Almond Granola

Ingredients:

o   3 cups (270 grams) of regular rolled oats (GF if desired)

o   ½ cup (4 oz.) of almond butter, no-oil-added

o   ½ cup (4 oz.) of maple syrup

o   2 tablespoons of raw cacao powder

o   2 teaspoons of almond extract

o   ¾ teaspoon of fine sea salt

 Mix ins:

o   ½ cup (69 grams) of sliced toasted almonds

o   ½ cup of dried cherries

o   1 bar (2.3 oz. / 65 grams) of Perfect Date Chocolate, chopped into chocolate chip sized chunks

Makes 4 cups of granola (click on the ingredients in bold to see what I use in this recipe)


Method for making Chocolate Cherry Almond Granola

Chocolate Cherry Almond Granola syrup

Steps One-Two:

1.  Pre-heat oven to 350 F (180 C)

 2. In a small saucepan over medium-high heat, combine almond butter, maple syrup, almond extract, cacao powder, and salt.  Stir continuously until melted and well combined. This will take a few minutes.


Chocolate Cherry Almond Granola ingredients ready for mixing

Step Three:

3.  Add the rolled oats to a large mixing bowl.  Pour the almond butter/maple syrup mixture over the oats.


Chocolate Cherry Almond Granola oats and syrup mixed together

Step Four:

4.  Using a wooden spoon or spatula, mix the warm sauce into the oats, making sure that all the oats are well coated. Leave some different sized clumps for a fun variety of textures.


Chocolate Cherry Almond Granola mixed with cherries and almonds

Step Five:

5.  Stir in the sliced almonds and dried cherries until evenly mixed.


Chocolate Cherry Almond Granola ready to bake

Step Six:

6.  Spread in an even layer on a large baking sheet.


Chocolate Cherry Almond Granola ready to eat

Steps Seven-Nine:

7.   Bake at 350 F / 180 C for 10 minutes. Remove from the oven and flip the granola over, in sections, using a metal spatula. Bake for an additional 10 minutes. Remove from the oven and stir.  Bake for a final 5 minutes until nice and golden. This three-step bake creates the perfect texture.

 8. Let cool and mix in the Perfect Date Chocolate chunks.

9.  Store in an airtight container for up to a month. You can also freeze it for future use.  Just let frozen granola thaw to room temperature before enjoying.


Printable Recipe Card:

Chocolate Cherry Almond Granola (Healthy Vegan Recipe)

Chocolate Cherry Almond Granola (Healthy Vegan Recipe)

Yield: 8 (½ cup) Servings
Author: Carol Clayton
Prep time: 15 MinCook time: 25 MinTotal time: 40 Min
Chocolate, Cherry and Almond….this magical trio of flavors tastes good in everything from ice cream to baked items. It also makes one delicious granola. So I created a chocolate cherry almond granola recipe with a healthy vegan twist. Featuring Perfect Date Chocolate from Goodness Tea.

Ingredients

Instructions

  1. Pre-heat oven to 350 F (180 C)
  2. In a small saucepan over medium-high heat, combine almond butter, maple syrup, almond extract, cacao powder, and salt. Stir continuously until melted and well combined. This will take a few minutes.
  3. Add the rolled oats to a large mixing bowl. Pour the almond butter/maple syrup mixture over the oats.
  4. Using a wooden spoon or spatula, mix the warm sauce into the oats, making sure that all the oats are well coated. Leave some different sized clumps for a fun variety of textures.
  5. Stir in the sliced almonds and dried cherries until evenly mixed.
  6. Spread in an even layer on a large baking sheet.
  7. Bake at 350 F / 180 C for 10 minutes. Remove from the oven and flip the granola over, in sections, using a metal spatula. Bake for an additional 10 minutes. Remove from the oven and stir. Bake for a final 5 minutes until nice and golden. This three-step bake creates the perfect texture.
  8. Let cool and mix in the Perfect Date Chocolate chunks.
  9. Store in an airtight container for up to a month. You can also freeze it for future use. Just let frozen granola thaw to room temperature before enjoying.

Calories

394.52

Fat (grams)

17.19

Sat. Fat (grams)

2.80

Carbs (grams)

52.85

Fiber (grams)

6.64

Net carbs

46.21

Sugar (grams)

24.31

Protein (grams)

9.66

Sodium (milligrams)

249.82

Cholesterol (grams)

0.65

Nutritional information is provided as a courtesy and is an estimate only. This information comes from online calculators.

Did you make this recipe?
Tag @vegeta.full on instagram and hashtag it #letsblendvegan
Created using The Recipes Generator

Peanut Butter Cacao Granola

Peanut Butter Cacao Granola

Peanut Butter Cacao Granola

Peanut Butter Cacao Granola

Jump To Recipe

Granola. My mouth waters just thinking about it. Those crunchy sweet clusters of oats always mixed with something fun. It’s simple to make and tastes good on just about anything. Oil-free peanut butter cacao granola is super healthy too, with minimal ingredients and no refined sugar.

I like to leave some different sized clusters when mixing the ingredients together for a variety of textures and just the right amount of crunch. Use regular GF rolled oats which are sturdier than quick cook oats and chewier than steel cut oats.

This is a recipe that you can really build on. Experiment with different mix-ins like nuts, seeds, and dried fruit. Once you discover how easy it is to make your own homemade granola, you’ll never go back to store bought!  

Peanut Butter Cacao Granola Ingredients

Ingredients

3 cups of GF rolled oats

1/2 cup of peanut butter

1/2 cup of maple syrup

2 teaspoons of vanilla

1 teaspoon of fine sea salt

1/3 cup of cacao nibs

 Makes about 3½ cups of granola (click on the ingredients in bold to learn more)

Method for making Peanut Butter Cacao Granola

Peanut Butter Cacao Granola Ready to Mix

Peanut Butter Cacao Granola Ready to Mix

1.  Pre-heat oven to 350 F.

 2.  Add rolled oats to a large mixing bowl.

 3. In a small saucepan, over medium heat, combine peanut butter, maple syrup, vanilla and salt. Wisk until melted and smooth. This will take a few minutes.

Peanut Butter Cacao Granola Mixed

Peanut Butter Cacao Granola Mixed

4. Pour the peanut butter mixture over the oats. Using a spatula, mix until the oats are well coated and there are some different sized clusters.

5. Add in the cacao nibs and mix until evenly distributed.

6. Spread the coated oats on a large baking sheet in an even layer.

Peanut Butter Cacao Granola Ready to Bake

Peanut Butter Cacao Granola Ready to Bake

7.  Bake at 350 F for 10 minutes. Then remove from the oven and, using a metal spatula, flip the granola over. Bake for an additional 10 minutes.

 8. Remove granola from the oven again and give it a stir. Cook for 5 additional minutes until golden.

 9. Let cool completely and store in an airtight container.

Peanut Butter Cacao Granola in Container

Other pantry staples you might have fun making!

Printable Recipe Card

Yield: 7 servings (makes 3 ½ cups)
Author: Carol Clayton
Peanut Butter Cacao Granola

Peanut Butter Cacao Granola

Granola. My mouth waters just thinking about it. Those crunchy sweet clusters of oats always mixed with something fun. It’s simple to make and tastes good on just about anything. Oil-free peanut butter cacao granola is super healthy too, with minimal ingredients and no refined sugar.
Prep time: 10 MinCook time: 25 MinTotal time: 35 Min

Ingredients

Instructions

  1. Pre-heat oven to 350 F.
  2. Add rolled oats to a large mixing bowl.
  3. In a small saucepan, over medium heat, combine peanut butter, maple syrup, vanilla, and salt. Wisk until melted and smooth. This will take a few minutes.
  4. Pour the peanut butter mixture over the oats. Using a spatula, mix until the oats are well coated and there are some different-sized clusters.
  5. Add in the cacao nibs and mix until evenly distributed.
  6. Spread the coated oats on a large baking sheet in an even layer.
  7. Bake at 350 F for 10 minutes. Then remove from the oven and, using a metal spatula, flip the granola over. Bake for an additional 10 minutes.
  8. Remove granola from the oven again and give it a stir. Cook for 5 additional minutes until golden. Let cool completely and store in an airtight container.

Notes:

For step-by-step instructions with photos, see blog post!

Nutrition Facts

Calories

347.45

Fat (grams)

14.97

Sat. Fat (grams)

4.33

Carbs (grams)

45.56

Fiber (grams)

5.69

Net carbs

39.87

Sugar (grams)

15.73

Protein (grams)

9.60

Sodium (milligrams)

396.45

Cholesterol (grams)

0.14
Did you make this recipe?
Tag @vegeta.full on instagram and hashtag it #feedpeopleplants
Created using The Recipes Generator