Vegan Almond Shortbread

Vegan Almond Shortbread / Gluten-Free

Jump To Recipe

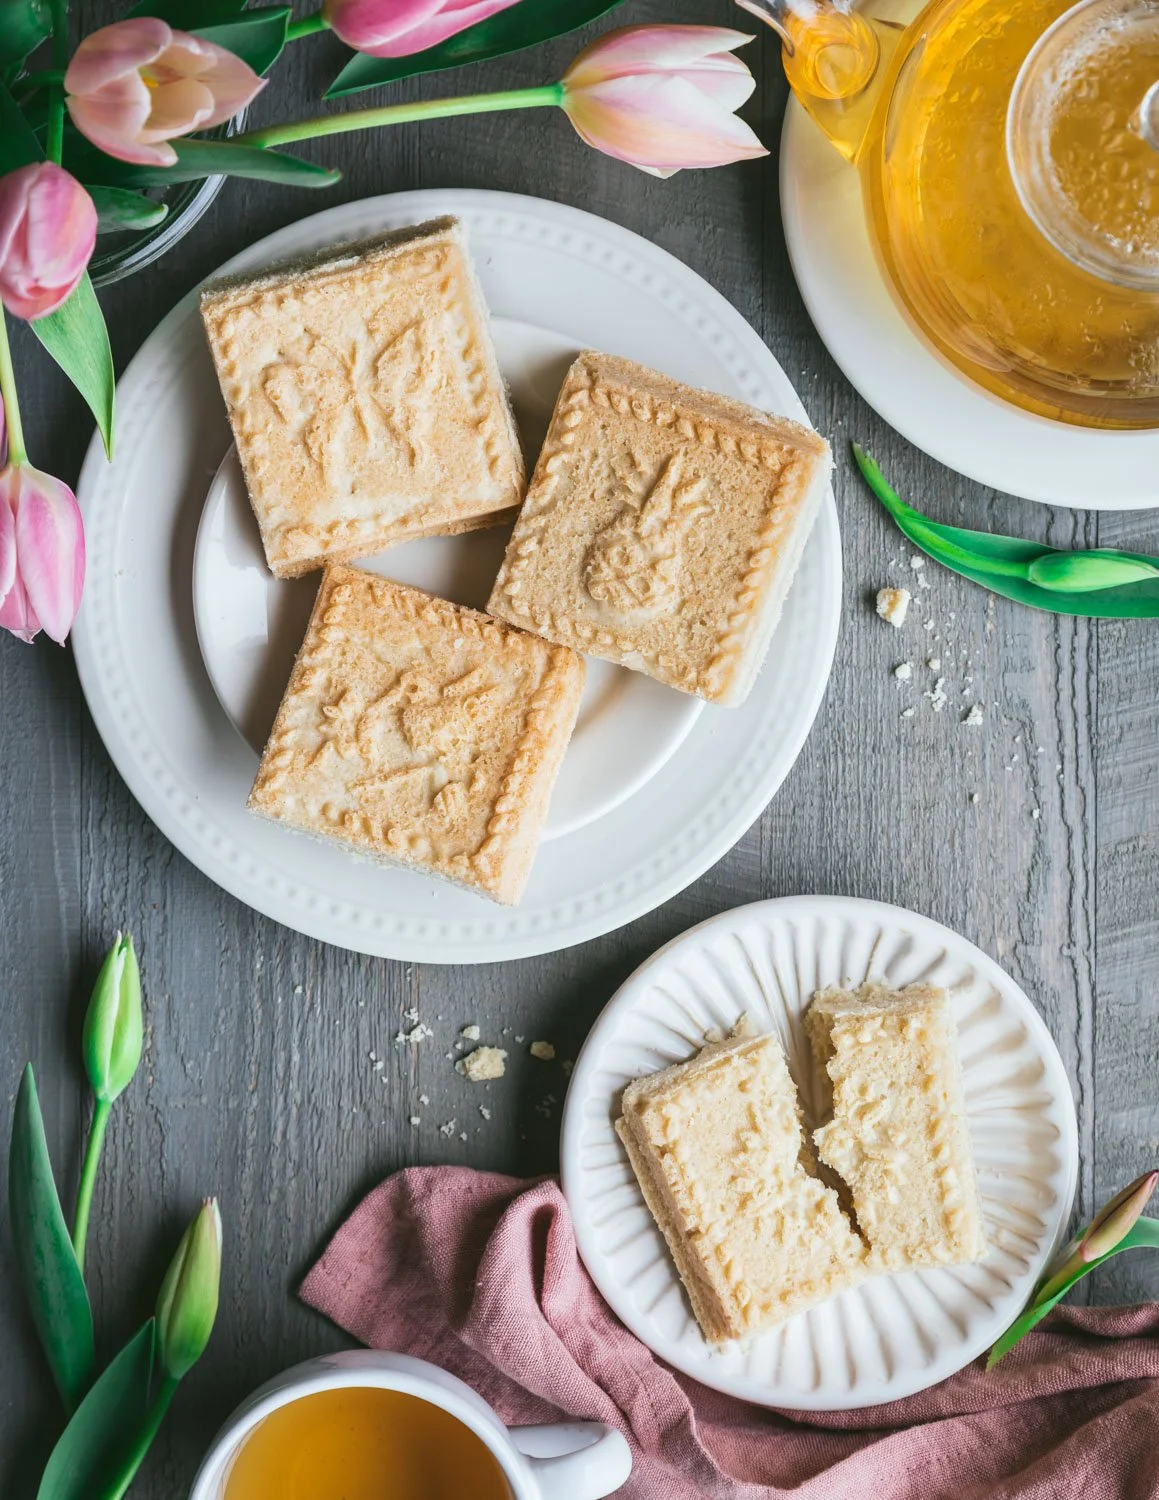
This Vegan Almond Shortbread is rich and buttery with an irresistible melt-in-your-mouth texture. Made with almond flour, it’s gluten-free with a subtle nutty flavor. Enjoy at tea time or anytime!


vegan almond shortbread

What was the first cookie you ever baked all by yourself? I’m guessing the ingredient list was short, the recipe uncomplicated, and the results utterly satisfying. That describes my first solo attempt at shortbread. The original recipe I baked came from our trusty, dog eared copy, of The Joy of Cooking which I still have to this day. Many years and many batches later, I still crave this tender cookie with its fine, sandy crumb and melt-in-your-mouth texture.

Just like traditional Scottish shortbread, this Vegan Almond Shortbread has minimal ingredients, is simple to mix into a dough, and makes a rich buttery cookie that is impossible to resist.

vegan almond shortbread

How do I make almond shortbread vegan and gluten-free?

Shortbread, pause of appreciation here, is very easy to make vegan and gluten-free. Because it is a “short” bread, meaning it has a high percentage of fat, you don’t have to worry about rising. This is a big plus in gluten-free baking. You can also work the dough to your hearts delight without worrying about that pesky gluten creating tough cookies.

The first easy swap is gluten-free flour for all purpose four. I use a combination of 1 to 1 gluten-free flour and blanched almond flour in this recipe. Why almond flour? With its fluffy texture and nutty taste, almond flour balances the slightly metallic taste of all-purpose gluten-free baking flour. It also compliments the almond extract in our Vegan Almond Shortbread.

For trouble-free shortbread, and baking in general, I highly recommend using a kitchen scale for accurate measuring.

vegan almond shortbread

The next easy swap is vegan butter for dairy-based butter. Vegan butter has come such a long way in the past 5 years that you really can’t taste the difference in baking. I purchase vegan buttery sticks at our local natural grocer, but you can always make your own at home if you’re enthusiastic. There is a lot of butter in this recipe and the flavor will shine through, so use a good quality vegan butter instead of margarine.

Vegan butter is softer than dairy-based butter. It should make a slight dent when you press it with your fingers but still feel cold when you cream it.

(Scroll down to the ingredient list for links to recommended products.)

vegan almond shortbread

What pan should I bake my almond shortbread in?

There are 2 ways to bake your shortbread. One is in a standard 9 x 9” baking pan (or size equivalent). The other is to use a mold. Either way, you’ll need to lightly grease the pan before baking.

If you are using a standard pan, simply coat it lightly with oil and press your dough into the bottom, patting it flat with your fingers. Have fun pricking the top all over with a fork (this is called docking) and pop it into a medium-low oven for 30 minutes (325 F / 165 C). Once baked, let it cool for 10 minutes, and cut the shortbread into 9 squares.

If you are using a mold, spray it lightly with cooking spray, and use your fingers to work the oil into all the cracks and crevices of the pan. You’ll thank yourself later when you unmold it. Then press the dough, in sections, into the bottom of the pan to see that all the details of the mold are filled. Keep patting the dough until it is flat on the top and you are sure there are no air pockets. Then prick the surface all over and bake it in a medium-low oven for 30 minutes (325 F / 165 C).

To unmold your shortbread, let it cool for 10 minutes so it can release from the sides of the pan, and flip the pan over onto a cutting board. This action should be enough to unmold it. You can tap stubborn shortbread on the cutting board to set it free. Cut it into 9 squares while it’s still warm.

I used a heavyweight cast aluminum pan in these photos which you can view here.

vegan almond shortbread

Can I make this almond shortbread oil-free?

The short story, yes. Here’s the long story: I recipe tested with this store-bought coconut butter (or manna) in place of vegan butter which felt more like a middle school science project than baking shortbread. The dense consistency of the coconut butter created a stubbornly crumbly dough. After warming it in the microwave, I was able to get the dough to stick together enough to pat it into the pan and bake it. The result? Tasty but overly dense and crumbly. I did, however, enjoy the subtle coconut flavor balanced with the almond. I feel if coconut butter is melted to a spreadable consistency and then creamed with sugar, it will work as a substitute for vegan butter. If you’ve had success baking with coconut butter, I’d love to hear all about it!

vegan almond shortbread

Why you’ll want to make this Vegan Almond Shortbread again and again, it’s:

  • Simple to make

  • Rich and buttery

  • Great for gift giving

  • Perfect for tea with a friend

  • Gluten-free

  • Addictively delicious!

Take a look in your pantry, you might have all the ingredients you need to make a batch right now! That bakery shop aroma filling your kitchen is just the icing on the shortbread!

vegan almond shortbread

Keep scrolling for step-by-step instructions and photos!


Ingredients for Vegan Almond Shortbread

ingredients for vegan almond shortbread
  • 1¾ cups (259g) of 1 to 1 gluten-free baking flour (I use Bob’s Red Mill)

  • ¾ cup (84g) of superfine almond flour, blanched

  • ¼ teaspoon of fine sea salt

  • 1 cup (8 oz.) of vegan butter, dent-able but still cold to the touch (see post for oil-free suggestions)

  • ¾ cup (75g) of powdered sugar, sifted

  • ½ teaspoon of almond extract

  • ½ teaspoon of vanilla extract

Makes 9 shortbread squares


How to make Vegan Almond Shortbread

pan for vegan almond shortbread

Steps 1-2

1. Preheat your oven to 325 F / 165 C / gas mark 3. Use cooking spray to lightly coat the inside of a 9” x 9” baking pan or shortbread baking mold. If you are using a mold, use your fingers to make sure all the cracks and crevices in the design are greased.

2. Wisk the gluten-free flour, almond flour, and salt in a medium mixing bowl and set aside.


creamed butter for vegan almond shortbread

Step 3

3. Using a stand mixer with the paddle attachment (or a hand-held mixer), cream the butter until light and fluffy. Then add the extracts, mix, and gradually add in the sugar. Start at low speed and work your way up to medium-high speed, scraping down the sides of the bowl as needed. This will take about 2 minutes


vegan almond shortbread dough

Step 4

4. Gradually add the flour, using the low-speed setting at first, to keep it from flying out of the bowl. Stop to scrape down the sides as needed. Increase to medium speed and mix until it forms a dough.


vegan almond shortbread dough in a pan

Steps 5-6

5. Scoop the dough into the prepared baking pan and press it down firmly, taking care that all the cracks and crevices in the mold are filled. Pat the top nice and flat with your fingers.

6. Use a fork to prick the top all over with a fork. This helps prevent air bubbles.


vegan almond shortbread in a pan

Step 7

7. Bake for 30 minutes. Remove from the oven and let cool for 10 minutes so that it will release from the sides of the pan.


removing vegan almond shortbread from a mold

Step 8

8. To remove the shortbread from the mold, flip it over onto a large cutting board and, if necessary, tap the pan on the cutting board to release it.

vegan almond shortbread unmolded

vegan almond shortbread cut into squares

Step 9

9. Cut into 9 squares while still warm. Serve straight away or let cool and store in an airtight container.


vegan almond shortbread

This recipe is based on an Almond Shortbread Cookies recipe I received in Kate McDermott’s newsletter which you can find on Substack. I highly recommend subscribing!

vegan almond shortbread

And while you’re in cookie mode, try these delectable recipes!

Classic Vegan and Gluten-Free Chocolate Chip Cookies

Oatmeal Breakfast Cookies

Almond Cacao Biscotti

If you like this recipe, please leave a 5-star rating on the recipe card below. I always appreciate your feedback and hearing about your creations! For more yummy vegan recipes, you can follow along on Instagram, Pinterest, Facebook, and Tiktok. I also send out a weekly newsletter with my latest recipes and upcoming cooking classes. Subscribe here to receive a FREE e-cookbook!

Yield: 9 shortbread squares
Author: Carol Clayton
Vegan Almond Shortbread / Gluten-Free

Vegan Almond Shortbread / Gluten-Free

This shortbread recipe is rich and buttery with an irresistible melt-in-your-mouth texture. Made with almond flour, it’s gluten-free with a subtle nutty flavor. Enjoy at tea time or anytime!
Prep time: 15 MinCook time: 30 MinInactive time: 10 MinTotal time: 55 Min
Cook modePrevent screen from turning off

Ingredients

Instructions

  1. Preheat your oven to 325 F / 165 C / gas mark 3. Use cooking spray to lightly coat the inside of a 9” x 9” baking pan or shortbread baking mold. If you are using a mold, use your fingers to make sure all the cracks and crevices in the design are greased.
  2. Wisk the gluten-free flour, almond flour, and salt in a medium mixing bowl and set aside.
  3. Using a stand mixer with the paddle attachment (or a hand-held mixer), cream the butter until light and fluffy. Then add the extracts, mix, and gradually add in the sugar. Start at low speed and work your way up to medium-high speed, scraping down the sides of the bowl as needed. This will take about 2 minutes.
  4. Gradually add the flour, using the low-speed setting at first, to keep it from flying out of the bowl. Stop to scrape down the sides as needed. Increase to medium speed and mix until it forms a dough.
  5. Scoop the dough into the prepared baking pan and press it down firmly, taking care that all the cracks and crevices in the mold are filled. Pat the top nice and flat with your fingers.
  6. Use a fork to prick the top all over with a fork. This helps prevent air bubbles.
  7. Bake for 30 minutes. Remove from the oven and let cool for 10 minutes so that it will release from the sides of the pan.
  8. To remove the shortbread from the mold, flip it over onto a large cutting board and, if necessary, tap the pan on the cutting board to release it.
  9. Cut into 9 squares while still warm. Serve straight away or let cool and store in an airtight container.

Notes

For step-by-step instructions, baking tips, and photos, see blog post!

Nutrition Facts

Calories

351.5

Fat (grams)

25.87 g

Sat. Fat (grams)

13.29 g

Carbs (grams)

28.96 g

Fiber (grams)

3.37 g

Net carbs

25.59

Sugar (grams)

10.98 g

Protein (grams)

4.57 g

Sodium (milligrams)

227.02 mg

Cholesterol (grams)

54.23 g

Nutritional information is provided as a courtesy and is an estimate only. This information comes from online calculators.

Did you make this recipe?
Tag @carolsvegankitchen on instagram and hashtag it #carolsvegankitchen
Created using The Recipes Generator

Healthy Shamrock Shake Recipe

Healthy Shamrock Shake Recipe  / Dairy-Free

Jump To Recipe

This dairy-free Healthy Shamrock Shake recipe is refreshing with a clean mint taste and just the right amount of sweetness. It’s full of healthy ingredients like hemp seeds and avocado that will satisfy your tummy and your sweet tooth! Made with just 8 ingredients and ready in 5 minutes!


Healthy Shamrock Shake in a glass

I’m a total sucker for anything mint and chocolate. Just the words “mint chip” can snap me out of a bad day and make me do a little happy dance (and make my mouth water)! While the temptation to dive into a fully loaded Shamrock Shake around St. Patty’s Day is real, you can be sipping on this minty miracle in the time it takes to throw a few ingredients into a blender.

Healthy Shamrock Shake in a glass mug

Okay, so, it’s healthy, but how does it taste?

My goal was to create a shake that was super creamy, just like a milkshake, full of healthy fats to make it satisfying and, of course, it needed to have a nice blend of mint and vanilla flavor. The natural green color from the avocados is a bonus! This healthy version tastes like a decadent mint milkshake without any suspicious ingredients or the food coma that usually follows the drive-through experience at the golden arches.

healthy shamrock shake made in a blender

What’s in this Healthy Shamrock Shake Recipe? 

Avocado and Hemp Seeds

The great thing about avocados and hemp seeds is that they have a very mild taste but blend up super rich and creamy. This makes the perfect thick base for adding mint and vanilla extracts. When you take a sip, you think “Wow this is sweet and minty” not “Oh, I’m eating vegetables and seeds.”!

Use shelled hemp seeds or hemp hearts which is the whole seed without the outer shell and ripe avocados in this recipe.

Healthy Sweetener

I chose agave syrup for its clean, sweet flavor. This low glycemic sweetener lets the mint flavor really shine. You can use maple syrup if you like, but you will taste the maple flavor a bit.

Cacao Nibs

These little powerhouses are small pieces of crushed cacao beans and have an amazing chocolate flavor and crunch. They are a great healthy stand-in for mini chocolate chips. In fact, I tested this recipe with chocolate chips and preferred the complex flavor of the cacao nibs!

Healthy Shamrock Shake in a glass mug

If you’re a mint lover like me, you gotta try this Healthy Shamrock Shake Recipe! It’s:

  • Lightly sweet

  • Thick and creamy

  • Full of minty flavor

  • Quick

  • Easy

  • Dairy-Free

  • Satisfying

  • Rich and delicious

Healthy Shamrock Shake in glass mugs

Keep scrolling for step-by-step instructions and photos!


Ingredients for Healthy Shamrock Shake Recipe  

ingredients for Healthy Shamrock Shake
  • 2 cups (16 oz) cold water

  • 2 medium ripe avocados

  • ½ cup (80g) of shelled hemp seeds

  • ¼ cup (2 oz) agave

  • ½ teaspoon of mint extract

  • ½ teaspoon of vanilla

  • A pinch of fine sea salt

  • 1 tablespoon of cacao nibs for topping

 Makes 2 servings


How to make Healthy Shamrock Shake Recipe  

Healthy Shamrock Shake ingredients in a blender

Step 1:

1. Add the water, avocado, hemp seeds, agave, mint and vanilla extracts, and salt to a blender.


Healthy Shamrock Shake in a blender

Step 2:

2. Secure the lid and blend, at high speed, until completely smooth. This takes about a minute in a high-powered blender but may take longer depending on what type of blender you’re using.

Healthy Shamrock Shake blended in a blender cup

Healthy Shamrock Shake with cacao nibs

Step 3:

3. Pour into your favorite glass and top with cacao nibs and a mint leaf!

This recipe is perfect to enjoy around St. Patrick’s Day or anytime you’re craving a mint milkshake!

Healthy Shamrock Shake in a glass mug with a straw

Other quick, easy, and healthy desserts to fall in love with!

3 Ingredient Chocolate Covered Chickpea Clusters

Easy Vegan Caramel Apples

Pumpkin Spice Nice Cream

If you like this recipe, please leave a 5-star rating on the recipe card below. I always appreciate your feedback and hearing about your creations! For more yummy vegan recipes, you can also follow along on Instagram, Pinterest, Facebook, and Tiktok. I also send out a weekly newsletter with my latest recipes and upcoming cooking classes. Subscribe here to receive a FREE e-cookbook!

Yield: 2 servings
Author: Carol Clayton
Healthy Shamrock Shake Recipe  / Dairy-Free

Healthy Shamrock Shake Recipe / Dairy-Free

This dairy-free milkshake is refreshing with a clean mint taste and just the right amount of sweetness. It’s full of healthy ingredients like hemp seeds and avocado that will satisfy your tummy and your sweet tooth! Made with just 8 ingredients and ready in 5 minutes!
Prep time: 5 MinTotal time: 5 Min
Cook modePrevent screen from turning off

Ingredients

Instructions

  1. Add the water, avocado, hemp seeds, agave, mint and vanilla extracts, and salt to a blender.
  2. Secure the lid and blend, at high speed, until completely smooth. This takes about a minute in a high-powered blender but may take longer depending on what type of blender you’re using.
  3. Pour into your favorite glass and top with cacao nibs and a mint leaf!

Nutrition Facts

Calories

526.43

Fat (grams)

39.26 g

Sat. Fat (grams)

6.42 g

Carbs (grams)

42.02 g

Fiber (grams)

14.86 g

Net carbs

27.15

Sugar (grams)

21.18 g

Protein (grams)

9.42 g

Sodium (milligrams)

93.11 mg

Cholesterol (grams)

0.09 g

Nutritional information is provided as a courtesy and is an estimate only. This information comes from online calculators.

Did you make this recipe?
Tag @carolsvegankitchen on instagram and hashtag it #carolsvegankitchen
Created using The Recipes Generator

Classic Vegan and Gluten-Free Chocolate Chip Cookies

Classic Vegan and Gluten-Free Chocolate Chip Cookies

Jump To Recipe

These Classic Vegan and Gluten-Free Chocolate Chip Cookies are irresistibly soft inside with that slightly crispy exterior we all know and love. Packed with gooey chocolate chips and made with just 10 ingredients, they’re ready to devour in under 30 minutes!


classic vegan and gluten free chocolate chip cookies

Call me old fashioned, but I still enjoy baking from a recipe card that you can pull out of a well-loved and moderately organized recipe box, kind of like checking out a book using a paper library card. (Anyone remember those?!) The card with the most splatters, bent corners, and scribbles in my box is a classic chocolate chip cookie recipe that came with my decades old Kitchen Aid. It’s priceless and I guard it with my life.

Now that my family is vegan, it was high time to put this recipe back into action by making a few simple changes. I’m very pleased to report that the flavor and texture of the original recipe shine through in my vegan / gluten-free version. So, grab your aprons my friends and let’s make cookie history!

classic vegan and gluten free chocolate chip cookies with milk

How do you make these cookies vegan?

Create a flax egg

A flax egg replaces chicken’s eggs in this recipe and helps the dough stick together. To make a flax egg, scoop 1½ tablespoons of flaxseed meal (which is ground flaxseed) into a small bowl. Then add 3 tablespoons of water and whisk like your life depended on it. In a short amount of time, the flax egg will froth and gel, looking viscous. Set aside to thicken while you prep your other ingredients. Then use it just like you would use a regular egg.

Use vegan butter

Plant-based butter is made by mixing water with a combination of plant-derived oils. (palm fruit, canola oil, and olive oil) Other ingredients are added such as pea protein and natural flavor. It performs remarkably similarly to dairy-based butter. I use Earth Balance Vegan Buttery Sticks in this recipe. The brand is well trusted and easy to find.

Let the butter soften slightly before creaming. You want to be able to gently press your finger in it and make a dent while the butter still feels cold. Vegan butter is much softer than dairy-based butter, even straight from the fridge. If your butter would spread easily on toast, it’s too soft and needs to firm up in the fridge a bit.

Use dairy-free chocolate chips

This is the fun part and there are SO many choices, so go with chocolate chips that speak to you. I love Enjoy Life chocolate chips but I’ll also use dark chocolate chips from the bulk section at my local natural grocer.

vegan and gluten free chocolate chip cookie on a glass of milk

How do you make these cookies gluten-free?

Use 1 to 1 gluten-free baking flour

Gluten-free flour has come a long way in the past 5 years, making it really easy to swap out regular flour for a gluten-free variety with consistent results. The flour I use in this recipe is Bob’s Red Mill 1 to 1 Gluten-Free Baking Flour. There are loads of gluten-free flours out there but stick with this one (or a similar mixture) for perfect texture.

I highly recommend using a kitchen scale to measure your flour and sugar, if you have one. Then you’ll know you’re baking with the correct amount. If you are using a measuring scoop instead of a scale, spoon the flour into your scoop and then level off the top with the flat end of a knife. For brown sugar, pack the sugar firmly into the measuring scoop and level off the top.

classic vegan and gluten free chocolate chip cookies with milk

Is your mouth watering yet? Mine sure is!

These irresistible cookies are:

  • Perfectly sweet

  • Slightly crispy on the outside and soft on the inside

  • Loaded with gooey chocolate chips

  • Easy to make in under 30 minutes

  • Eat the whole batch, delicious!

Even with Valentine’s Day and all the chocolate last week I still couldn’t resist whipping up a batch to share. I feel like I’m walking down memory lane with each mouthwatering bite. I hope this recipe brings you as much joy as it has for me and my family!

vegan and gluten free chocolate chip cookie dunked in a glass of milk

Keep scrolling for step-by-step instructions and photos!


Ingredients for Classic Vegan and Gluten-Free Chocolate Chip Cookies

ingredients for classic vegan and gluten free chocolate chip cookies
  • 1½ tablespoons of flaxseed meal (ground flaxseed)

  • 3 tablespoons of water

  • ½ cup (4 oz.) of vegan butter, slightly softened (see notes for oil-free option)

  • ½ cup (100g) of organic cane sugar

  • ½ cup (100g) of organic light brown sugar firmly packed

  • 1½ teaspoons of vanilla extract

  • 1½ cups (222g) of 1 to 1 gluten-free baking flour (like Bob’s Red Mill)

  • ½ teaspoon of baking soda

  • ½ teaspoon of fine sea salt

  • ¾ cup (135g) of dairy-free chocolate chips

Makes 16 cookies using a 3-tablespoon sized scoop. This recipe can easily be doubled.


How to make Classic Vegan and Gluten-Free Chocolate Chip Cookies

flour and flax egg for baking vegan and gluten free chocolate chip cookies

Steps 1-3:

1. Pre-heat oven to 375 F (190 C / gas mark 5). Line 1-2 cookies sheets with parchment paper.

2. Create your “flax egg” by energetically whisking the ground flaxseed meal with water in a small bowl. Set aside to gel and thicken. You can use a fork or a small whisk for this task.

3. Sift or whisk the flour, baking soda, and salt into a separate bowl and set aside.


batter for baking vegan and gluten free chocolate chip cookies

Step 4:

4. In a medium mixing bowl, using an electric mixer, cream the vegan butter, cane, and brown sugar until there are no lumps of butter and it looks fluffy. Stop and scrape down the sides of the bowl as needed. This will take about 3 minutes. Then add in the flax egg and vanilla and blend until well light and creamy, 1 minute more.


batter for baking vegan and gluten free chocolate chip cookies

Step 5:

5. Gradually beat the flour mixture into the butter mixture until it forms cookie dough that is soft, yet thick enough to stick to a spoon if turned over.


batter for baking vegan and gluten free chocolate chip cookies

Step 6:

6. Mix in the chocolate chips by hand, using a wooden spoon. You want an even number of chips in every bite, so mix thoroughly without overworking the dough.


unbaked vegan and gluten free chocolate chip cookies

Step 7:

7. Use a 3-tablespoon scoop (or a spoon) to make 16 same-sized cookie dough mounds. Place them on your prepared cookie sheets spaced 2” apart. They will spread out as they cook, so there is no need to flatten them.


freshly baked vegan and gluten free chocolate chip cookies

Steps 8-9:

8. Bake on the middle oven rack for 12 minutes.

9. Remove from the oven and let cool for 3 minutes before transferring them to a wire rack to finish cooling. They will look poofy and undercooked straight from the oven. This is totally normal. The cookies will “settle” into that classic cookie shape and texture as they cool down.  

Enjoy warm, for a gooey, chocolate chip melty cookie experience. Or when cooled for a crispy on the outside, irresistibly soft on the inside cookie.


classic vegan and gluten free chocolate chip cookies

Notes:

Oil-free option:

You can use chilled coconut cream in place of vegan butter in this recipe. The cookies will spread out a bit more but will taste just as delicious. To get coconut cream, scoop the hard cream from a chilled can (13.5 oz. / 398 ml.) of full-fat coconut milk. (the kind that comes in a can not a carton) The can will need to chill in the fridge for at least 24 hours for the cream to separate and harden.

Storage:

The cookies will continue to firm up as they sit and are best eaten within a few days. Store, when cool, in an airtight container. To freeze the cookies, place them in single layers, separated with a piece of parchment, in an airtight container or freezer bag for up to 3 months. Gently thaw and enjoy!

Flour substitutions:  

Feel free to swap regular all-purpose baking flour for the gluten-free baking flour. If you are using gluten-free flour, I would stick with Bob’s Red Mill 1 to 1 Gluten-Free Baking Flour or a brand that has the same mix as Bob’s for a consistent cookie texture. For tips on measuring flour accurately, see blog post.

Sugar substitutions:

I’ve tested this recipe using beet sugar in place of cane sugar, which was indistinguishable. I also tested coconut sugar in place of brown sugar which had a similar texture but a less sweet and caramelly flavor. Date sugar will not work in this recipe.

classic vegan and gluten free chocolate chip cookies

If you like this recipe, please leave a 5-star rating on the recipe card below. I always appreciate your feedback and hearing about your creations! For more yummy vegan recipes, you can also follow along on Instagram, Pinterest, Facebook, and Tiktok. I also send out a weekly newsletter with my latest recipes and upcoming cooking classes. Subscribe here to receive a FREE e-cookbook!

Yield: 16 cookies
Author: Carol Clayton
Classic Vegan and Gluten-Free Chocolate Chip Cookies

Classic Vegan and Gluten-Free Chocolate Chip Cookies

These chocolate chip cookies are irresistibly soft inside with that slightly crispy exterior we all know and love. Packed with gooey chocolate chips and made with just 10 ingredients, they’re ready to devour in under 30 minutes!
Prep time: 15 MinCook time: 12 MinTotal time: 27 Min
Cook modePrevent screen from turning off

Ingredients

Instructions

  1. Pre-heat oven to 375 F (190 C / gas mark 5). Line 1-2 cookies sheets with parchment paper.
  2. Create your “flax egg” by energetically whisking the ground flax seed meal with water in a small bowl. Set aside to gel and thicken. You can use a fork or a small whisk for this task.
  3. Sift or whisk the flour, baking soda, and salt into a separate bowl and set aside.
  4. In a medium mixing bowl, using an electric mixer, cream the vegan butter, cane, and brown sugar until there are no lumps of butter and it looks fluffy. Stop and scrape down the sides of the bowl as needed. This will take about 3 minutes. Then add in the flax egg and vanilla and blend until light and creamy, 1 minute more.
  5. Gradually beat the flour mixture into the butter mixture until it forms cookie dough that is soft, yet thick enough to stick to a spoon if turned over.
  6. Mix in the chocolate chips by hand, using a wooden spoon. You want an even number of chips in every bite, so mix thoroughly without overworking the dough.
  7. Use a 3-tablespoon scoop (or a spoon) to make 16 same sized cookie dough mounds. Place them on your prepared cookie sheets spaced 2” apart. They will spread out as they cook, so there is no need to flatten them.
  8. Bake on the middle oven rack for 12 minutes.
  9. Remove from the oven and let cool for 3 minutes before transferring them to a wire rack to finish cooling. They will look poofy and undercooked straight from the oven. This is totally normal. The cookies will “settle” into that classic cookie shape and texture as they cool down.

Notes

Oil-free option:

You can use chilled coconut cream in place of vegan butter in this recipe. The cookies will spread out a bit more but will taste just as delicious. To get coconut cream, scoop the hard cream from a chilled can (13.5 oz. / 398 ml.) of full-fat coconut milk. (the kind that comes in a can not a carton) The can will need to chill in the fridge for at least 24 hours for the cream to separate and harden.

Storage:

The cookies will continue to firm up as they sit and are best eaten within a few days. Store, when cool, in an airtight container. To freeze the cookies, place them in single layers, separated with a piece of parchment, in an airtight container or freezer bag for up to 3 months. Gently thaw and enjoy!

Flour substitutions:  

Feel free to swap regular all-purpose baking flour for the gluten-free baking flour. If you are using gluten-free flour, I would stick with Bob’s Red Mill 1 to 1 Gluten-Free Baking Flour or a brand that has the same mix as Bob’s for a consistent cookie texture. For tips on measuring flour accurately, see blog post.

Sugar substitutions:

I’ve tested this recipe using beet sugar in place of cane sugar, which was indistinguishable. I also tested coconut sugar in place of brown sugar which had a similar texture but a less sweet and caramelly flavor. Date sugar will not work in this recipe.


For step-by-step instructions, with photos, see blog post!

Nutrition Facts

Calories

181.49

Fat (grams)

9.33 g

Sat. Fat (grams)

3.05 g

Carbs (grams)

25.03 g

Fiber (grams)

1.02 g

Net carbs

24.01

Sugar (grams)

17.77 g

Protein (grams)

1.39 g

Sodium (milligrams)

108.90 mg

Cholesterol (grams)

0.00 g

Nutritional information is provided as a courtesy and is an estimate only. This information comes from online calculators.

Did you make this recipe?
Tag @carolsvegankitchen on instagram and hashtag it #carolsvegankitchen
Created using The Recipes Generator
vegan and gluten free chocolate chip cookie dipped in milk

Super Seed Energy Bites

Super Seed Energy Bites

Jump To Recipe

These Super Seed Energy Bites are loaded with nutrients and make the perfect healthy snack, all while tasting like a chocolate treat! This easy-to-make recipe comes together in just 20 minutes and is vegan, gluten-free, and oil-free!


super seed energy bites stacked on a plate

This is a sponsored post written by me on behalf of O3 Superfoods. The opinions, text, and recipe are my own creation. Thank you so much for creating the ultimate flax butter and for the support!

super seed energy bites with flax butter

I have a confession to make. Before creating this recipe, I had never tried energy bites. Maybe this is because I grew up with a concoction that my mom fondly named “Peanut” which was a cover for emptying random old pantry items into a bowl, mixing them with peanut butter, and forming them into balls. Everyone in the house loved them, which was always a curiosity to me. Now that I’m older, (much older) I see what a fantastic and convenient idea it is to combine nutrient-dense pantry staples with nut or seed butter, and then roll them into tasty bite-sized balls. Hello energy bites!

super seed energy bites

Energy bites taste like a fudgy dessert but are full of healthy fats and protein making them perfect for snack attacks! They are also super filling and portable. I’ll often make a double batch and stash them in the freezer, then pull a few out in the morning to look forward to between meals or after a run.

super seed energy bites with flax butter

What’s in Super Seed Energy Bites?

Seeds

Seeds are some of nature’s best superfoods and they’re so cute! These ‘lil nutritional powerhouses add a fun crunch to the bites and make them really filling. This recipe has hemp hearts and sesame seeds, but you can add chia seeds or raw pumpkin seeds too. Rolling the balls in sesame seeds also makes them less sticky to handle and beautiful at the same time.

Seed butter

Flax butter is a new to me superfood that has been used by ancient cultures as part of their training regimen and as a snack food. A little goes a long way so you only need 1 tablespoon for the whole batch of energy bites. Click here to learn more about flax butter!

Tahini, which is ground up toasted sesame seeds that have been blended into butter, has a creamy, silky consistency that helps the bites stick together.

super seed energy bites rolled in sesame seeds

Dates and rolled oats

Sweet sticky dates hold all those lovely seeds and oats together. They are naturally very sweet without tasting like some crazy dessert. If your dates feel dry and firm, pop them in the microwave for 5-10 seconds (they burn quickly!) to soften them.

Raw cacao powder

Raw cacao powder makes the bites taste rich and fudgy and I love finding ways to tuck this superfood into recipes. For a different flavor profile, you can swap out the cacao powder for 2 teaspoons of cinnamon.

super seed energy bites with flax butter

Can I mix in other ingredients?

Yes! Adding chia seeds, raw pumpkin seeds, chopped nuts, or cacao nibs will bump up the nutrient level of the bites and give them an extra crunch. You can add up to ¼ cup of additional ingredients and the balls will still stick together.

super seed energy bites

I should definitely thank my mother for introducing my young self to “Peanut” and planting the seed for this fun and versatile recipe!

Did you know that you can turn the crust of my Vegan Dark Chocolate Tart into energy bites? Yup! Just make the dough and roll it into bite sized balls for a healthy chocolate treat!

super seed energy bites

Keep scrolling for step-by-step instructions and photos!


Ingredients for Super Seed Energy Bites

ingredients for super seed energy bites
  • ¾ cup (110 grams) of medjool dates, pitted (about 6 large dates)

  • ½ cup (45 grams) of rolled oats

  • 3 tablespoons of tahini

  • 2 tablespoons of maple syrup

  • 2 tablespoons of raw cacao powder

  • 2 tablespoons of hemp hearts

  • 1 tablespoon of O3 Superfoods Flax Butter (see note)

  • 1 teaspoon of vanilla

  • ¼ teaspoon of fine sea salt

  • 2 tablespoons of sesame seeds (for rolling the bites in)

Makes 14 (1) tablespoon sized energy bites


How to make Super Seed Energy Bites

super seed energy bite dough in a food processor

Steps 1-2:

1. First, give your dates a squeeze. You want them to be nice and soft. If they feel stiff, pop them in the microwave for 5-10 seconds until soft and almost sticky.

2. Add the dates and the rest of the ingredients to a food processor (not a blender). Using the pulse setting, process the mixture until it begins to look like coarse sand. Continue to process until a tablespoon of the dough can be rolled into a smooth ball. You may have to stop a time or two and scrape the sides of the container.


super seed energy bite dough rolled into balls

Step 3:

3. Scoop out 14 tablespoon-sized balls and roll them between your palms until smooth.


super seed energy bites rolled in sesame seeds

Steps 4-5:

4. Pour the sesame seeds into a small dish and roll the energy bites around in the seeds so they are coated all over. Press the seeds into the bites by rolling them between your palms.

5. Store in the refrigerator for firm energy bites or in the pantry for “fudgy” energy bites. They also freeze really well.


Enjoy anytime you need a tasty pick-me-up. Energy bites also make great travel snacks!

Notes:

If you don’t have flax butter on hand, use tahini or your favorite creamy/drippy style nut butter.

super seed energy bites

Craving healthy snacks?! Check out these scrumptious recipes!

Chocolate Covered Chickpea Clusters

Tangy Tofu Yogurt

Oatmeal Breakfast Cookies

super seed energy bites stacked on a plate

If you like this recipe, please leave a 5-star rating on the recipe card below. I always appreciate your feedback and hearing about your creations! For more yummy vegan recipes, you can also follow along on Instagram, Pinterest, Facebook, and Tiktok. I also send out a weekly newsletter with my latest recipes and upcoming cooking classes. Subscribe here to receive a FREE e-cookbook!

Yield: 14 (1) Tablespoon sized bites
Author: Carol Clayton
Super Seed Energy Bites

Super Seed Energy Bites

These fudgy bites are loaded with nutrients and make the perfect healthy snack, all while tasting like a chocolate treat! This easy-to-make recipe comes together in just 20 minutes and is vegan, gluten-free, and oil-free!
Prep time: 20 MinTotal time: 20 Min
Cook modePrevent screen from turning off

Ingredients

Instructions

  1. First, give your dates a squeeze. You want them to be nice and soft. If they feel stiff, pop them in the microwave for 5-10 seconds until soft and almost sticky.
  2. Add the dates and the rest of the ingredients to a food processor (not a blender). Using the pulse setting, process the mixture until it begins to look like coarse sand. Continue to process until a tablespoon of the dough can be rolled into a smooth ball. You may have to stop a time or two and scrape the sides of the container.
  3. Scoop out 14 tablespoon-sized balls and roll them between your palms until smooth.
  4. Pour the sesame seeds in a small dish and roll the energy bites around in the seeds so they are coated all over. Press the seeds into the bites by rolling them between your palms.
  5. Store in the refrigerator for firm energy bites or in the pantry for “fudgy” energy bites. They also freeze really well.

Notes

For step-by-step instructions and photos, see blog post!

Nutrition Facts

Calories

81.97

Fat (grams)

3.53 g

Sat. Fat (grams)

0.44 g

Carbs (grams)

11.69 g

Fiber (grams)

1.57 g

Net carbs

10.13

Sugar (grams)

7.04 g

Protein (grams)

2.05 g

Sodium (milligrams)

39.90 mg

Cholesterol (grams)

0.00 g

Nutritional information is provided as a courtesy and is an estimate only. This information comes from online calculators.

Did you make this recipe?
Tag @carolsvegankitchen on instagram and hashtag it #carolsvegankitchen
Created using The Recipes Generator

Vegan Mini Chocolate Bundt Cakes

Vegan Mini Chocolate Bundt Cakes / Gluten Free

Jump To Recipe

Calling all chocolate lovers! This Mini Vegan Chocolate Bundt Cakes recipe is almost as easy as using a mix but looks super fancy in the mini cake molds. It’s super moist, cakey, and full of rich chocolatey flavor, all while being vegan & gluten-free. Drizzle the top with a simple yet decadent chocolate ganache for any special occasion!


vegan mini chocolate bundt cakes with chocolate ganache

I’ve been on a gluten-free baking kick lately in my quest to find the perfect cake to celebrate my January 6th birthday which is also on 12th night. (double celebration!) Soooo, I’m ecstatic to share this vegan chocolate cake recipe with you that ticks all the dessert boxes and is super easy to make too!

vegan mini chocolate bundt cakes on small plates

This is the first cake recipe to come to VegetaFull, next to Vegan Strawberry Shortcake. I love it because you can mix all the ingredients in one bowl and then decide what kind of cake you want to make: mini bundt cakes, cupcakes, or a single layer cake. I’m also sharing a ridiculously easy, 2 ingredient, chocolate ganache that you can make in the microwave. It’s the ultimate finishing touch drizzled over the tops of the cakes!

vegan mini chocolate bundt cakes with chocolate ganache

Let’s talk about texture

The key to a moist and cakey gluten-free cake is balancing the amount of wet to dry ingredients. If the batter is too wet, the cake will turn out gummy. If it’s too dry it will bake up overly dense. I tested this recipe 7 times and found that the ingredients listed make the most “authentic” tasting vegan chocolate cake. The texture is moist, cakey, slightly fudgy, and the taste is pure chocolate heaven.

vegan mini chocolate bundt cakes held on a small plate

Oil-free options

The best oil-free option for this chocolate cake recipe is using melted coconut cream in place of the canola oil. You can buy a can of coconut cream or scoop the solid part out of a chilled can of full-fat coconut milk. I also tested melted cacao butter which mixed up weirdly foamy and tasted more like cacao butter than chocolate. (lol) The coconut cream will have a more fudgy texture than a cakey texture, but it will still be moist and delicious.

mini bundt cake pan dusted with cocoa powder

Prepping your pans!

That’s the secret to beautiful bundt cakes! Prep your mini bundt pan by greasing the insides of the molds with coconut oil, vegan butter, or shortening. Reach into all the grooves with your fingers to make sure the cake doesn’t stick. Then dust the insides with sifted cocoa powder, flip the pan over and tap out any excess. Use silicone molds for oil-free. I used a heavy-weight cast aluminum bundtlette pan which you can view here.

It’s also important to let the cakes cool for at least 20 minutes before turning them out of the pan. They naturally release from the molds and firm up as they cool.

If you don’t want to fuss with a bundt pan, this recipe will make 9 standard-sized cupcakes (cook for 20-22 minutes, or (1) 8” layer cake (cook for 30 minutes). Double the recipe for a 2-layer cake.

easy chocolate ganache

Easy Vegan Chocolate Ganache

This is the literal icing on the cake! Simply melt dairy-free chocolate chips with full-fat coconut milk in the microwave or on the stove top, cool until drizzle able, and then pour over the cooled cakes.

vegan mini chocolate bundt cakes

This Vegan Mini Chocolate Bundt Cakes recipe is:

  • Gluten-free

  • Moist and cakey

  • Rich and chocolatey

  • Easy to make

  • Perfect for any celebration!

vegan mini chocolate bundt cakes on small plates

Keep scrolling for step-by-step instructions with photos!


Ingredients for Vegan Mini Chocolate Bundt Cakes

ingredients for vegan mini chocolate bundt cakes
  • 1½ cups (188 grams) of gluten-free baking flour

  • ¾ cup (100 grams) of coconut sugar

  • ¼ cup (25 grams) of unsweetened cocoa powder, sifted

  • 1 teaspoon of baking soda

  • ½ teaspoon of fine sea salt

  • 1 cup of cold water

  • 1/3 cup (80 ml.) of canola oil (or melted coconut cream as an oil-free option)

  • 1 tablespoon (15 ml.) of distilled white vinegar

  • 1½ teaspoons of vanilla extract


Ingredients for Easy Vegan Chocolate Ganache

Ingredients for Easy Vegan Chocolate Ganache
  • 6 tablespoons (60 grams) of dairy-free chocolate chips

  • ¼ cup (2 oz. / 59 ml.) of full-fat coconut milk

Makes 4 mini bundt cakes or 9 standard sized cupcakes.


How to make Vegan Mini Chocolate Bundt Cakes

mini bundt cake pan

Step 1:

1. Preheat your oven to 350 F / 180 C / gas mark 4. Prep your mini bundt pan by greasing the insides with coconut oil, vegan butter, or shortening. Then dust the insides of the molds with sifted cocoa powder. Flip the pan over and tap out any excess cocoa. You want all the little grooves in the pan greased and coated so the cakes won’t stick. Use a silicone bundt pan as an oil-free option.


dry ingredients for vegan mini chocolate bundt cakes

Step 2:

2. Whisk the flour, coconut sugar, cocoa powder, baking soda, and salt in a medium mixing bowl, making sure there are no lumps.


vegan mini chocolate bundt cakes batter

Step 3:

3. Make a well in the center of the dry ingredients and pour the water, canola oil, (or melted coconut cream for oil-free) vinegar, and vanilla. Mix by hand, until combined and smooth.


vegan mini chocolate bundt cakes batter in a pan

Step 4:

4. Carefully spoon the batter into prepared molds. You should be able to fill 4 (1 cup) capacity molds ¾ full of batter. Give the pan a tap on the counter to let the batter settle into all the grooves and release any air bubbles.


vegan mini chocolate bundt cakes baked in a pan

Step 5:

5. Bake for 30 minutes. You’ll know they’re done when a toothpick inserted into the cake comes out clean. The tops will look cracked but will spring back when pressed. For standard sized cupcakes, bake for 20-22 minutes.


vegan mini chocolate bundt cakes on a cutting board

Step 6:

6. Let the cakes cool for a full 20 minutes before unmolding. Then, invert the pan so the cakes can easily slide out.


easy vegan chocolate ganache

Step 7:

7. To make the ganache, add the chocolate chips and coconut milk to a dish and microwave, at 20-second intervals, stirring in between, until melted, smooth, and glossy. You can also melt the ganache in a small saucepan, on the stovetop, over medium heat.


vegan mini chocolate bundt cakes topped with chocolate ganache and raspberries

Step 8:

8. When the cakes are completely cool, drizzle the tops with easy vegan chocolate ganache and decorate with fresh raspberries! (optional)


Storage:

Store in an airtight container in a cool place for 5 days or in the fridge for 2 weeks.

vegan mini chocolate bundt cakes on cake stands

We’ve been eating this over-the-top delicious cake nonstop around here (birthday week and beyond!) and I hope you get a chance to make it for your next celebration!

vegan mini chocolate bundt cakes on small plates

More gluten-free baking recipes you will love!

Vegan Pumpkin Spice Blender Muffins

Gluten-Free Cinnamon Currant Scones

Vegan Strawberry Shortcake

If you like this recipe, please leave a 5-star rating on the recipe card below. I always appreciate your feedback and hearing about your creations! For more yummy vegan recipes, you can also follow along on Instagram, Pinterest, Facebook, and Tiktok. I also send out a weekly newsletter with my latest recipes and upcoming cooking classes. Subscribe here to receive a FREE e-cookbook!


Yield: 4 Mini Bundt Cakes
Author: Carol Clayton
Vegan Mini Chocolate Bundt Cakes / Gluten Free

Vegan Mini Chocolate Bundt Cakes / Gluten Free

Calling all chocolate lovers! This Vegan Chocolate Cake recipe is almost as easy as using a mix but looks super fancy in the mini cake molds. It’s super moist, cakey, and full of rich chocolatey flavor, all while being vegan & gluten-free. Drizzle the top with a simple yet decadent chocolate ganache for any special occasion!
Prep time: 20 MinCook time: 30 MinInactive time: 20 MinTotal time: 1 H & 10 M
Cook modePrevent screen from turning off

Ingredients

For the mini chocolate bundt cakes
For the chocolate ganache

Instructions

  1. Preheat your oven to 350 F / 180 C / gas mark 4. Prep your mini bundt pan by greasing the insides with coconut oil, vegan butter, or shortening. Then dust the insides of the molds with sifted cocoa powder. Flip the pan over and tap out any excess cocoa. You want all the little grooves in the pan greased and coated so the cakes won’t stick. Use a silicone bundt pan as an oil-free option.
  2. Whisk the flour, coconut sugar, cocoa powder, baking soda, and salt in a medium mixing bowl, making sure there are no lumps.
  3. Make a well in the center of the dry ingredients and pour the water, canola oil, (or melted coconut cream for oil-free) vinegar, and vanilla. Mix by hand, until combined and smooth.
  4. Carefully spoon the batter into prepared molds. You should be able to fill 4 (1 cup) capacity molds ¾ full of batter. Give the pan a tap on the counter to let the batter settle into all the grooves and release any air bubbles.
  5. Bake for 30 minutes. You’ll know they’re done when a toothpick inserted into the cake comes out clean. The tops will look cracked but will spring back when pressed. For standard-sized cupcakes, bake for 20-22 minutes.
  6. Let the cakes cool for a full 20 minutes before unmolding. Then, invert the pan so the cakes can easily slide out.
  7. To make the ganache, add the chocolate chips and coconut milk to a dish and microwave, at 20-second intervals, stirring in between, until melted, smooth, and glossy. You can also melt the ganache in a small saucepan, on the stovetop, over medium heat.
  8. When the cakes are completely cool, drizzle the tops with easy vegan chocolate ganache and decorate with fresh raspberries! (optional)

Notes

Storage:

Store in an airtight container in a cool place for 5 days or in the fridge for 2 weeks.


For step-by-step instructions with photos, see blog post!

Nutrition Facts

Calories

529.44

Fat (grams)

21.88 g

Sat. Fat (grams)

4.09 g

Carbs (grams)

63.60 g

Fiber (grams)

1.86 g

Net carbs

61.74

Sugar (grams)

36.36 g

Protein (grams)

4.52 g

Sodium (milligrams)

584.44 mg

Cholesterol (grams)

0.00 g

Nutritional information is provided as a courtesy and is an estimate only. This information comes from online calculators.

Did you make this recipe?
Tag @carolsvegankitchen on instagram and hashtag it #carolsvegankitchen
Created using The Recipes Generator

This recipe is my gluten-free adaptation from the Chocolate Cake recipe in Colleen Patrick-Goudreau’s The Joy of Vegan Baking which is an adaptation from Jennifer Raymond’s recipe in her book Peaceful Palate.

Chocolate Covered Chickpea Clusters

Chocolate Covered Chickpea Clusters / Vegan Protein-Rich Treat

Jump To Recipe

Chocolate Covered Chickpea Clusters are an easy to make and delicious protein-rich treat! They are made with only 3 ingredients and are vegan, gluten-free, and oil-free. This fun, healthy candy has a rich chocolate taste and a satisfying crunch!


chocolate covered chickpea clusters

Welp, it’s the last week of 2021 and despite having my fair share of chocolate over the holidays, I’m looking forward to the new year and getting excited about all the fun ways to create with my favorite superfoods, like chocolate and chickpeas.

Have you ever tried chocolate-covered chickpeas? At first glance, it may seem odd to pour melted chocolate over beans. But when you think about it, chocolate can turn even the most humble ingredients into something special. And…this is one of the easiest to make and healthiest treats out there!

chocolate covered chickpea clusters

Roasting Chickpeas:

Roasting chickpeas is a pretty simple process. Drain and rinse a can of chickpeas and then dry the beans using a kitchen towel. Spread the chickpeas evenly on a parchment lined baking sheet and roast at 350 F/ 180 C until they are hard and crunchy.

chickpeas on a baking sheet

How long does it take to roast chickpeas?

In a standard oven, it takes about 60 minutes, and you’ll want to move the beans around every 20 minutes to ensure even roasting. My oven is from 1952 and it takes the full hour at 350 F. If you have a convection oven, the beans will roast much faster, only 35-40 minutes, with no stirring.

dry roasting chickpeas

When are the chickpeas done roasting?

You’ll know they are finished roasting when they are hard on the outside and crunch between your teeth. The best way to test if they are done is to eat one!


Melting Chocolate:

Melting chocolate is also super easy. You can melt the chocolate chips in the microwave or on the stove top.

melted chocolate chips in a glass bowl

In the microwave: 

Place your chocolate chips in a bowl and microwave at 30-second intervals, stirring in between, until smooth and glossy.

On the stovetop:

Pour your chocolate chips into a small saucepan and melt, while stirring, over medium heat until smooth and glossy.


Sprinkle with coarse sea salt:

This is the ultimate finishing touch. Sprinkle the clusters with coarse flakey sea salt, while the chocolate is still soft, so it will stick.

chocolate covered chickpea clusters sprinkled with coarse sea salt

Can I add other ingredients?

Absolutely! Try mixing in ¼ cup of your favorite nuts with the chickpeas for a fun variation. Peanuts taste amazing!

chocolate covered chickpea clusters

These Chocolate Covered Chickpea Clusters are: 

  • Semi-sweet

  • Protein-rich

  • Crunchy

  • Satisfying

  • Vegan, gluten-free, and oil-free

Once you’ve made these tasty clusters, I promise, they will become a staple in your kitchen. They’re so easy to make, you can get the kids involved too!

Keep scrolling for step-by-step instructions with photos!


Ingredients for Chocolate Covered Chickpea Clusters

ingredients for chocolate covered chickpea clusters

Makes about 15 clusters


How to make Chocolate Covered Chickpea Clusters

Steps 1-2:

1. Preheat your oven to 350 F / 180 C / gas mark 4. Line a rimmed baking sheet with parchment paper for roasting the chickpeas. Then line another baking sheet with parchment paper for the clusters.


2. Drain and thoroughly rinse the chickpeas so they don’t taste “beany”. Then dry them with a kitchen towel and spread them evenly on the baking sheet.

chickpeas on a baking sheet

Step 3:

3. Roast the chickpeas until they are hard and crunchy. This will take about 60 minutes in a standard oven. You’ll need to stir the chickpeas every 20 minutes to ensure even roasting. If you have a convection oven, this will take 35-40 minutes. The best way to test if they’re done is to eat one!

Step 4:

4. Place the chocolate chips in a microwave safe bowl or a small saucepan. Melt in the microwave at 30 second intervals, stirring in between, until smooth and glossy. Or, melt on the stovetop over medium heat, stirring until smooth.


roasted chickpeas on top of melted chocolate chips in a bowl

Step 5:

5. Pile the roasted chickpeas into the melted chocolate and stir until well coated. If you’re adding ¼ cup of chopped nuts, (optional) stir those in as well.

roasted chickpeas covered in melted chocolate

chocolate covered chickpea clusters

Step 6:

6. Using a spoon, scoop about 1 tablespoon of chocolate-covered chickpeas onto the parchment-lined baking sheet, forming a cluster shape. Leave a bit of space between clusters so they can settle. Sprinkle with coarse sea salt and let cool until firm. You can place them in the fridge or freezer to speed this up.


chocolate covered chickpea clusters

Step 7:

7. Once the chocolate is firm, they are ready to eat! Store in an airtight container in the pantry or in the fridge if there is a chance the chocolate might melt.


chocolate covered chickpea clusters
chocolate covered chickpea clusters stacked on a dish

If you like this recipe, please leave a 5-star rating on the recipe card below. I always appreciate your feedback and hearing about your creations! For more yummy vegan recipes, you can also follow along on Instagram, Pinterest, Facebook, and Tiktok. I also send out a weekly newsletter with my latest recipes and upcoming cooking classes. Subscribe here to receive a FREE e-cookbook!

Yield: 15 Clusters
Author: Carol Clayton
Chocolate Covered Chickpea Clusters / Vegan Protein-Rich Treat

Chocolate Covered Chickpea Clusters / Vegan Protein-Rich Treat

These tasty little clusters are an easy-to-make protein-rich treat! They are made with only 3 ingredients and are vegan, gluten-free, and oil-free. This fun, healthy candy has a rich chocolate taste and a satisfying crunch!
Prep time: 15 MinCook time: 1 HourInactive time: 20 MinTotal time: 1 H & 35 M
Cook modePrevent screen from turning off

Ingredients

Instructions

  1. Preheat your oven to 350 F / 180 C / gas mark 4. Line a rimmed baking sheet with parchment paper for roasting the chickpeas. Then line another baking sheet with parchment paper for the clusters.
  2. Drain and thoroughly rinse the chickpeas so they don’t taste “beany”. Then dry them with a kitchen towel and spread them evenly on the baking sheet.
  3. Roast the chickpeas until they are hard and crunchy. This will take about 60 minutes in a standard oven. You’ll need to stir the chickpeas every 20 minutes to ensure even roasting. If you have a convection oven, this will take 35-40 minutes. The best way to test if they’re done is to eat one!
  4. Place the chocolate chips in a microwave-safe bowl or a small saucepan. Melt in the microwave at 30-second intervals, stirring in between, until smooth and glossy. Or, melt on the stovetop over medium heat, stirring until smooth.
  5. Pile the roasted chickpeas into the melted chocolate and stir until well coated. If you’re adding ¼ cup of chopped nuts, (optional) stir those in as well.
  6. Using a spoon, scoop about 1 tablespoon of chocolate-covered chickpeas onto the parchment-lined baking sheet, forming a cluster shape. Leave a bit of space between clusters so they can settle. Sprinkle with coarse sea salt and let cool until firm. You can place them in the fridge or freezer to speed this up.
  7. Once the chocolate is firm, they are ready to eat! Store in an airtight container in the pantry or in the fridge if there is a chance the chocolate might melt.

Notes

For step-by-step instructions, with photos, see blog post!

Nutrition Facts

Calories

78.49

Fat (grams)

2.73 g

Sat. Fat (grams)

1.26 g

Carbs (grams)

12.03 g

Fiber (grams)

2.55 g

Net carbs

9.49

Sugar (grams)

4.99 g

Protein (grams)

2.79 g

Sodium (milligrams)

41.48 mg

Cholesterol (grams)

0.00 g

Nutritional information is provided as a courtesy and is an estimate only. This information comes from online calculators.

Did you make this recipe?
Tag @carolsvegankitchen on instagram and hashtag it #carolsvegankitchen
Created using The Recipes Generator