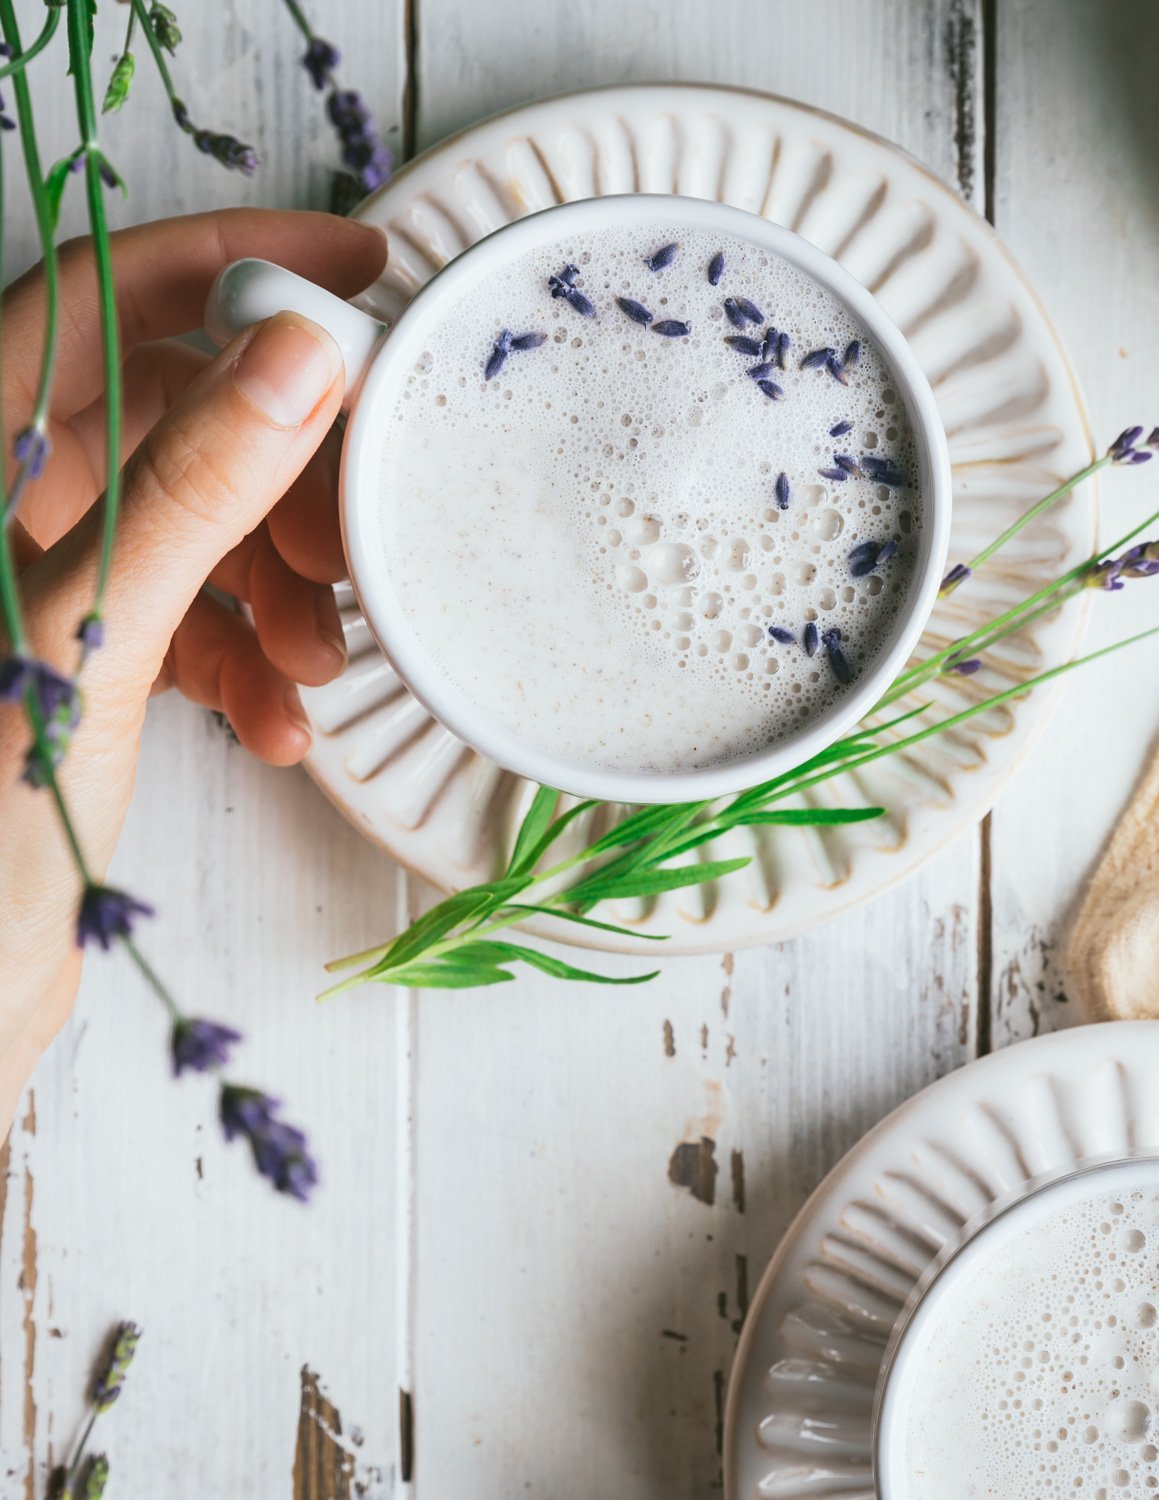
Peach Pie Smoothie

Jump To Recipe

This Peach Pie Smoothie tastes like sipping on a slice of summer pie! It’s creamy and naturally sweet thanks to ripe peaches and bananas! Perfect for breakfast or a quick snack.

peach pie smoothie

Peaches of all sorts are piled up in the produce section, my blender has made a permanent home on the countertop, and it officially feels like summer. Ahhh summer. Most of the year you can find me tucking into a smoothie bowl for breakfast, but by August, a simple refreshing smoothie is happening on the daily.

If you’ve hung out in the smoothie bowl section of the blog, you’ll find I’m a huge fan of pie-in-a-bowl recipes like Apple Pie Smoothie Bowl, Healthy Pumpkin Pie Smoothie Bowl, and Strawberry Rhubarb Pie Smoothie Bowl. But it’s summer and it’s time for pie-in-a-glass.

peach pie smoothies

Naturally Sweetened

Getting that dessert for breakfast deliciousness in smoothie form is literally as easy as plopping all the ingredients into a blender. We’re talking 5 minutes to drinking a slice of pie, only much healthier.

This peach and banana smoothie is naturally sweetened with ripe fruit. When choosing peaches, give them a squeeze. If they’re soft and can be dented but not mushy, they’re ripe but not over-ripe and perfect for smoothies. When blending bananas, use ripe bananas that are bright yellow with a few black spots, letting you know the starches have turned into simple sugars.

peach pie smoothie

Fresh Fruit or Frozen Fruit?

This vegan peach smoothie uses fresh fruit and you can drink it through a straw. For a thicker, slushy-style smoothie, use frozen fruit.

The recipe is clean and simple, but you can toss in some extra fiber and protein. Here’s a few of my go-to add-ins for thickening smoothies while getting a hit of added nutrients. Psst…the cashew/oat combo really takes peach pie smoothie to the next level!

  • ¼ cup of raw cashews (soaked until soft)

  • 2 tablespoons of rolled oats

  • 2 tablespoons of hemp seeds

  • 1 tablespoon of chia seeds

peach pie smoothie

What’s in this peach pie smoothie?

Peaches: Use fresh ripe flavorful peaches. Bland peaches will make for a bland-tasting smoothie. For a thicker smoothie use frozen peaches.

Bananas: To make the smoothie naturally sweet, use ripe bananas. Freeze them ahead of time for extra thickness.

Almond Milk: My favorite plant-based milk is homemade almond milk. You can use almond milk, oat milk, or full-fat coconut milk for extra richness.

 Almond Butter: for healthy fats and richness. It complements the almond milk nicely. Cashew butter would also be very tasty.

Vanilla, cinnamon, and salt: are essential for that peach pie flavor!

peach pie smoothie

Tips for making this peach pie smoothie recipe

  • Use flavorful peaches. Hard, early-season peaches that taste bland will make a bland smoothie. So, choose ripe juicy peaches.

  • Use ripe bananas. Green bananas will taste starchy, under sweet, and bland. Very over-ripe bananas will overpower the peach flavor in the smoothie.

  • Don’t skip the salt. A pinch of salt (1/16 teaspoon) will marry all the flavors together while providing an essential electrolyte. This will help keep you hydrated.

  • This smoothie is easily customizable. Use your favorite plant-based milk and nut butter. Toss in a couple of fresh figs. Thicken it with the optional protein boosters above. This is your smoothie!

peach pie smoothie

Smoothies make the easiest summer breakfast. But, hey, with that blender winking at me from the countertop, I’m blending up pie-in-a-glass all day long! It’s:

  • Naturally sweet

  • Dairy-free

  • Gluten-free

  • Vegan

  • Quick

  • Low effort

  • Customizable

  • Scrumptious!

peach pie smoothies

Other summer beverages you won’t want to miss:

Pina Colada Mocktail

Lavender Moon Milk

Vegan Chai Latte


Keep scrolling for step-by-step instructions and photos!

ingredients for peach pie smoothie

Ingredients for Peach Pie Smoothie

Makes 20 oz. 2½ cups

  • 1 cup of almond milk

  • 1 ripe banana

  • 1 ripe peach, stoned removed and skin on

  • 2 tablespoons of almond butter

  • 1 teaspoon of vanilla

  • ½ teaspoon of cinnamon

  • A pinch of sea salt


How to Make a Peach Smoothie

1. Pile all of the ingredients into a blender.

2. Secure the lid and blend at medium to high speed until completely smooth, about 1 minute. You may need to scrape down the sides of the container, depending on what type of blender you’re using.

3. Pour into a tall glass, garnish with a peach slice and drink right away!


peach pie smoothie

If you like this recipe, please leave a 5-star rating on the recipe card below. Your ratings and comments mean the world to me, thank you!

And, receive a gorgeous FREE e-cookbook by subscribing to my newsletter! Click here for delicious weekly recipes and your e-cookbook.

<
Yield: 2 Smoothies
Author: Carol Clayton
Peach Pie Smoothie

Peach Pie Smoothie

This Peach Pie Smoothie tastes like sipping on a slice of summer pie! It’s creamy and naturally sweet thanks to ripe peaches and bananas! Perfect for breakfast or a quick snack.
Prep time: 5 MinTotal time: 5 Min

Ingredients

Instructions

  1. Pile all of the ingredients into a blender.
  2. Secure the lid and blend at medium to high speed until completely smooth, about 1 minute. You may need to scrape down the sides of the container, depending on what type of blender you’re using.
  3. Pour into a tall glass, garnish with a peach slice, and drink right away!

Notes

For step-by-step instructions and photos, see blog post!

Nutrition Facts

Calories

206.75

Fat (grams)

10.79

Sat. Fat (grams)

0.76

Carbs (grams)

25.2

Fiber (grams)

4.96

Net carbs

20.25

Sugar (grams)

14.61

Protein (grams)

5.33

Sodium (milligrams)

193.57

Cholesterol (grams)

0

Nutritional information is provided as a courtesy and is an estimate only. This information comes from online calculators.

Did you make this recipe?
Tag @vegeta.full on instagram and hashtag it # feedpeopleplants

Lavender Moon Milk

Jump To Recipe

Relax with a dreamy cup of Lavender Moon Milk as a sleepy-time treat! This vegan milk recipe is made with cashews, lavender blossoms, vanilla, and a splash of maple syrup. Feel your stress melt away with each creamy sip!


lavender moon milk in cups

Fun fact: Sequim (my neighboring town) is the lavender capital of North America. Every year they hold a huge lavender festival where you can tour all the lavender farms and cruise through endless rolling purple fields. This flowering bush grows everywhere here, even in my backyard!

So, as a nod to this well-loved bud, I’ve created a 5-minute vegan moon milk recipe for you that is as easy as it is delicious. New to moon milk? Yay! You’re in for a sleepy-time treat! Picture sipping warm, lightly sweetened creamy milk infused with lavender and vanilla. Just thinking about it makes me relax. It really is the perfect nightcap to send you off into a peaceful dreamy sleep.

lavender moon milk poured into a cup

What is moon milk?

The old story: Moon milk has been around for centuries and is rooted in Ayurveda, a medicine tradition that originated in India. Ancient moon milk was served warm with spices, oils, and adaptogenic herbs like ashwagandha.

The new story: Modern-day moon milk is a warm nightcap made from milk (obvs), a touch of sweetener, and calming ingredients like lavender. If you’re into sleepy time supplements, moon milk can be a delicious way to work them into your bedtime routine.

lavender moon milk in a cup

Is moon milk vegan?

Traditional moon milk is made with dairy-based milk and is not vegan. But hold onto your nut bag, this vegan moon milk is made with soaked cashews for fuss-free milk that you don’t have to strain. You’re welcome!

preparing lavender for moon milk

Where do I find culinary lavender?

Fortunately, lavender is pretty easy to find. You can purchase it from your natural grocer, spice shops, and in many chain stores like Whole Foods. It also pops up in farmers’ markets which is where I usually get mine. Double-check that it’s culinary lavender and labeled for cooking.

Popular varieties of edible lavender include sweet-smelling English, Hidcote, and Munstead. Most culinary lavender comes dried. If you’re using fresh blossoms, use triple the amount. For example, if a recipe calls for 1 teaspoon of dried lavender, use 1 tablespoon of fresh blossoms.

Remember, a little goes a long way; ½ teaspoon is all you need in this recipe. Too much lavender will disappointingly taste like soap.

lavender moon milk in a cup

Do I really need to soak my cashews?

Yup! If you want totally creamy milk with no little bits of cashew, you will need to soak your nuts before blending. Even the most powerful blender will leave tiny unsoaked cashew grains behind.

Soak your cashews in cold water for 24 hours. This draws out the bitter phytic acid for a milder taste and keeps the milk raw. If you need milk asap, (I get it!) pour boiling water over your nuts and let them sit for 20 minutes. Just don’t forget to drain and rinse the nuts before blending.

lavender moon milk in cups

If you're curious about moon milk, this is a great recipe to try it’s:

  • Lightly sweet & creamy

  • Uncomplicated

  • Floral

  • Calming

  • Vegan

  • Gluten-free

  • Raw

Serving Suggestions:

I love sipping on a warm cup of lavender milk with a sweet treat to dip it in. It pairs perfectly with Almond Shortbread or alongside Cinnamon Current Scones.  And if you’re a fan of cookies and milk, I highly recommend Classic Chocolate Chip Cookies!


Keep scrolling for step-by-step instructions with photos!

ingredients for lavender moon milk

Ingredients for Lavender Moon Milk

  • 1½ cups (12 oz) of cold water

  • ¼ cup (35g) of raw cashew nuts (soaked until soft)

  • 1 tablespoon of maple syrup

  • ½ teaspoon of dried culinary lavender

  • ½ teaspoon of vanilla

  • pinch of fine sea salt

 Makes a single serving (14 oz.) / This recipe can easily be doubled.


How to make Lavender Moon Milk

1. First, soak your cashews in a jar filled with cold water overnight. Or quick soak the cashews in a heat-proof jar by pouring boiling water over them. They’ll be soft after 20 minutes. Drain the cashews and give them a good rinse as the soaking water can be bitter.

2. Pour the water into a blender cup and plop in the rest of the ingredients. I’ve had the best luck creating a creamy texture with no lumps in a small cup-style blender like a Nutribullet.

3. Secure the lid and blend, at high speed, until completely smooth. This takes 90 seconds in a high-powered blender but may take longer depending on what type of blender you’re using.

4. Warm the moon milk in a small saucepan over medium-high heat until just simmering. Or heat it up in the microwave (which is what I usually do). It also tastes wonderful poured straight from the blender at room temperature.

5. Pour into your favorite mug and sprinkle with lavender blossoms!

Storage:

Store in the fridge for up to a week.

lavender moon milk in cups

If you like this recipe, please leave a 5-star rating on the recipe card below. Your ratings and comments mean the world to me, thank you!

And just for you, receive a gorgeous FREE e-cookbook by subscribing to my newsletter! Click here for delicious weekly recipes and your e-cookbook.

Yield: 1
Author: Carol Clayton
Lavender Moon Milk

Lavender Moon Milk

Prep time: 5 MinTotal time: 5 Min

Ingredients

Instructions

  1. First, soak your cashews in a jar filled with cold water overnight. Or quick soak the cashews in a heat-proof jar by pouring boiling water over them. They’ll be soft after 20 minutes. Drain the cashews and give them a good rinse as the soaking water can be bitter.
  2. Pour the water into a blender cup and plop in the rest of the ingredients. I’ve had the best luck creating a creamy texture with no lumps in a small cup-style blender like a Nutribullet.
  3. Secure the lid and blend, at high speed, until completely smooth. This takes 90 seconds in a high-powered blender but may take longer depending on what type of blender you’re using.
  4. Warm the moon milk in a small saucepan over medium-high heat until just simmering. Or heat it up in the microwave (which is what I usually do). It also tastes wonderful poured straight from the blender at room temperature.
  5. Pour into your favorite mug and sprinkle with lavender blossoms!

Notes

Store in the fridge for up to a week.


For step-by-step instructions with photos, see blog post!

Nutrition Facts

Calories

239.33

Fat (grams)

14.17

Sat. Fat (grams)

2.51

Carbs (grams)

23.75

Fiber (grams)

1.06

Net carbs

22.68

Sugar (grams)

14.14

Protein (grams)

5.91

Sodium (milligrams)

62.35

Cholesterol (grams)

0

Nutritional information is provided as a courtesy and is an estimate only. This information comes from online calculators.

Did you make this recipe?
Tag @vegeta.full on instagram and hashtag it # feedpeopleplants

Red Velvet Hot Chocolate

Red Velvet Hot Chocolate / Dairy Free

Jump To Recipe

This Red Velvet Hot Chocolate recipe is luxuriously rich and decadent. It tastes like your favorite cake in cozy beverage form! The beautiful pink tone comes from healthy beetroot in this dairy-free hug in a mug.


red velvet hot chocolate in a mug

The first day of summer is tomorrow! Kids are out of school, summer festivals are on the calendar, and I’m itching to pack my puffy jacket away for a few short months. It’s hanging on a hook in my entryway teasing me as I write this. But, hey, whom I kidding? It’s Juneuary in the PNW and that puffy jacket and I are besties. While the rest of the country is sipping on a tall cool lemonade, I’ll be wrapping my hands around a warm mug of this red velvet hot chocolate.

red velvet hot chocolate in mugs

Don’t feel sorry for us northwesters though this dairy free hot chocolate will put a smile on your face even in the thick of June gloom. It’s super rich and creamy thanks to soaked raw cashews. The pretty pink color comes from healthy beetroot, and you can use regular cocoa powder or make it a superfood drink with raw cacao powder. For just the right amount of sweetness, use the same amount of maple syrup as cocoa powder. A splash of vanilla and a pinch of salt balance the flavors. And if the temperature is soaring in your neck of the woods, no worries, this cake inspired beverage tastes just as luxurious straight from the fridge or iced!

red velvet hot chocolate poured from a pitcher

Is Red Velvet Hot Chocolate vegan?

Yup! By blending soaked raw cashews with water, we make rich and creamy dairy-free milk. This is the base for the hot chocolate. Look for raw cashews instead of roasted salted cashews. For the creamiest texture, soak the cashew in very hot water while you gather your ingredients and grate the beetroot. You can also soak the cashews in cold water in the fridge overnight for a totally raw beverage. Then drain off the soaking water, give them a good rinse, and pop them in the blender with the rest of the ingredients. Blend in high speed for at least 90 seconds and you’re good to go!

red velvet hot chocolate in a mug

Can you taste the beetroot?

I personally cannot taste the beetroot in this recipe. The chocolate flavor is rich and hits your tongue first with sweet creaminess. If you’re really sensitive to the earthy flavor of beets, try using half the amount or skip this ingredient and use a few drops of natural red food coloring to create that signature red velvet pink.

Tip: It’s worth taking the time to grate the beetroot before blending so you don’t end up with little chunks of beet in your mug.

What cocoa powder should I use?

My favorite cocoa powder to use in this recipe is unsweetened dutched cocoa powder which has a mellow flavor and dissolves easily into liquids. (Like Oreo cookies!) If you’re looking for the healthiest form of chocolate, use raw cacao powder which is pure cacao bean powder and is minimally processed.

red velvet hot chocolate poured from a pitcher

I love whipping up this comforting beverage all year long and like to keep a stash of grated beet handy in my freezer. All the other ingredients are shelf stable, so you are minutes away from the best hot chocolate in the PNW or right where you live!

Try this recipe it’s:

  • Creamy

  • Sweet

  • Full of chocolate flavor

  • Dairy-free

  • Healthy

  • Low effort

  • Tastes great hot or cold

More creamy dreamy beverages for summer and beyond!

Cherry Almond Milk

Healthy Shamrock Shake

Cashew Golden Milk


Keep scrolling for step-by-step instructions and photos!

red velvet hot chocolate ingredients

Ingredients for Red Velvet Hot Chocolate

Makes 2 servings

  • 2 cups (16 oz.) of cold water

  • ½ cup (70g) of raw cashews (soaked until soft)

  • ¼ cup of grated red beetroot (raw)

  • ¼ cup (25g) tablespoons of unsweetened cocoa powder (or raw cacao powder)

  • ¼ cup (2 oz.) of maple syrup

  • ½ teaspoon of vanilla

  • Pinch of fine sea salt


How to make Red Velvet Hot Chocolate

red velvet hot chocolate in a blender

1. First, soak your cashews in a jar filled with cold water overnight. Or quick soak the cashews in a heat proof jar by pouring boiling water over them. They’ll be soft after 20 minutes. Drain the cashews and give them a good rinse since the soaking water can be bitter.

2. Plop the water, cashews, beetroot, cocoa powder, maple syrup, vanilla, and salt into a blender. I’ve had the best luck creating a silky texture with no lumps in a small cup style blender like a Nutribullet.

3.  Secure the lid and blend, at high speed, until completely smooth. This takes 90 seconds in a high-powered blender but may take longer depending on what type of blender you’re using.

4. Warm the hot chocolate in a small saucepan over medium-high heat until just simmering. Or heat it up in the microwave (which is what I usually do). OR, enjoy chilled from the fridge or iced.

5.  Pour into your favorite mug and top with chocolate shavings and mini marshmallows!

Storage:

Store leftovers in the fridge for up to a week. The natural ingredients will separate, so give it a shake before serving.


red velvet hot chocolate in a mug

If you like this recipe, please leave a 5-star rating on the recipe card below. I always appreciate your feedback and hearing about your creations! For more yummy vegan recipes, you can follow along on Instagram, Pinterest, Facebook, and Tiktok. I also send out a weekly newsletter with my latest recipes and upcoming cooking classes. Subscribe here and receive a FREE e-cookbook!

Yield: 2 servings
Author: Carol Clayton
Red Velvet Hot Chocolate / Dairy Free

Red Velvet Hot Chocolate / Dairy Free

( 0 reviews )
This Red Velvet Hot Chocolate recipe is luxuriously rich and decadent. It tastes like your favorite cake in cozy beverage form! The beautiful pink tone comes from healthy beetroot in this dairy-free hug in a mug.
Prep time: 10 MinTotal time: 10 Min

Ingredients

Instructions

  1. First, soak your cashews in a jar filled with cold water overnight. Or quick soak the cashews in a heat-proof jar by pouring boiling water over them. They’ll be soft after 20 minutes. Drain the cashews and give them a good rinse since the soaking water can be bitter.
  2. Plop the water, cashews, beetroot, cocoa powder, maple syrup, vanilla, and salt into a blender. I’ve had the best luck creating a silky texture with no lumps in a small cup-style blender like a Nutribullet.
  3. Secure the lid and blend, at high speed, until completely smooth. This takes 90 seconds in a high-powered blender but may take longer depending on what type of blender you’re using.
  4. Warm the hot chocolate in a small saucepan over medium-high heat until just simmering. Or heat it up in the microwave (which is what I usually do). OR, enjoy chilled from the fridge or iced.
  5. Pour into your favorite mug and top with chocolate shavings and mini marshmallows!

Notes

Store leftovers in the fridge for up to a week. The natural ingredients will separate, so give it a shake before serving.


For step-by-step instructions and photos, see blog post!

Nutrition Facts

Calories

321.71

Fat (grams)

15.64

Sat. Fat (grams)

3.38

Carbs (grams)

44.84

Fiber (grams)

5.52

Net carbs

39.31

Sugar (grams)

27.5

Protein (grams)

8.27

Sodium (milligrams)

54.3

Cholesterol (grams)

0

Nutritional information is provided as a courtesy and is an estimate only. This information comes from online calculators.

Did you make this recipe?
Tag @vegeta.full on instagram and hashtag it # feedpeopleplants

Pina Colada Mocktail

Pina Colada Mocktail

Jump To Recipe

This Pina Colada Mocktail is a refreshing drink the whole family will love. Made rich and sweet with coconut cream and frozen pineapple, it’s decadent enough for special occasions but healthy enough for breakfast!


pina colada mocktail in a glass

A few years ago, my husband Todd and I were taking a winter vacation on the big island of Hawaii. After a long flight, we drove to our hotel and were given 2 drink vouchers at check-in. Why thank you! The vouchers were good for pina coladas which, at the time, I had never tried. We dumped our bags and made a beeline for the cheery poolside bar complete with a Jack Johnson cover singer. Several songs later our laidback bartender plunked down two frosty, creamy yellow cocktails all fancied up with a pineapple wedge and maraschino cherry. It was love at first sip. The sweet/tart taste of pineapple blended with cool and creamy coconut was like drinking a tropical paradise. At that moment I knew I wanted to recreate this delectable beverage, mocktail style, at home!

The beautiful thing about this healthy pina colada recipe is it’s just as simple as blending a smoothie. You can make it in about 5 minutes with ingredients that store in the pantry or freezer. So, if you’re in party mode (or breakfast mode) it’s quick and easy to grab all the ingredients and blend away!

Click here to Wiki up on your pina colada knowledge.

pina colada mocktail in a glass

What blender should I use?

Here’s the good news. Since we’re using frozen pineapple chunks and water instead of ice in this recipe, a budget-friendly blender will power through the ingredients. Don’t worry, your mocktail won’t taste watery thanks to the coconut cream. If you have a high-powered blender to use, go for it!

pina colada mocktail poured into a glass

Where can I find coconut cream?

There are two ways to buy coconut cream.

1. Buy a can of ready-made coconut cream. This can usually be found in the Asian section of your grocery store. Scoop out the cream which will be soft like room temperature butter.

2. Buy a can of full-fat coconut milk and store it in the fridge. After 24 hours the cream will separate from the liquid and become solid, making it easy to scoop off the top.

Note: Thai Kitchen brand organic coconut milk will not separate even after sitting in the fridge for over 24 hours. I use their canned coconut cream instead.

pina colada mocktail in a glass

Substitutions:

  • Use regular coconut milk (that comes in a carton, not a can) in place of the water for an even richer mocktail.

  • Swap out the coconut cream for coconut milk (full-fat or “light”) for a “skinny” mocktail.

  • Use crushed ice in place of water and partially thawed pineapple in a high-powered blender for a slushy-style mocktail.

  • For an even fresher drink, cube and freeze freshly cut up pineapple.

pina colada mocktail in a glass

Recipe notes:

Use a kitchen scale to measure your pineapple if you have one. Too much or too little pineapple will change the taste and texture of the mocktail. If you don’t have a scale, measure out 2 generous cups of pineapple chunks as they don’t compact down into the cup when frozen.

Use room temperature coconut cream. Cold cream is stubborn about fully blending and you’ll end up with little bitty chunks of cream in your drink.

Storage:

This recipe stores exceptionally well. Even after a week in the fridge, it tastes fresh and holds its color making it a great base for green smoothies. Just give it a shake before drinking as the cream and pineapple will separate from the water.

pina colada mocktail with a cherry

Now whenever I listen to Jack Johnson, I think about how delicious that first Pina Colada was and am so happy that I can make my own at a moment’s notice! It’s everything you want in a mocktail:

  • Sweet/tangy

  • Creamy

  • Refreshing

  • Quick and easy

  • Healthy

  • Dairy-free

  • Oil-free

  • Vegan

pina colada mocktail in a glass

Keep scrolling for step-by-step instructions with photos!

ingredients for pina colada mocktail

Ingredients for Pina Colada Mocktail / Makes 24 oz / 3 cups

  • ½ cup (4 oz) of coconut cream

  • ¼ cup (2 oz) of pineapple juice

  • 2 cups (280 g) of frozen pineapple chunks

  • 1 cup (8 oz) of cold water

  • 1 tablespoon of agave


How to make Pina Colada Mocktail

1. Plop the coconut cream into your blender and pour in the pineapple juice. Add these ingredients first to give the blade something to grab onto. Tumble in the frozen pineapple chunks followed by the water and agave.

2. Secure the lid and blend, starting at low speed, working your way up to medium or high speed, depending on your blender. You want a creamy, frothy consistency, so blend until all the frozen pineapple chunks are nice and smooth.

3. Pour into a fun cocktail glass and garnish with a pineapple wedge and a cherry to top it off!

pina colada mocktail in a glass

If you like this recipe, please leave a 5-star rating on the recipe card below. I always appreciate your feedback and hearing about your creations! For more yummy vegan recipes, you can follow along on Instagram, Pinterest, Facebook, and Tiktok. I also send out a weekly newsletter with my latest recipes and upcoming cooking classes. Subscribe here and receive a FREE e-cookbook!

Yield: 2 (12 oz.) servings
Author: Carol Clayton
Pina Colada Mocktail

Pina Colada Mocktail

( 0 reviews )
This Pina Colada Mocktail is a refreshing drink the whole family will love. Made rich and sweet with coconut cream and frozen pineapple, it’s decadent enough for special occasions but healthy enough for breakfast!
Prep time: 5 MinTotal time: 5 Min

Ingredients

Instructions

  1. Plop the coconut cream into your blender and pour in the pineapple juice. Add these ingredients first to give the blade something to grab onto. Tumble in the frozen pineapple chunks followed by the water and agave.
  2. Secure the lid and blend, starting at low speed, working your way up to medium or high speed, depending on your blender. You want a creamy, frothy consistency, so blend until all the frozen pineapple chunks are nice and smooth.
  3. Pour into a fun cocktail glass and garnish with a pineapple wedge and a cherry to top it off!

Notes

Use a kitchen scale to measure your pineapple if you have one. Too much or too little pineapple will change the taste and texture of the mocktail. If you don’t have a scale, measure out 2 generous cups of pineapple chunks as they don’t compact down into the cup when frozen.


Use room temperature coconut cream. Cold cream is stubborn about fully blending and you’ll end up with little bitty chunks of cream in your drink.


Storage

This recipe stores exceptionally well. Even after a week in the fridge, it tastes fresh and holds its color making it a great base for green smoothies. Just give it a shake before drinking as the cream and pineapple will separate from the water.


For step-by-step instructions with photos, see blog post!


Nutrition Facts

Calories

388.14

Fat (grams)

21.15

Sat. Fat (grams)

18.47

Carbs (grams)

52.62

Fiber (grams)

4.48

Net carbs

48.14

Sugar (grams)

43.81

Protein (grams)

3.51

Sodium (milligrams)

11.7

Cholesterol (grams)

0

Nutritional information is provided as a courtesy and is an estimate only. This information comes from online calculators.

Did you make this recipe?
Tag @vegeta.full on instagram and hashtag it # feedpeopleplants

Vegan Chai Latte Recipe

Vegan Chai Latte Recipe / Caffeine-Free!

Jump To Recipe

Cozy up to this warmly spiced vegan chai latte recipe. It’s got all the classic chai spices and no caffeine! You can make this single-serving treat in about 5 minutes with wholesome plant-based milk. Perfect for bedtime or anytime you want a sweet and creamy beverage!


caffeine free vegan chai latte

Just the words chai latte feels special. It makes me think of sitting cross legged on a Himalayan Mountain sipping peacefully from a steaming cup. Or, more practically, pouring overly sweet coffee shop-style chai mix from an aseptic carton. So, what is a chai latte anyway?

Masala chai originated in India thousands of years ago as a medicinal drink. It’s a beverage of massive cultural significance which now has worldwide popularity. Masala chia, meaning spiced tea, is made from black tea, milk, and spices including cinnamon, cardamom, ginger, and cloves. The modern-day chai latte is a fusion of masala chai and frothy steamed milk. To make it caffeine-free and vegan we skip the tea and use plant-based milk. 

You can read all about the history of chia here.

caffeine free vegan chai latte

What milk should I use in this Vegan Chai Latte Recipe?

When choosing milk, the first thing to decide is how rich you want your latte to be. The richer the milk, the creamier the latte. I tested this recipe with soy milk which is thick and foams up nicely.

Next, choose milk that you really like because it’s the main ingredient. So, if Oatly is your favorite brand, go with that! I feel it would be delicious with my homemade almond milk as well.

Choose unsweetened. But, if sweetened is your only option, or what you have on hand, forge ahead and reduce the maple syrup to 1 tablespoon. You can test it to see if it’s sweet enough before adding more.

caffeine free vegan chai latte

How do I make it frothy?

I’ve got two easy options for you, and both are very satisfying.

The jar method is almost too good to be true. Just add all your ingredients to a jar that is large enough to accommodate some serious foam. Heat it in the microwave until it’s hot but not scorch-your-tongue hot. Secure the lid and shake with the intensity of outrunning an on-rushing bear.

You’ll see the milk magically foam up as you shake the jar. Carefully unscrew the lid and pour into your favorite mug, scooping any precious remaining foam on top.

For the more traditional stovetop method, add all your ingredients to a medium saucepan over medium-high heat. Use a whisk, or better yet, a milk frother, to whip up the milk into foam as it heats. When it’s pleasantly warm but not boiling, pour it into your favorite mug, scooping the foam on top.

caffeine free vegan chai latte

What spices are in a chai latte?

The most common spices are cinnamon, cardamom, ginger, and cloves. But some recipes will include nutmeg, allspice, anise, vanilla, and pepper, among others, depending on the region in India. This recipe features a balance of the most common spices. Using ground spices makes the recipe quick, easy, and flavorful.

What sweetener is in this chai latte?

Remember those boxes of Oregon Chai? Don’t worry, this recipe has way less than 31 grams of sugar per serving! Two tablespoons of maple syrup make it sweet enough to brighten the spices and feel like a treat without the gut bomb. Pure maple syrup has just the right amount of caramel flavor too.

caffeine free vegan chai latte

Serving Suggestions:

Vegan Chai Latte is delectable on its own but is a match in heaven with:

 Vegan Almond Shortbread, probs my favorite cookie of all time!

Almond Cacao Biscotti, which just begs to be dipped into a warm beverage.

Vegan Pumpkin Spice Blender Muffins are the perfect pair to the warm spices in chai.

caffeine free vegan chai latte

If I ever find myself sitting cross-legged on a majestic mountain, you can bet I’ll be sipping this chai latte and peacefully smiling. This recipe is:

  • Caffeine-free

  • Vegan

  • Dairy-Free

  • Sweet

  • Creamy

  • Warmly spiced

  • Quick and easy

Here’s a couple more cozy drinks for your cup!

Cashew Golden Milk

Dairy-Free Hot Cocoa Mix 

caffeine free vegan chai latte

Keep scrolling for step-by-step instructions with photos!


Ingredients for Caffeine-Free Vegan Chai Latte

Single serving recipe Makes about 12 oz.

ingredients for vegan chai latte
  • 1½ cups (355 ml) of unsweetened plant-based milk (soy, oat, or almond)

  • 2 tablespoons of maple syrup

  • ½ teaspoon of ground cinnamon

  • ¼ teaspoon of ground cardamom

  • 1/8 teaspoon of ground ginger (¼ teaspoon for spicy)

  • Pinch of ground cloves

  • Pinch of salt


How to make Caffeine-Free Vegan Chai Latte

Microwave directions:

1. Add all of your ingredients to a 16 oz. (or bigger) glass jar without the lid. Microwave until very warm but not piping hot, 1½ minutes.

2. Secure the lid and shake like your life depends on it. You’ll see the spices mix into the warm milk which will turn foamy.

vegan chai latte in a jar

Stovetop directions:

1. Add all of your ingredients to a heavy-bottomed saucepan over medium-high heat. Use a whisk or a milk frother to blend the ingredients. As it heats up, a thick foam will form on the top.

2. Remove from the heat when very warm, but not boiling.

vegan chai latte on the stovetop

3. Pour into your favorite mug, spooning any extra foam on top. Garnish with whatever makes your heart happy!

Store leftovers in the fridge for up to a week.

caffeine free vegan chai latte

If you like this recipe, please leave a 5-star rating on the recipe card below. I always appreciate your feedback and hearing about your creations! For more yummy vegan recipes, you can follow along on Instagram, Pinterest, Facebook, and Tiktok. I also send out a weekly newsletter with my latest recipes and upcoming cooking classes. Subscribe here and receive a FREE e-cookbook!

Yield: 1 Serving
Author: Carol Clayton
Vegan Chai Latte Recipe / Caffeine-Free!

Vegan Chai Latte Recipe / Caffeine-Free!

( 0 reviews )
Cozy up to this warmly spiced vegan chai latte recipe. It’s got all the classic chai spices and no caffeine! You can make this single-serving treat in about 5 minutes with wholesome plant-based milk. Perfect for bedtime or anytime you want a sweet and creamy beverage!
Prep time: 2 MinCook time: 3 MinTotal time: 5 Min

Ingredients

Instructions

Microwave directions
  1. Add all of your ingredients to a 16 oz. (or bigger) glass jar without the lid. Microwave until very warm but not piping hot, 1½ minutes.
  2. Secure the lid and shake like your life depends on it. You’ll see the spices mix into the warm milk which will turn foamy.
Stovetop directions
  1. Add all of your ingredients to a heavy-bottomed saucepan over medium-high heat. Use a whisk or a milk frother to blend the ingredients. As it heats up, a thick foam will form on the top.
  2. Remove from the heat when very warm, but not boiling.
  3. Pour into your favorite mug, spooning any extra foam on top. Garnish with whatever makes your heart happy!

Notes

Store leftovers in the fridge for up to a week.


For step-by-step instructions with photos, see blog post!

Nutrition Facts

Calories

233.43

Fat (grams)

5.93

Sat. Fat (grams)

0.76

Carbs (grams)

34.69

Fiber (grams)

2.56

Net carbs

32.11

Sugar (grams)

25.49

Protein (grams)

10.54

Sodium (milligrams)

177.77

Cholesterol (grams)

0

Nutritional information is provided as a courtesy and is an estimate only. This information comes from online calculators.

Did you make this recipe?
Tag @vegeta.full on instagram and hashtag it # feedpeopleplants

Cherry Almond Milk

Cherry Almond Milk

Jump To Recipe

A homemade vegan milk recipe with the fun addition of cherries and almond! This 10-minute recipe is creamy, lightly sweetened, and made from just 4 basic ingredients. Delectable warm or chilled!


cherry almond milk

If you’ve been around the blog, you see I’m a total sucker for anything cherry and almond (and chocolate!) There’s Chocolate Cherry Almond Granola, smoothie bowl, quick bread, nice cream, but, alas, no milk! I couldn’t let another cherry blossom season go by without creating a homemade milk that is just as pretty in pink and over-the-top delicious!

cherry almond milk

This cherry almond milk recipe is just as simple as making regular homemade almond milk but really takes it to the next level by adding frozen cherries and almond extract. If you’re into homemade milks, you’ll definitely want to give this recipe a try! It’s sweet, creamy, and tastes barista-style fancy. BTW, that almond pulp is a-ma-zing!

cherry almond milk

What I love about this recipe:

Made simple. You actually don’t have to strain the milk through a nut bag if you want it to be more like a smoothie with extra fiber. All that almond pulp is really filling too!

Short cut! You can use 2 cups of Homemade Almond Milk in place of the water and soaked almonds.

Feels fancy. The addition of frozen cherries and almond extract turn the milk a sweet shade of pink and give it dessert quality flavor. It looks so inviting in a mug or a glass, you’ll feel like you’re in your favorite coffee shop!

Make it chocolate. For a fun variation, add 3-4 tablespoons of raw cacao powder for chocolate cherry almond milk.

Heat it up or drink it cold. I love cozying up to a warm mug of this creamy milk in the crisp spring mornings we’ve been having lately. But it’s also delicious chilled from the fridge with a piece of chocolate cake!

cherry almond milk

Why you’ll want to give this Cherry Almond Milk Recipe a try!

  • Tastes delicious warm or cold

  • Easy to make

  • Pink and pretty

  • Full of almond flavor

  • Dairy-free and creamy

Most grocery stores carry frozen cherries year-round, so you don’t have to wait for cherry season to enjoy this scrumptious almond milk! It’s also a fun and easy way to elevate your homemade milk experience. And who can say no to that beautiful shade of pink?

cherry almond milk

Keep scrolling for step-by-step instructions and photos!


Ingredients for Cherry Almond Milk                                       

cherry almond milk ingredients
  • 2 cups of cold water

  • ½ cup (65g) of almonds (soaked until soft, 24hrs.)

  • 10 frozen sweet cherries

  • 1 tablespoon of maple syrup

  • ½ teaspoon of almond extract

  • A pinch of fine sea salt

Makes about 2¼ cups of milk


cherry almond milk ingredients in a blender

Steps 1-2

1. First, soak your almonds in cold water for 24 hours or more. Drain the almonds and give them a good rinse. Don’t skip this step! Soft almonds make for creamy almond milk.

2. Add the water, almonds, cherries, maple syrup, almond extract, and salt to a blender container.


cherry almond milk in a blender

Step 3

3. Secure the lid and blend at medium to high speed until completely smooth. This will take 1-2 minutes in a high-powered blender or longer in a standard blender.


cherry almond milk poured through a nut bag

Step 4

4.  Pour the milk through a nut bag fitted over a pitcher. Use your hands to squeeze all the milk through the nut bag, leaving the pulp behind. Save the pulp for smoothies, snacking, etc.

cherry almond milk squeezed through a nut bag

cherry almond milk

Step 5

5. Store in a clean glass jar in the refrigerator for up to a week!


cherry almond milk

Let’s get this milk party started with these reader favorites!

Homemade Oat Milk

Cashew Golden Milk  

Dairy-Free Hot Cocoa Mix  

cherry almond milk

If you like this recipe, please leave a 5-star rating on the recipe card below. I always appreciate your feedback and hearing about your creations! For more yummy vegan recipes, you can follow along on Instagram, Pinterest, Facebook, and Tiktok. I also send out a weekly newsletter with my latest recipes and upcoming cooking classes. Subscribe here to receive a FREE e-cookbook!

Yield: 2 cups
Author: Carol Clayton
Cherry Almond Milk

Cherry Almond Milk

( 0 reviews )
A homemade vegan milk recipe with the fun addition of cherries and almond! This 10-minute recipe is creamy, lightly sweetened, and made from just 4 basic ingredients. Delectable warm or chilled!
Prep time: 10 MinTotal time: 10 Min

Ingredients

Instructions

  1. First, soak your almonds in cold water for 24 hours or more. Drain the almonds and give them a good rinse. Don’t skip this step! Soft almonds make for creamy almond milk.
  2. Add the water, almonds, cherries, maple syrup, almond extract, and salt to a blender container.
  3. Secure the lid and blend at medium to high speed until completely smooth. This will take 1-2 minutes in a high-powered blender or longer in a standard blender.
  4. Pour the milk through a nut bag fitted over a pitcher. Use your hands to squeeze all the milk through the nut bag, leaving the pulp behind. Save the pulp for smoothies, snacking, etc.
  5. Store in a clean glass jar in the refrigerator for up to a week!

Notes

For step-by-step instructions and photos, see blog post!

Nutrition Facts

Calories

112.98

Fat (grams)

5.07

Sat. Fat (grams)

0.4

Carbs (grams)

15.43

Fiber (grams)

2.09

Net carbs

13.34

Sugar (grams)

11.66

Protein (grams)

2.54

Sodium (milligrams)

32.3

Cholesterol (grams)

0

Nutritional information is provided as a courtesy and is an estimate only. This information comes from online calculators.

Did you make this recipe?
Tag @vegeta.full on instagram and hashtag it # feedpeopleplants