Vegan Dark Chocolate Tart

Vegan Dark Chocolate Tart (No-Bake, Gluten-Free)

Jump To Recipe

With a gluten-free pecan crust and a rich and creamy dark chocolate filling, this vegan dark chocolate tart is truly one of the best desserts you’ll ever taste! Made with wholesome ingredients you can feel good about eating.


Vegan Dark Chocolate Tart (No-Bake, Gluten-Free)

Vegan Dark Chocolate Tart (No-Bake, Gluten-Free)

This vegan dark chocolate tart is one of my all-time favorite desserts and I’m SO excited to share it with you! It gets rave reviews at gatherings, potlucks, and I make it every year for the holidays. The no-bake crust and filling come together in about half an hour. It holds its shape perfectly, even at room temperature, and tastes amazing with or without toppings. Oh, and it freezes like a dream. Do I have your attention yet?

Vegan Dark Chocolate Tart (No-Bake, Gluten-Free)

Vegan Dark Chocolate Tart (No-Bake, Gluten-Free)

Why you’ll fall in love with this Vegan Dark Chocolate Tart

Easy to make. The gluten-free crust, which is mostly pecans, oats, and dates, is made in the food processor. No baking required! The dough is simply pressed into a tart pan and put in the freezer to set while you make the filling.

Rich and Chocolatey. The filling is made naturally dairy-free with wholesome full-fat coconut milk and dark chocolate. Just heat the milk on the stovetop with agar powder and vanilla, pour it over the chocolate, wait 5 minutes and stir.

Use good-quality vegan chocolate that you really enjoy since it is the main ingredient in this tart. Very dark chocolate (over 70%) will taste less sweet than 60-70% dark chocolate. My sweet spot is 70% for a sophisticated dark chocolate taste that is still sweet but not cloyingly sweet.

Make ahead and freezes well. You can make this dark chocolate tart way ahead of time because it keeps well in the fridge for up to a week and in the freezer for 3 months. I often make this for special occasions for just that reason. (and that it’s addictively delicious)

Perfect texture. Fudgy and decadent, this vegan dark chocolate tart holds its shape even at room temperature without melting. The secret is agar powder (not agar flakes). Just ¼ of a teaspoon whisked into the coconut milk gives the tart a touch of additional creamy thickness.  

Vegan Dark Chocolate Tart (No-Bake, Gluten-Free)

Vegan Dark Chocolate Tart (No-Bake, Gluten-Free)

If you like this vegan dark chocolate tart recipe, please give it a 5-star rating in the recipe card below, and lemme know how it turns out in the comments. I love hearing from you! And if you’re looking for more yummy vegan inspo, check out my Pinterest and Instagram Page!

Vegan Dark Chocolate Tart (No-Bake, Gluten-Free)

Vegan Dark Chocolate Tart (No-Bake, Gluten-Free)

Keep scrolling for step-by-step instructions with photos!

Vegan Dark Chocolate Tart (No-Bake, Gluten-Free)

Vegan Dark Chocolate Tart (No-Bake, Gluten-Free)

A BIG thank you to Royal Craft Wood for sponsoring post and creating the absolutely stunning cutting boards!


Ingredients for Vegan Dark Chocolate Tart

vegan dark chocolate tart.jpg

For the crust:

o   1½ cups (135 grams) of gluten-free rolled oats

o   ½ cup (65 grams) of pecans

o   2 tablespoons of cocoa powder

o   ¼ teaspoon of fine sea salt

o   2 tablespoons of coconut cream, melted and pourable (see note)

o   2 tablespoons of maple syrup

o   1½ cups (220 grams) of medjool dates, pitted (about 12 large dates)

vegan dark chocolate tart-2.jpg

For the chocolate filling:

o   13.5 oz can (1¾ cups, 400 ml) of full-fat coconut milk, whisked until no lumps remain

o   ¼ teaspoon of agar powder (not agar flakes)

o   1 teaspoon of vanilla

o   1¾ cups (9oz. / 255 grams) of good quality dark chocolate, chopped

o   2 tablespoons of maple syrup

Makes 8 slices. Click on the ingredients in bold to see what I use in this recipe.


Vegan Dark Chocolate Tart (No-Bake, Gluten-Free)

Vegan Dark Chocolate Tart (No-Bake, Gluten-Free)

Method for making for Vegan Dark Chocolate Tart

vegan dark chocolate tart-3.jpg

Steps 1-2:

1. Line the bottom of a 9.5 x 1.5” (or similar size) tart pan with parchment paper. Do this by using the bottom of the pan as a template to draw and then cut a circle the same size as the pan. To line the side, cut a long 1” strip of parchment and lay it around the side of the pan, cutting it into smaller pieces as necessary. You can also apply some oil to the sides to protect against sticking.

2. Combine rolled oats, pecans, cocoa powder, and salt in a food processor and pulse until coarsely ground.


vegan dark chocolate tart-4.jpg

Step 3:

3. Pour the melted coconut cream and maple syrup over the oat mixture and add in the dates. Process until the mixture begins to clump together and can form a ball when pressed between your fingers.

No-Bake Crust for Vegan Dark Chocolate Tart

No-Bake Crust for Vegan Dark Chocolate Tart


vegan dark chocolate tart-7.jpg

Steps 4-5:

4. Using your hands, spread the dough evenly over the bottom and sides of the tart pan. Continue to press the dough until it is nice and smooth and evenly covers the pan.

5. Place in the freezer to set while you make the filling.


vegan dark chocolate tart-8.jpg

Steps 6-8:

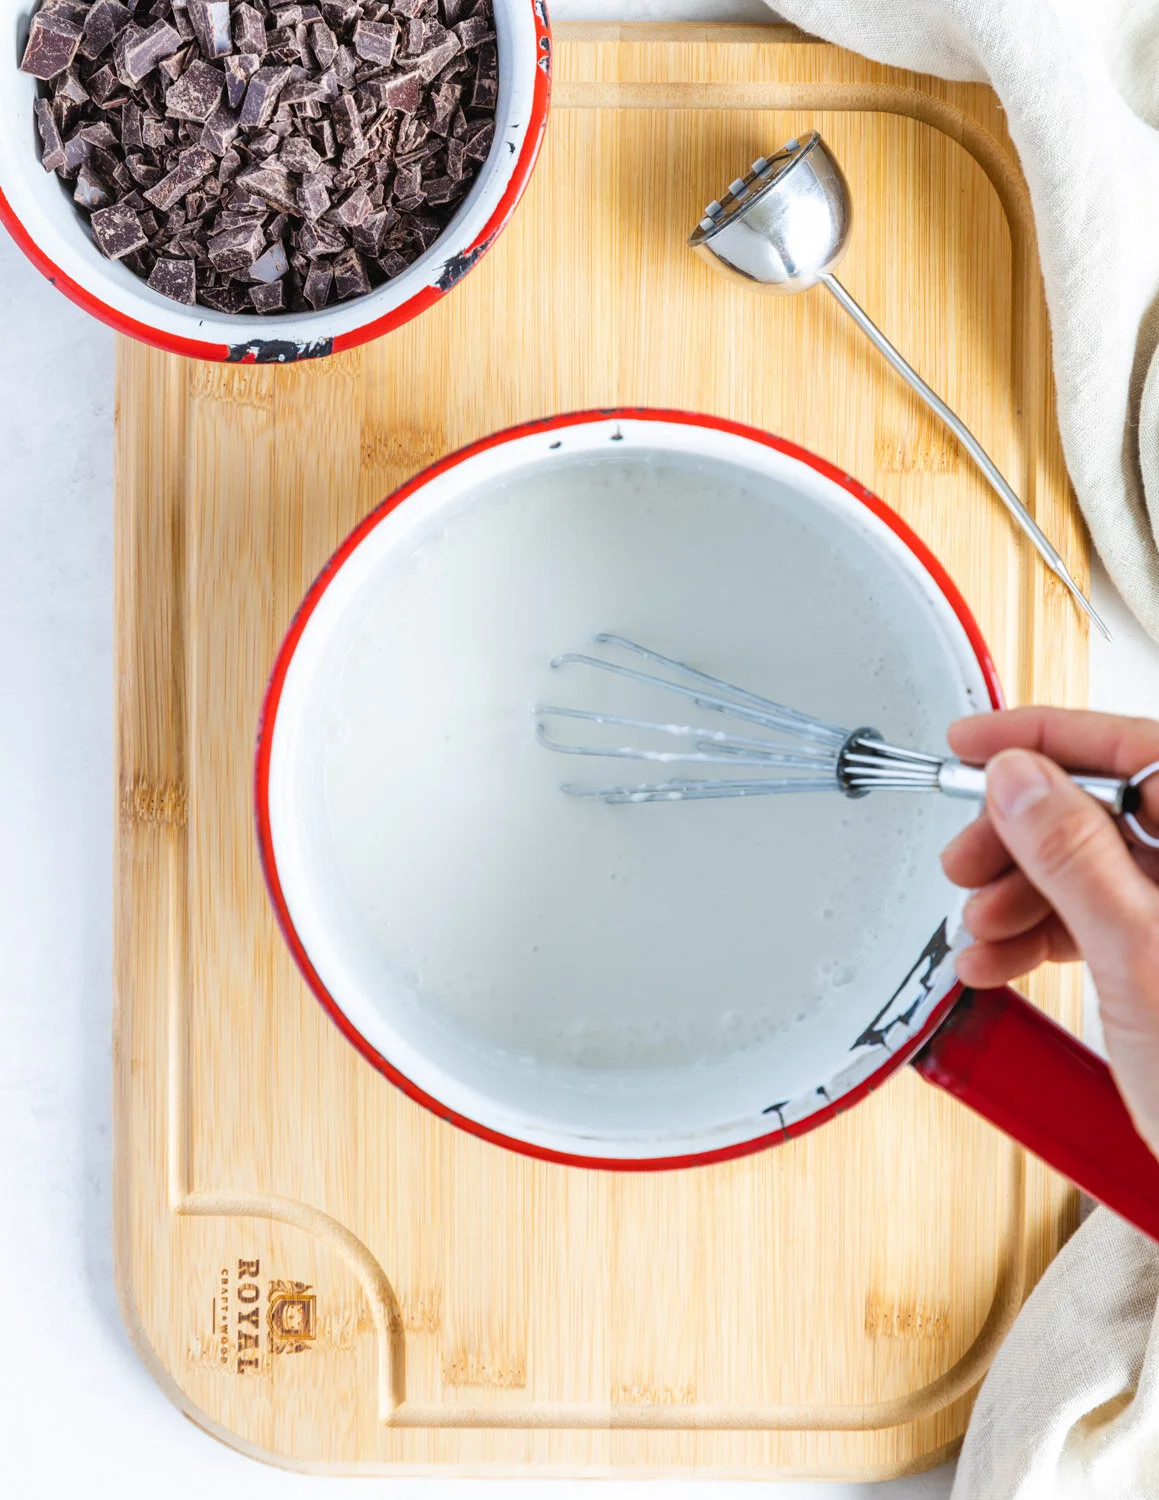
6. Chop the chocolate into small pieces and scrape them into a medium-sized bowl.

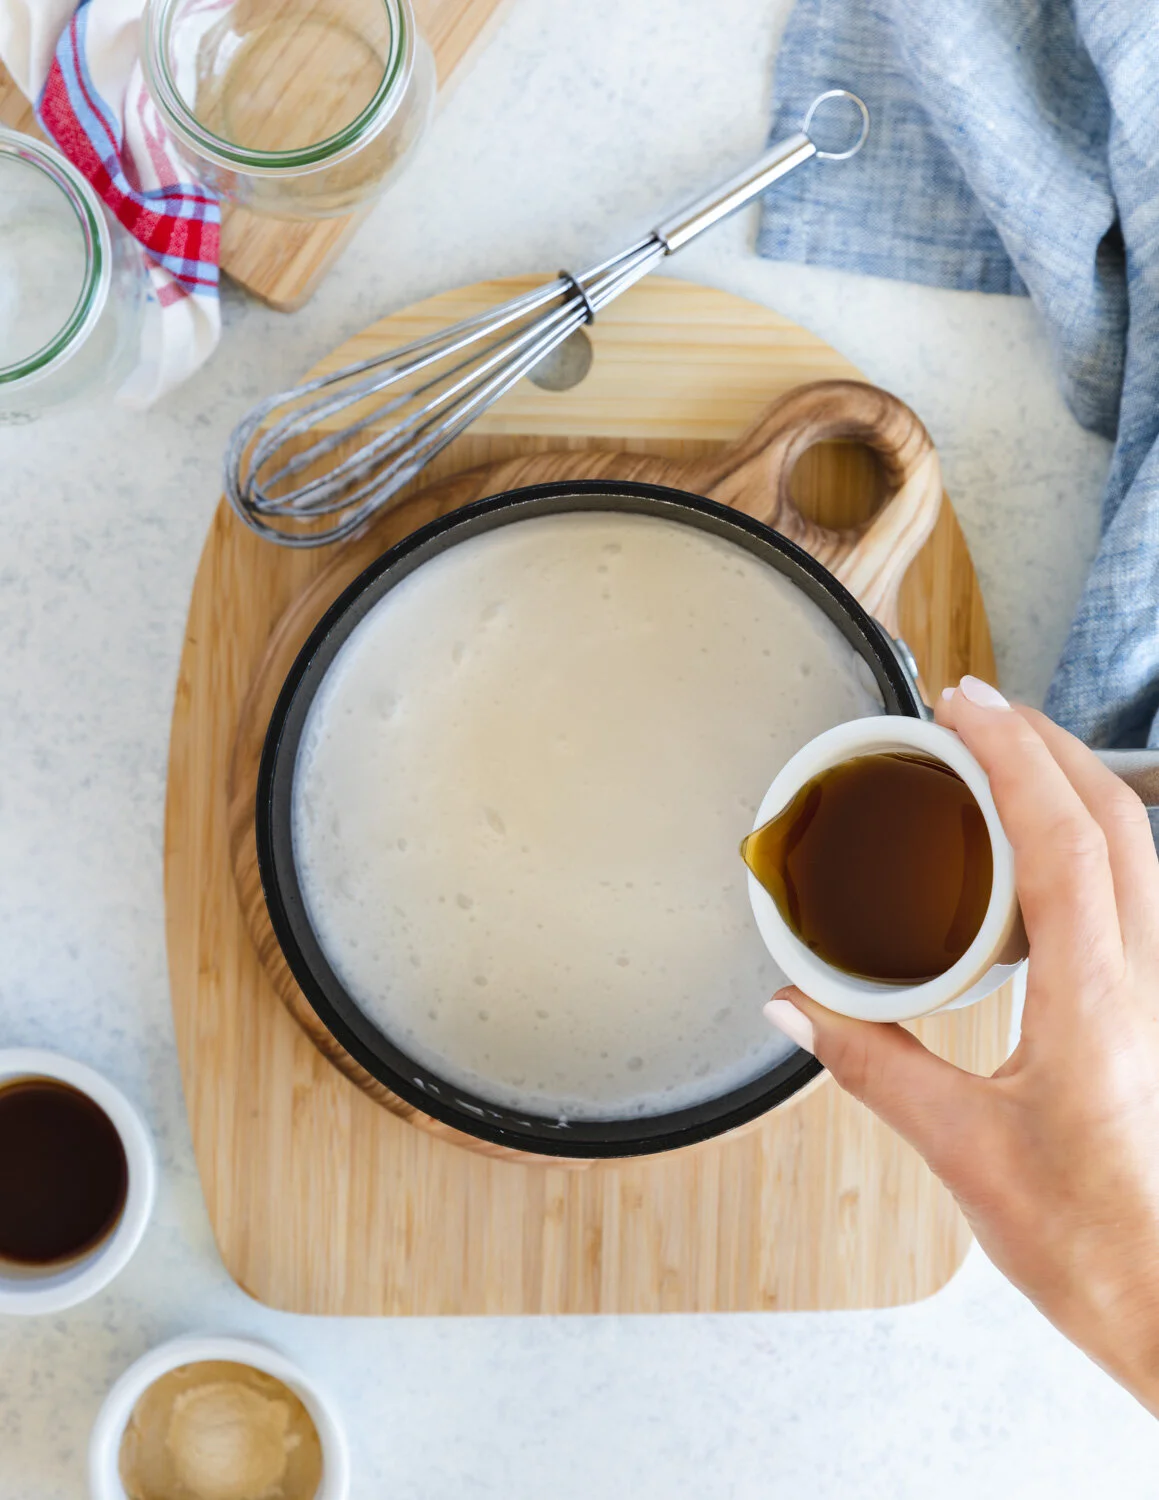
7. Whisk the coconut cream, agar powder, and vanilla in a small mixing bowl until the agar is dissolved. Pour into a small saucepan.

8. Bring to a simmer over medium-high heat, stirring occasionally. You’ll know it’s ready when little bubbles form around the sides and begin to rise up from the bottom of the pan, and the milk has reached at least 185 F (85 C).


vegan dark chocolate tart-9.jpg

Step 9:

9. Pour the hot milk over the chopped chocolate and let sit for 5 minutes without stirring. Then whisk until smooth and glossy. Add the maple syrup and continue to whisk until combined.


vegan dark chocolate tart-10.jpg

Step 10:

10. Pour into prepared crust and place in the fridge to set for at least 1 hour.

Vegan Dark Chocolate Tart (No-Bake, Gluten-Free)

Vegan Dark Chocolate Tart (No-Bake, Gluten-Free)

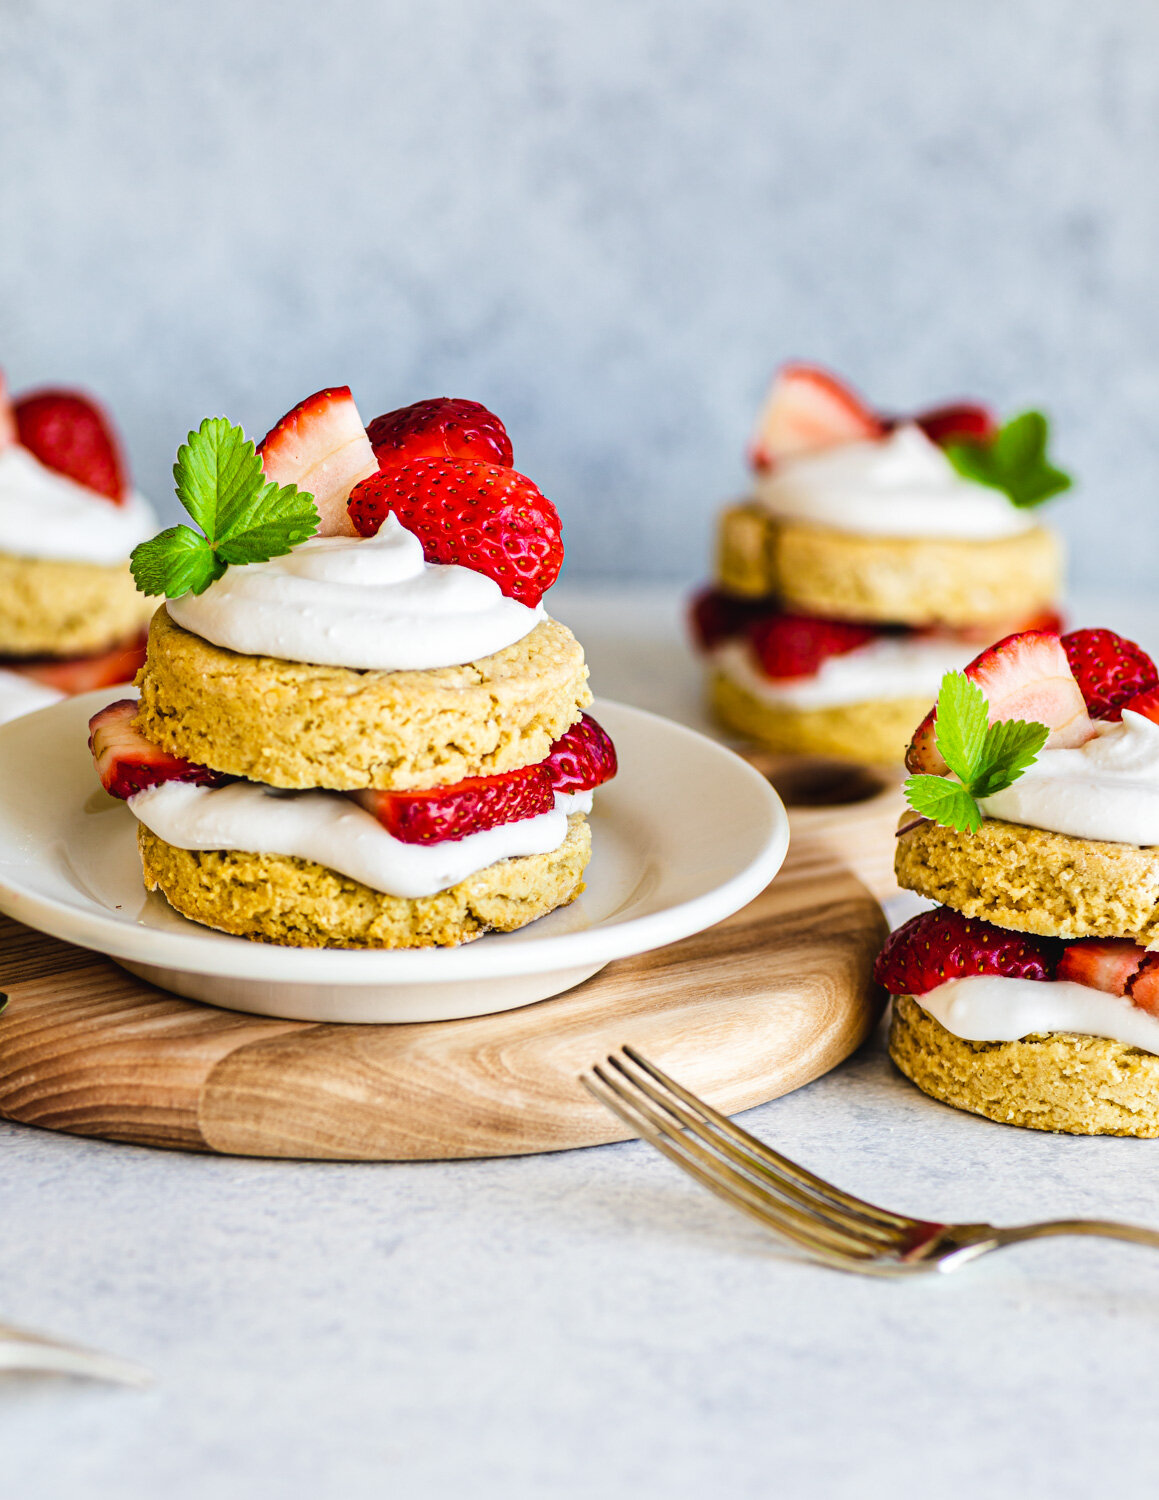
To serve, cut slices by placing a knife under hot running water, wiping it dry, and making a clean cut. Repeat for each slice. Garnish with your favorite seasonal fruit and enjoy!

Notes: This recipe will still taste delicious without agar powder but takes much longer to set (4+ hours) and will begin to melt at room temperature.

Coconut Cream: You can use the coconut cream from a can (13.5 oz. / 398 ml.) of full-fat coconut milk (the kind that comes in a can not a carton). To separate the cream from the liquid, put the can in the fridge for 24 hours, to allow the cream to separate and become solid. Then scoop out the hard cream, saving the liquid for another use. You can also use canned coconut cream (which is thicker than coconut milk) straight from the can at room temperature.


Other fun no-bake desserts to fall in love with!

Easy Vegan Panna Cotta With Fresh Berries

Seed the Day Bar

Chocolate Avocado Mousse

Printable Recipe Card:

Yield: 8 Slices
Author: Carol Clayton
Vegan Dark Chocolate Tart (No-Bake, Gluten-Free)

Vegan Dark Chocolate Tart (No-Bake, Gluten-Free)

With a gluten-free pecan crust and a rich and creamy dark chocolate filling, this vegan dark chocolate tart is truly one of the best desserts you’ll ever taste! Made with wholesome ingredients you can feel good about eating.
Prep time: 15 MinCook time: 15 MinInactive time: 1 HourTotal time: 1 H & 30 M

Ingredients

Ingredients for the crust:
Ingredients for the dark chocolate filling:

Instructions

Instructions for the crust:
  1. Line the bottom of a 9.5 x 1.5” (or similar size) tart pan with parchment paper. Do this by using the bottom of the pan as a template to draw and then cut a circle the same size as the pan. To line the side, cut a long 1” strip of parchment and lay it around the side of the pan, cutting it into smaller pieces as necessary. You can also apply some oil to the sides to protect against sticking.
  2. Combine rolled oats, pecans, cocoa powder, and salt in a food processor and pulse until coarsely ground.
  3. Pour the melted coconut cream and maple syrup over the oat mixture and add in the dates. Process until the mixture begins to clump together and can form a ball when pressed between your fingers.
  4. Using your hands, spread the dough evenly over the bottom and sides of the tart pan. Continue to press the dough until it is nice and smooth and evenly covers the pan.
  5. Place in the freezer to set while you make the filling.
Instructions for the dark chocolate filling:
  1. Chop the chocolate into small pieces and scrape them into a medium-sized bowl.
  2. Whisk the coconut cream, agar powder, and vanilla in a small mixing bowl until the agar is dissolved. Pour into a small saucepan.
  3. Bring to a simmer over medium-high heat, stirring occasionally. You’ll know it’s ready when little bubbles form around the sides and begin to rise up from the bottom of the pan, and the milk has reached at least 185 F (85 C).
  4. Pour the hot milk over the chopped chocolate and let sit for 5 minutes without stirring. Then whisk until smooth and glossy. Add the maple syrup and continue to whisk until combined.
  5. Pour into prepared crust and place in the fridge to set for at least 1 hour.

Notes:

This recipe will still taste delicious without agar powder but takes much longer to set (4+ hours) and will begin to melt at room temperature.


Coconut Cream: You can use the coconut cream from a can (13.5 oz. / 398 ml.) of full-fat coconut milk (the kind that comes in a can not a carton). To separate the cream from the liquid, put the can in the fridge for 24 hours, to allow the cream to separate and become solid. Then scoop out the hard cream, saving the liquid for another use. You can also use canned coconut cream (which is thicker than coconut milk) straight from the can at room temperature.


For step-by-step instructions with photos, see blog post!

Nutrition Facts

Calories

539.21

Fat (grams)

26.94

Sat. Fat (grams)

16.37

Carbs (grams)

73.92

Fiber (grams)

7.50

Net carbs

66.42

Sugar (grams)

52.42

Protein (grams)

6.21

Sodium (milligrams)

84.31

Cholesterol (grams)

2.55

Nutritional information is provided as a courtesy and is an estimate only. This information comes from online calculators.

Did you make this recipe?
Tag @vegeta.full on instagram and hashtag it #feedpeopleplants

Berry Rhubarb Crisp Gluten Free

Berry Rhubarb Crisp, Gluten-Free (Vegan)

Jump To Recipe

This delicious gluten-free berry rhubarb crisp recipe has got all the tastes of summer. Ruby red rhubarb, fresh from the patch strawberries, and sweet blueberries, are smothered under a crispy oat and almond topping. Each bite is full of juicy baked fruit and sweet crisp.


Berry Rhubarb Crisp, Gluten Free (Vegan)

Berry Rhubarb Crisp, Gluten Free (Vegan)

Have you ever been in the mood for a freshly baked pie and thought “that’s way too much fuss!” I’ve been there many a time. That’s when I reach for the fruit, oats, and nuts and make a crisp. The great thing about a crisp is that you can pile all the fruit into a dish, sprinkle the topping on, slide it in the oven, and walk away. They come out unique every time and always mouthwateringly delicious. They’re even great for breakfast!

This berry rhubarb crisp recipe uses a combination of rhubarb which tastes bright and tart (almost lemony), and sweet berries. The sweet/tart flavor combo makes me want to eat the whole crisp in one go! All this goodness is smothered under a layer of oats, almond flour, and chopped toasted almonds mixed with melted coconut cream and coconut sugar. It’s juicy and sweet with just the right amount of texture. It’s also naturally gluten-free and vegan, yet still rich tasting without butter or oil. Yum!  Add a scoop of dairy-free ice cream or whipped cream on top for the ultimate summer dessert!

Berry Rhubarb Crisp, Gluten Free (Vegan)

Berry Rhubarb Crisp, Gluten Free (Vegan)


What’s the difference between a crisp and a crumble?

At first glance a crisp and a crumble appear to be the same dish, so what’s the difference?  A crumble, which is of British origin, is a dish of baked fruit with a streusel topping made from fat, flour, and sugar. A crisp is an American dish of baked fruit with a crispy topping made from oats, flour, fat, and often ground nuts The oats and nuts crisp up during baking while the streusel remains rich and cakey.

Should I use fresh or frozen fruit?

I recommend using fresh or thawed frozen fruit in this recipe, not fully frozen fruit. Fresh fruit has less juice than frozen-thawed fruit and will cook in 50-55 minutes. Frozen thawed fruit will have more juice than fresh fruit and need to cook for the full hour. Fruit that is still frozen takes much longer to cook and you can end up with an over-browned top. If you need to use fully frozen fruit, lay a sheet of foil on top of the crisp after 60 minutes, to prevent burning, and cook the crisp until most of the liquid is absorbed (up to 90 minutes).

Berry Rhubarb Crisp, Gluten Free (Vegan)

Berry Rhubarb Crisp, Gluten Free (Vegan)

Are you ready to roll up your sleeves and get baking? Let’s go!

Why you’ll fall in love with this berry rhubarb crisp recipe:

o   Easier to make than a pie but just as delicious

o   Sweet and tart with a rich crispy topping

o   Great way to use frozen rhubarb and berries

o   Vegan, gluten & oil-free as always

Keep scrolling for step-by-step instructions with photos!

If you like this recipe, please give it a 5-star rating in the recipe card below. It’s also fun to see your creations on Instagram. Please share and tag me @vegeta.full.  And, if you want to save this recipe for later, be sure to pin it on Pinterest!

Berry Rhubarb Crisp with Fresh Fruit

Berry Rhubarb Crisp with Fresh Fruit


Ingredients for Berry Rhubarb Crisp

Berry Rhubarb Crisp.jpg

Ingredients for the fruit filling:

o   3 cups (370 grams) of strawberries, cut in half (fresh or thawed frozen)

o   3 cups (350 grams) of rhubarb cut into 1” pieces (fresh or thawed frozen)

o   2 cups (260 grams) of blueberries (fresh or thawed frozen)

o   ½ cup (4 oz.) maple syrup

o   2 teaspoons of vanilla

o   ¼ cup (30 grams) of cornstarch

Berry Rhubarb Crisp-2.jpg

Ingredients for the crisp topping:

o   1 cup (90 grams) of regular rolled oats

o   ½ cup (56 grams) of almond flour

o   1 cup (130 grams) of chopped almonds, toasted (see note on toasting)

o   ½ teaspoon of fine sea salt, or kosher salt

o   1 teaspoon of cinnamon

o   ¼ cup (45 grams) of coconut sugar

o   1/3 cup (2.7 oz) of coconut cream melted until pourable (in the microwave or on the stovetop) see note

Makes 6-8 servings. Click on the ingredients in bold to see what I use in this recipe.


Method for making Berry Rhubarb Crisp

Berry Rhubarb Crisp-4.jpg

Steps 1-2:

1. Pre-heat oven to 350 F (180 C, gas mark 4). There is no need to grease the pan. If using frozen fruit, thaw it first, draining off any excess juice.

2. Pile all the thawed fruit into a large mixing bowl. Whisk the maple syrup, vanilla, and cornstarch in a small mixing bowl and pour over the fruit. Stir until well coated. Let sit while you make the topping.


Berry Rhubarb Crisp-5.jpg

Steps 3-4:

3. Melt the coconut cream in the microwave or on the stovetop until it is pourable. (see note on coconut cream)

4. Combine the oats, almond flour, chopped toasted almonds, salt, and cinnamon in a medium mixing bowl. Pour the coconut cream over the oat mixture and mix until it looks like wet chunky sand.

Topping for Berry Rhubarb Crisp

Topping for Berry Rhubarb Crisp


Berry Rhubarb Crisp-9.jpg

Step 5:

5. Give the fruit a stir and scoop it into a 10.75 X 7.5 inch (2.5 quart) ungreased baking dish or same size equivalent. Sprinkle the topping over the fruit in an even layer.


Berry Rhubarb Crisp-10.jpg

Step 6:

6. Bake at 350 F (180 C, gas mark 4) for 50-60 minutes. You are looking for bubbling hot fruit which has begun to caramelize on the sides of the pan, and a crispy browned top. If the fruit appears liquidy after 50-60 minutes (usually with frozen fruit) but the top is brown, place a piece of tin foil over the top, to prevent over-browning, and continue to cook until most of the liquid is absorbed and has begun to caramelize on the sides of the pan.

Let cool 20-30 minutes and serve as is or with a generous scoop of nice cream, coconut whipped cream or tangy tofu yogurt.

Berry Rhubarb Crisp, Gluten Free (Vegan)

Berry Rhubarb Crisp, Gluten Free (Vegan)


Notes:

Coconut Cream: You can purchase coconut cream that is ready to use in a can. Simply open the can and use it at room temperature. Another way to get coconut cream is to purchase full-fat coconut milk, put it in the fridge overnight, and scoop out the hard cream which will have separated from the liquid.

Toasted Almonds: Toast raw almonds on a baking sheet at 452 F (218 C, gas mark 7) for 12 minutes until lightly brown when cut in half.


More mouthwatering desserts to fall in love with!

Easy Vegan Panna Cotta with Fresh Berries

Vegan Strawberry Shortcake

GF Cinnamon Currant Scones

Printable Recipe Card:

Yield: 8 servings
Author: Carol Clayton
Berry Rhubarb Crisp, Gluten-Free (Vegan)

Berry Rhubarb Crisp, Gluten-Free (Vegan)

This delicious gluten-free berry rhubarb crisp recipe has got all the tastes of summer. Ruby red rhubarb, fresh from the patch strawberries, and sweet blueberries, are smothered under a crispy oat and almond topping. Each bite is full of juicy baked fruit and sweet crisp.
Prep time: 20 MinCook time: 60 MinTotal time: 1 H & 19 M

Ingredients

Ingredients for the fruit filling
Ingredients for the crisp topping

Instructions

  1. Pre-heat oven to 350 F (180 C, gas mark 4). There is no need to grease the pan. If using frozen fruit, thaw it first, draining off any excess juice.
  2. Pile all the thawed fruit into a large mixing bowl. Whisk the maple syrup, vanilla, and cornstarch in a small mixing bowl and pour over the fruit. Stir until well coated. Let sit while you make the topping.
  3. Melt the coconut cream in the microwave or on the stovetop until it is pourable. (see note on coconut cream)
  4. Combine the oats, almond flour, chopped toasted almonds, salt, and cinnamon in a medium mixing bowl. Pour the coconut cream over the oat mixture and mix until it looks like wet chunky sand.
  5. Give the fruit a stir and scoop it into a 10.75 X 7.5 inch (2.5 quart) ungreased baking dish or same size equivalent. Sprinkle the topping over the fruit in an even layer.
  6. Bake at 350 F (180 C, gas mark 4) for 50-60 minutes. You are looking for bubbling hot fruit which has begun to caramelize on the sides of the pan, and a crispy browned top. If the fruit appears liquidy after 50-60 minutes (usually with frozen fruit) but the top is brown, place a piece of tin foil over the top, to prevent over-browning, and continue to cook until most of the liquid is absorbed and has begun to caramelize on the sides of the pan.
  7. Let cool 20-30 minutes and serve as is or with a generous scoop of nice cream, coconut whipped cream or tangy tofu yogurt.

Notes:

Coconut Cream: You can purchase coconut cream that is ready to use in a can. Simply open the can and use it at room temperature. Another way to get coconut cream is to purchase full-fat coconut milk, put it in the fridge overnight, and scoop out the hard cream which will have separated from the liquid.


Toasted Almonds: Toast raw almonds on a baking sheet at 452 F (218 C, gas mark 7) for 12 minutes until lightly brown when cut in half.


For step-by-step instructions with photos, see blog post!

Nutrition Facts

Calories

358.31

Fat (grams)

14.45

Sat. Fat (grams)

2.93

Carbs (grams)

53.98

Fiber (grams)

6.75

Net carbs

47.23

Sugar (grams)

33.13

Protein (grams)

7.24

Sodium (milligrams)

217.70

Cholesterol (grams)

0.00

Nutritional information is provided as a courtesy and is an estimate only. This information comes from online calculators.

Did you make this recipe?
Tag @vegeta.full on instagram and hashtag it #feedpeopleplants

Dairy-Free Hot Cocoa Mix

Dairy-Free Hot Cocoa Mix (Healthy)

Jump To Recipe

This ultra-rich and creamy Dairy-Free Hot Cocoa Mix recipe is calling all chocolate lovers! It’s simple to make and tastes so much better than store-bought. Made oh-so-healthy with raw cacao powder, date sugar, and coconut milk powder, it’s a healthy chocolate dream come true!


Dairy-Free Hot Cocoa Mix (Healthy)

Dairy-Free Hot Cocoa Mix (Healthy)

You might be wondering why a recipe for hot cocoa is popping up in a summer post. That, my friends, can be summed up in a word: camping. Hot cocoa is like a camping secret weapon. It’s lightweight, easy to prepare, tastes delicious both hot or cold and is erm…chocolate.

Have you ever been cold while camping? (Hand raised high in the air!) This year for our 15th wedding anniversary, Todd and I took a hike up to the Olympic Hot Springs. It was beautiful, peaceful, scenic… and rainy. The kind of rain where you think you don’t need a coat but hours later are soaked to the skin. All I could think about, the entire hike down, was a comforting cup of this rich chocolatey hot cocoa.

This is where dairy-free hot cocoa mix ticks all my boxes. It’s dead simple to make, just mix dairy-free milk powder, cocoa, sweetener, and flavorings with hot water. The milk powder I use in this recipe is coconut milk powder which is vegan and gluten-free. You can make a single cup or a bigger batch. It’s also easy to whip up ahead of time and store for later use, at home or on the trail. Full of creamy, rich chocolatey flavor, it’s surprisingly healthy too.

I’ve got two recipe options for you.

1.     The superfood option: with raw cacao powder and date sugar

2.     The sweeter option: with dutched cocoa powder and beet sugar

 Either way, you’ll be in chocolate heaven.

Dairy-Free Hot Cocoa Mix makes a fun DIY gift too. Just add the mix to a jar, tuck in some toppings, and tie a ribbon around the top with a note!

Dairy-Free Hot Cocoa Mix makes a great gift!

Dairy-Free Hot Cocoa Mix makes a great gift!

If you like this recipe, please give it a 5-star rating below. It’s also fun to see your creations on Instagram. Please share and tag me @vegeta.full.  And, if you want to save this recipe for later, be sure to pin it on Pinterest!

Dairy-Free Hot Cocoa Mix (Healthy)

Dairy-Free Hot Cocoa Mix (Healthy)


Ingredients for 4 servings (32 oz.) of dairy-free hot cocoa mix

Dairy Free Hot Cocoa Mix Ingredients

Ingredients:

o   ½ cup of coconut milk powder

o   ¼ cup of raw cacao powder (or dutched cocoa powder for richer)

o   ¼ cup of date sugar (or beet sugar for sweeter)

o   1/8 teaspoon of fine sea salt

o   1 teaspoon of vanilla (or ½ a vanilla bean added to dry mix)

o   4 cups (32 oz. / 946 ml) of very hot water

Ingredients for a single serving (8 oz.) of dairy-free hot cocoa mix

Dairy Free Hot Cocoa Mix

Ingredients:

o   2 tablespoons of coconut milk powder

o   1 tablespoon of raw cacao powder (or dutched cocoa powder for richer)

o   1 tablespoon of date sugar (or beet sugar for sweeter)

o   A pinch of fine sea salt

o   ¼ teaspoon of vanilla

o   1 cup (8oz. / 237 ml) of very hot water

Click on the ingredients in bold to see what I use in this recipe.


Method for making dairy-free hot cocoa mix

Dairy Free Hot Cocoa Mix

Step 1:

1. To make 4 servings, add coconut milk powder, cacao (or cocoa) powder, sugar, and salt to a jar and shake. To make 1 serving add ¼ of these ingredients to a mug. (see single serving ingredients for amounts)


Dairy Free Hot Cocoa Mix

Step 2:

2. Whisk ¼ cup of the hot cocoa mix with 1 cup (8 oz.) of very hot water until dissolved and frothy.


Dairy Free Hot Cocoa Mix

Step 3:

3. Stir vanilla extract into prepared cocoa and garnish as desired. (see note on how to flavor dry mix)

Enjoy hot cocoa topped with all your favorites: marshmallows, chocolate shaving, and coconut whipped cream!

Note: To flavor the dry mix with vanilla, add ½ a vanilla bean which has been split lengthwise to the jar. This will infuse the cocoa mix with vanilla flavor while keeping it storage-friendly.


Dairy-Free Hot Cocoa Mix (Healthy)

Dairy-Free Hot Cocoa Mix (Healthy)

Taking a hike? Try these delicious camp-friendly recipes!

 Yam and Chickpea Peanut Stew

Oil-Free Socca Bread

Seed the Day Bar

Printable Recipe Card:

Yield: 4 Servings
Author: Carol Clayton
Dairy-Free Hot Cocoa Mix (Healthy)

Dairy-Free Hot Cocoa Mix (Healthy)

This ultra-rich and creamy Dairy-Free Hot Cocoa Mix recipe is calling all chocolate lovers! It’s simple to make and tastes so much better than store-bought. Made oh-so-healthy with raw cacao powder, date sugar, and coconut milk powder, it’s a healthy chocolate dream come true!
Prep time: 5 MinTotal time: 5 Min

Ingredients

Instructions

  1. To make 4 servings, add coconut milk powder, cacao (or cocoa) powder, sugar, and salt to a jar and shake. To make 1 serving add ¼ of these ingredients to a mug. (See single-serving ingredients for amounts in blog post.)
  2. Whisk ¼ cup of the hot cocoa mix with 1 cup (8 oz.) of very hot water until dissolved and frothy.
  3. Stir vanilla extract into prepared cocoa and garnish as desired. (see note on how to flavor dry mix)

Notes:

To flavor the dry mix with vanilla, add ½ a vanilla bean which has been split lengthwise to the jar. This will infuse the cocoa mix with vanilla flavor while keeping it storage-friendly.


For step-by-step instructions with photos, see blog post!

Nutrition Facts

Calories

185.99

Fat (grams)

6.73

Sat. Fat (grams)

5.34

Carbs (grams)

13.96

Fiber (grams)

1.40

Net carbs

12.56

Sugar (grams)

8.87

Protein (grams)

1.98

Sodium (milligrams)

79.21

Cholesterol (grams)

0.00

Nutritional information is provided as a courtesy and is an estimate only. This information comes from online calculators.

Did you make this recipe?
Tag @vegeta.full on instagram and hashtag it #feedpeopleplants

Easy Vegan Panna Cotta with Fresh Berries

Easy Vegan Panna Cotta with Fresh Berries

Jump To Recipe

This easy vegan panna cotta recipe makes the most delicious summer dessert. It’s firm enough to hold a pile of fresh berries, yet soft enough to melt in your mouth. Using only 4 ingredients, it’s surprisingly easy to make, and tastes just like the fancy Italian dessert!


Easy Vegan Panna Cotta with Fresh Berries

Easy Vegan Panna Cotta with Fresh Berries

I discovered panna cotta recently while making my vegan strawberry shortcake recipe. What does the traditional Italian dessert made of cooked cream and shortcake have in common? Cream. (Yum!) Cream that has been sweetened and flavored with vanilla. (Double yum!) I decided the more recipes with sweet vanilla coconut cream the better and began testing this super easy vegan panna cotta.

Are you new to the world of panna cotta like me? Panna cotta is a popular Italian dessert made with cooked cream, sugar, vanilla, and gelatin. This healthy vegan version is made with full-fat coconut milk, maple syrup, vanilla, and the key ingredient: agar powder. Agar is a naturally gelatinous powder derived from marine red algae. It’s tasteless and dissolves quickly in liquid. To create a texture that is firm enough to be used as a mold yet soft enough to melt in your mouth, we use just ½ teaspoon of agar powder and dissolve it in the cream mixture before heating. It’s important to use agar power and not agar flakes in this recipe.

You need only a few ingredients and tips to make perfect vegan panna cotta every time.

1. Dissolve all your ingredients in a small saucepan while cold. This allows the agar powder to incorporate into the cream, so you don’t end up with weird lumps.

2. Bring the cream to a boil, turn the heat down, and stir gently so it doesn’t boil over.

3. After a few minutes, pour into jars, cool, and then chill in the fridge for one hour.

The great thing about this vegan panna cotta recipe is that it holds well and can be left out at room temperature without melting. The texture will be firmer straight from the fridge and softer as it warms up to room temperature. It’s fancy enough to serve at a dinner party or gathering but is still kid-friendly. Sweet (but not too sweet), it’s the perfect dessert to pair with fresh from the patch summer berries.

If you like this recipe, please give it a 5-star rating below. It’s also fun to see your creations on Instagram. Please share and tag me @vegeta.full.  And, if you want to save this recipe for later, be sure to pin it on Pinterest!

Keep scrolling for step-by-step instructions and photos!

Note: If you would like to make a panna cotta mold, see note below.

Easy Vegan Panna Cotta with Fresh Berries

Easy Vegan Panna Cotta with Fresh Berries


Ingredients for Easy Vegan Panna Cotta with Fresh Berries

Easy Vegan Panna Cotta with Fresh Berries Ingredients

Ingredients:

o   1 can (13.5 oz. / 400 ml) of full-fat coconut milk

o   2 tablespoons of maple syrup

o   2 teaspoons of vanilla

o   ½ teaspoon of agar powder (not agar flakes) *see note

o   ¾ cup of fresh berries, sliced

Makes 3 panna cotta. Click on the ingredients in bold to see what I use in this recipe.


Method for making Easy Vegan Panna Cotta with Fresh Berries

Easy Vegan Panna Cotta with Fresh Berries

Step 1:

1. Pour the coconut milk in a small saucepan (with the heat off) and whisk until no lumps remain.


Easy Vegan Panna Cotta with Fresh Berries

Step 2:

2. Add the maple syrup, vanilla, and agar powder to the coconut milk. Whisk until the agar powder is dissolved.


Easy Vegan Panna Cotta with Fresh Berries

Steps 3-4:

3. Turn the heat on to medium-high and bring to a boil, stirring occasionally to prevent the agar from setting up on the bottom of the pan.

4. Once boiling, turn the heat down to low (taking care the milk doesn’t boil over) and gently simmer for 3 minutes while stirring.


Easy Vegan Panna Cotta with Fresh Berries

Steps 5-6:

5. Remove from the heat and pour (use a funnel if it makes this easier) into 3 heat-proof serving jars. Let cool and chill in the fridge for 1 hour until the panna cotta is set.

6. Spoon sliced berries over the top and enjoy!


Note: To make a panna cotta mold, pour the milk into small bowls and chill until set, at least 1 hour. When ready to serve, dip the bowl in very hot water for approx. 30 seconds. (You can also rub a little oil on the inside of the bowl, beforehand, for easy removal.) Slide a rubber spatula around the rim of the panna cotta, to break the seal, and invert onto a plate. Garnish with fresh berries and serve.

If you are serving the panna cotta in jars (without unmolding it) and prefer a softer, more melty mouthfeel, reduce the amount of agar powder to ¼ teaspoon.

Easy Vegan Panna Cotta with Fresh Berries

Easy Vegan Panna Cotta with Fresh Berries


Looking for more recipes with fresh berries? Try these delicious ideas!

Vegan Strawberry Shortcake

Vegan Cobb Salad with Strawberries

Strawberry Rhubarb Pie Smoothie Bowl

Easy Vegan Panna Cotta with Fresh Berries

Easy Vegan Panna Cotta with Fresh Berries


 Printable Recipe Card:

Yield: 3
Author: Carol Clayton
Easy Vegan Panna Cotta with Fresh Berries

Easy Vegan Panna Cotta with Fresh Berries

This easy vegan panna cotta recipe makes the most delicious summer dessert. It’s firm enough to hold a pile of fresh berries, yet soft enough to melt in your mouth. Using only 4 ingredients, it’s surprisingly easy to make, and tastes just like the fancy Italian dessert!
Prep time: 5 MinCook time: 10 MinInactive time: 1 H & 15 MTotal time: 1 H & 30 M

Ingredients

Instructions

  1. Pour the coconut milk in a small saucepan (with the heat off) and whisk until no lumps remain.
  2. Add the maple syrup, vanilla, and agar powder to the coconut milk. Whisk until the agar powder is dissolved.
  3. Turn the heat on to medium-high and bring to a boil, stirring occasionally to prevent the agar from setting up on the bottom of the pan.
  4. Once boiling, turn the heat down to low (taking care the milk doesn’t boil over) and gently simmer for 3 minutes while stirring.
  5. Remove from the heat and pour (use a funnel if it makes this easier) into 3 heat-proof serving jars. Let cool and chill in the fridge for 1 hour until the panna cotta is set.
  6. Spoon sliced berries over the top and enjoy!

Notes:

To make a panna cotta mold, pour the milk into small bowls and chill. When ready to serve, dip the bowl in very hot water for approx. 30 seconds. (You can also rub a little oil on the inside of the bowl for easy removal.) Slide a rubber spatula around the rim of the panna cotta, to break the seal, and invert onto a plate. Garnish with fresh berries and serve.


*If you are serving the panna cotta in jars (without unmolding it) and prefer a softer, more melty mouthfeel, reduce the amount of agar powder to ¼ teaspoon.


For step-by-step instructions with photos, see blog post!

Nutrition Facts

Calories

318.60

Fat (grams)

28.28

Sat. Fat (grams)

24.94

Carbs (grams)

16.81

Fiber (grams)

1.39

Net carbs

15.42

Sugar (grams)

10.53

Protein (grams)

3.02

Sodium (milligrams)

19.36

Cholesterol (grams)

0.00

Nutritional information is provided as a courtesy and is an estimate only. This information comes from online calculators.

Did you make this recipe?
Tag @vegeta.full on instagram and hashtag it #feedpeopleplants

How To Freeze Ripe Bananas

How To Freeze Ripe Bananas (For Smoothie Bowls, Nice Cream, and More!)

Jump To Recipe

Ripe bananas are natures perfect sweetener. They freeze beautifully and come in so handy when making smoothie bowls, nice cream, quick breads and more. Once your bananas are covered all over with black spots, just peel them and freeze them whole. Freezing whole peeled bananas the easiest way to keep them from sticking together!

Perfect Ripe Bananas for Smoothie Bowls, Nice Cream and More!

Perfect Ripe Bananas for Smoothie Bowls, Nice Cream and More!

How do you know when your bananas are ripe enough to freeze? The perfect ripe banana is just past the point where you would want to eat it fresh out of the peel. The skin will be soft and covered all over with dark brown or black spots, indicating that the starches have turned to simple sugars. They may even be a little mushy…no worries, we’re going to blend or mash them later!

Black spot bananas are naturally very sweet and blend up oh-so-creamy, turning your smoothie bowl or nice cream into a decadent, soft-serve like treat, with no dairy or refined sugar!  They’re super economical too, often found on the discount produce shelf, just waiting to be taken home and frozen.

To freeze bananas, simply peel them and freeze them whole. This keeps them from sticking together. They are fairly easy to slice even when frozen. Put them in glass or other freezer-friendly containers, labeling the quantity of bananas on the top. I usually freeze them in containers of 2, for smoothie bowls, or 4, for nice cream.

When you’re ready to use your frozen bananas, pull the amount needed from the freezer and let them thaw just a little bit. They should still be frozen but just soft enough to dent slightly if squeezed. This gives the blender something to grab onto, making the creamiest soft-serve style smoothie bowls or nice cream ever.

These golden nuggets are not only the perfect base for smoothie bowls and nice cream. They can also be used as a sweetener/binding medium when mashed in quick breads and pancakes. Bananas come in their own waste-free packaging and are incredibly economical and convenient. Especially if you are between trips to the grocery store or only have green bananas on hand. Frozen bananas will keep their flavor for about 6 months.

If you’re curious about the health benefits of bananas, click here.

And if you like this blog post, please give it a 5-star rating below. It’s also fun to see your creations on Instagram. Please share and tag me @vegeta.full.  And, if you want to save this post for later, be sure to pin it on Pinterest!


Ingredients for Freezing Ripe Bananas

Perfect Ripe Bananas

Ingredients:

o   4 Black Spot Bananas


Method for Freezing Ripe Bananas

How To Freeze Ripe Bananas

Steps 1-2:

1.  Let your bananas ripen until they are just past the point where you would want to eat them fresh out of the peel. The skin will be soft and covered all over with dark brown or black spots, indicating that the starches have turned to simple sugars.

2. To freeze bananas, simply peel them and freeze them whole. This keeps them from sticking together. They are fairly easy to slice even when frozen. Put them in glass or other freezer-friendly containers, labeling the quantity of bananas on the top. I usually freeze them in containers of 2, for smoothie bowls, or 4, for nice cream.


How To Freeze Ripe Bananas

Step 3:

3.  When you are ready to use your frozen bananas, pull the amount needed from the freezer and let them thaw just a little bit. They should still be frozen but just soft enough to dent slightly if squeezed. This gives the blender something to grab onto, making the creamiest soft-serve style smoothie bowls or nice cream ever.


There are so many ways to use frozen ripe bananas.  My two favorite ways are in:

Nice Cream Recipes

Smoothie Bowl Recipes

Ripe Bananas for Smoothie Bowls, Nice Cream and More!

Ripe Bananas for Smoothie Bowls, Nice Cream and More!

Printable Recipe Card:

Yield: 4 Servings
Author:
How To Freeze Ripe Bananas (For Smoothie Bowls, Nice Cream and More!)

How To Freeze Ripe Bananas (For Smoothie Bowls, Nice Cream and More!)

Ripe bananas are nature's perfect sweetener. They freeze beautifully and come in so handy when making smoothie bowls, nice cream, quick breads, and more. Once your bananas are covered all over with black spots, just peel them and freeze them whole. Freezing whole peeled bananas the easiest way to keep them from sticking together!
Prep time: 5 MinTotal time: 5 Min

Ingredients

Instructions

  1. Let your bananas ripen until they are just past the point where you would want to eat them fresh out of the peel. The skin will be soft and covered all over with dark brown or black spots, indicating that the starches have turned to simple sugars.
  2. To freeze bananas, simply peel them and freeze them whole. This keeps them from sticking together. They are fairly easy to slice even when frozen. Put them in glass or other freezer-friendly containers, labeling the quantity of bananas on the top. I usually freeze them in containers of 2, for smoothie bowls, or 4, for nice cream.
  3. When you are ready to use your frozen bananas, pull the amount needed from the freezer and let them thaw just a little bit. They should still be frozen but just soft enough to dent slightly if squeezed. This gives the blender something to grab onto, making the creamiest soft-serve style smoothie bowls or nice cream ever.

Nutrition Facts

Calories

105.02

Fat (grams)

0.39

Sat. Fat (grams)

0.13

Carbs (grams)

26.95

Fiber (grams)

3.07

Net carbs

23.88

Sugar (grams)

14.43

Protein (grams)

1.28

Sodium (milligrams)

1.18

Cholesterol (grams)

0.00

Nutritional information is provided as a courtesy and is an estimate only. This information comes from online calculators.

Did you make this recipe?
Tag @vegeta.full on instagram and hashtag it #letsblendvegan

Vegan Strawberry Shortcake

Vegan Strawberry Shortcake (Gluten & Oil-Free)

Jump To Recipe

Vegan Strawberry Shortcake (Gluten & Oil-Free)

Vegan Strawberry Shortcake (Gluten & Oil-Free)

Picture fresh-from-the patch strawberries and sweet coconut whipped cream, sandwiched between moist and tender melt-in-your-mouth biscuits. Are you drooling yet because I sure am! This vegan strawberry shortcake recipe uses all-purpose gluten-free flour and almond flour for a light, tender biscuit, and full fat coconut milk for richness. So, you can have your cake and eat it too without gluten or oil. It makes the perfect fancy brunch or dessert when summer strawberries are ripe and plentiful.

Vegan Strawberry Shortcake

Vegan Strawberry Shortcake

A few tips and tricks for making perfect vegan strawberry shortcake:

1. This oil-free recipe relies on fat from coconut milk, so be sure to use full-fat coconut milk that comes in a can and mix it well so it’s nice and smooth with no lumps. I’ve had good luck with Thai Kitchen Coconut Milk

2. The wet/dry ingredient ratio in gluten-free baking needs to be balanced to avoid gummy or dry, crumbly biscuits. I highly recommend using a kitchen scale for accuracy. If you don’t have a kitchen scale, use the scoop and level method for the 1 to 1 gluten-free flour. This is where you spoon the flour into a measuring cup and level the top with the flat end of a knife. The almond flour (which is super fluffy) measures most accurately by scooping directly from the bag (which compacts the fluffiness) and then leveling the top with the flat end of a knife. Almond flour is key for flavor and melt-in-your-mouth texture. This is the kitchen scale I use.

3. I enjoy fresh strawberries in this recipe without adding additional sugar. But feel free to macerate the strawberries by mixing them with 1 tablespoon of sugar and letting them sit for an hour to release some of their juices.  If you’re making this recipe outside of strawberry season, just use thawed frozen strawberries instead.

If you like this recipe, please give it a 5-star rating below. It’s also fun to see your creations on Instagram. Please share and tag me @vegeta.full.  And, if you want to save this recipe for later, be sure to pin it on Pinterest!

Keep scrolling for step-by-step instructions and photos!


Ingredients for Vegan Strawberry Shortcake

Vegan Strawberry Shortcake Ingredients

Ingredients:

o   2/3 cup (5.3 oz.) of full-fat coconut milk, stirred until completely smooth with no lumps remaining

o   1 tablespoon of lemon juice

o   1 teaspoon of vanilla

o   3 tablespoons of maple syrup

o   1¼ cups (156 grams) of gluten-free baking flour (I use Bob’s Red Mill 1 to 1 gluten-free flour)

o   1½ cups (168 grams) of blanched almond flour

o   2 teaspoons of baking powder

o   1 teaspoon of baking soda

o   ½ teaspoon of fine sea salt

o   2 cups (270 grams) of fresh strawberries, sliced

o   1 recipe of coconut whipped cream

Makes 6 shortcakes. Click on the ingredients in bold to see what I use in this recipe.


Method for making Vegan Strawberry Shortcake

Vegan Strawberry Shortcake Ingredients

Steps 1-3:

1.  Pre-heat oven to 400 F (204 C) and line a baking tray with parchment paper.

2. Fully mix your coconut milk until it is completely smooth and free of lumps. Whisk the coconut milk, lemon juice, vanilla, and maple syrup in a small bowl and set aside to turn into buttermilk. (this acts as a natural leavening agent)

3. In a large bowl, combine gluten-free flour, almond flour, baking powder, baking soda and salt. Mix well.


Vegan Strawberry Shortcake Ingredients

Step 4:

4.  Drizzle ¼ of the milk over the flour mixture and fold it in with a fork. Repeat this step until all but 1 tablespoon of the milk is worked into the dough. The dough will be slightly sticky but easy to handle with floured hands. (if it’s too sticky to handle, sprinkle with 1 tablespoon more of gluten-free flour)

Vegan Strawberry Shortcake Dough

Vegan Strawberry Shortcake Dough


Vegan Strawberry Shortcake Cut Into Biscuits

Steps 5-6:

5.  Lightly flour your work surface and gently pat the dough into a square disk that is 1 inch thick, using your hands. (not a rolling pin which will squish all the air out of the dough)

6. Using a floured 2½ inch biscuit cutter, cut 4 biscuits from the disk. Reform the dough into a rectangle and cut the remaining 2 biscuits. Gently transfer biscuits to the parchment-lined baking sheet, spaced evenly apart.


Vegan Strawberry Shortcake Biscuits Brushed with Milk

Step 7:

7.  Brush the tops with the remaining 1 tablespoon of milk and bake at 400 F (204 C) for 17 minutes.


Vegan Strawberry Shortcake Biscuits

Steps 8-9:

8. Let cool for 10 minutes and slice in half.

9. Layer the bottom half of the biscuit with coconut whipped cream and sliced strawberries. Add the top biscuit and layer with more whipped cream and strawberries.

Enjoy as a decadent breakfast, brunch or dessert!


Vegan Strawberry Shortcake (Gluten & Oil-Free)

Vegan Strawberry Shortcake (Gluten & Oil-Free)

Note: If you don’t have almond flour, you can use 2 cups (256 grams) of gluten-free 1-to-1 flour, but the biscuits will be denser and less flavorful.

Other healthy vegan desserts to fall in love with:

Chocolate Chunk Cookies

Almond Cacao Biscotti

Lemon Poppy Seed Loaf


Vegan Strawberry Shortcake with Coconut Whipped Cream

Vegan Strawberry Shortcake with Coconut Whipped Cream

Printable Recipe Card:

Yield: 6 shortcakes
Author: Carol Clayton
Vegan Strawberry Shortcake (Gluten & Oil-Free)

Vegan Strawberry Shortcake (Gluten & Oil-Free)

( 0 reviews )
Picture fresh-from-the patch strawberries and sweet coconut whipped cream, sandwiched between moist and tender melt-in-your-mouth biscuits. This vegan strawberry shortcake recipe uses all-purpose gluten-free flour and almond flour for a light and tender biscuit, and full-fat coconut milk for richness.
Prep time: 20 MinCook time: 17 MinTotal time: 37 Min

Ingredients

Instructions

  1. Pre-heat oven to 400 F (204 C) and line a baking tray with parchment paper.
  2. Fully mix your coconut milk until it is completely smooth and free of lumps. Whisk the coconut milk, lemon juice, vanilla, and maple syrup in a small bowl and set aside to turn into buttermilk. (this acts as a natural leavening agent)
  3. In a large bowl, combine gluten-free flour, almond flour, baking powder, baking soda, and salt. Mix well.
  4. Drizzle ¼ of the milk over the flour mixture and fold it in with a fork. Repeat this step until all but 1 tablespoon of the milk is worked into the dough. The dough will be slightly sticky but easy to handle with floured hands. (if it’s too sticky to handle, sprinkle with 1 tablespoon more of gluten-free flour)
  5. Lightly flour your work surface and gently pat the dough into a square disk that is 1 inch thick, using your hands. (not a rolling pin which will squish all the air out of the dough)
  6. Using a floured 2½ inch biscuit cutter, cut 4 biscuits from the disk. Reform the dough into a rectangle and cut the remaining 2 biscuits. Gently transfer biscuits to the parchment-lined baking sheet, spaced evenly apart.
  7. Brush the tops with the remaining 1 tablespoon of milk and bake at 400 F (204 C) for 17 minutes.
  8. Let cool for 10 minutes and slice in half.
  9. Layer the bottom half of the biscuit with coconut whipped cream and sliced strawberries. Add the top biscuit and layer with more whipped cream and strawberries.

Notes

For tips and tricks, and step-by-step instructions with photos, see blog post.

Nutrition Facts

Calories

396.86

Fat (grams)

26.42

Sat. Fat (grams)

11.79

Carbs (grams)

35.27

Fiber (grams)

5.24

Net carbs

30.03

Sugar (grams)

10.23

Protein (grams)

9.62

Sodium (milligrams)

559.02

Cholesterol (grams)

0.00

Nutritional information is provided as a courtesy and is an estimate only. This information comes from online calculators.

Did you make this recipe?
Tag @vegeta.full on instagram and hashtag it # feedpeopleplants

Vegan Strawberry Shortcake (Gluten & Oil-Free)

Vegan Strawberry Shortcake (Gluten & Oil-Free)