
Oatmeal Breakfast Cookies
Oatmeal Breakfast Cookies (gluten-free and vegan)

Oatmeal Breakfast Cookies (gluten-free and vegan)
Move over granola, there’s a new cookie in town! While I do love the crunch of a good granola, sometimes you want the soft chewiness of a cookie…and you want that cookie for breakfast. No problem. By taking the same basic ingredients of granola, you can create a healthy oatmeal breakfast cookie that satisfies just like a traditional cookie.
The flavors in this gluten-free, vegan breakfast cookie came from one of my favorite trail mix combinations: peanuts, raisins, pumpkin seeds, and chocolate (o’ course!). They are loaded with plant-based goodness too, making them very breakfast-friendly. We’ve got healthy fats from peanut butter, nutrient-dense seeds, and lots of fiber, not to mention that amazing chocolate crunch from the cacao nibs.
Healthy oatmeal breakfast cookies are just as easy to make as regular cookies and are so convenient to have on hand when you need a grab-and-go breakfast or snack.
1. Blend your dry ingredients
2. Melt your wet ingredients
3. Combine
4. Add mix-ins
5. Bake
Scroll down for step-by-step instructions and photos!
I love having a batch on hand to pull out for a sweet (no banana) treat, that tastes like a chewy granola bar and is full of energizing whole plant foods.

Healthy Oatmeal Breakfast Cookies
If you make this recipe, I’d love to hear how you enjoyed it in the ratings and comments below. It’s so fun to see your creations, as well, on Instagram. Please tag me @vegeta.full.
Ingredients for Oatmeal Breakfast Cookies

I
ngredients:
Dry Ingredients:
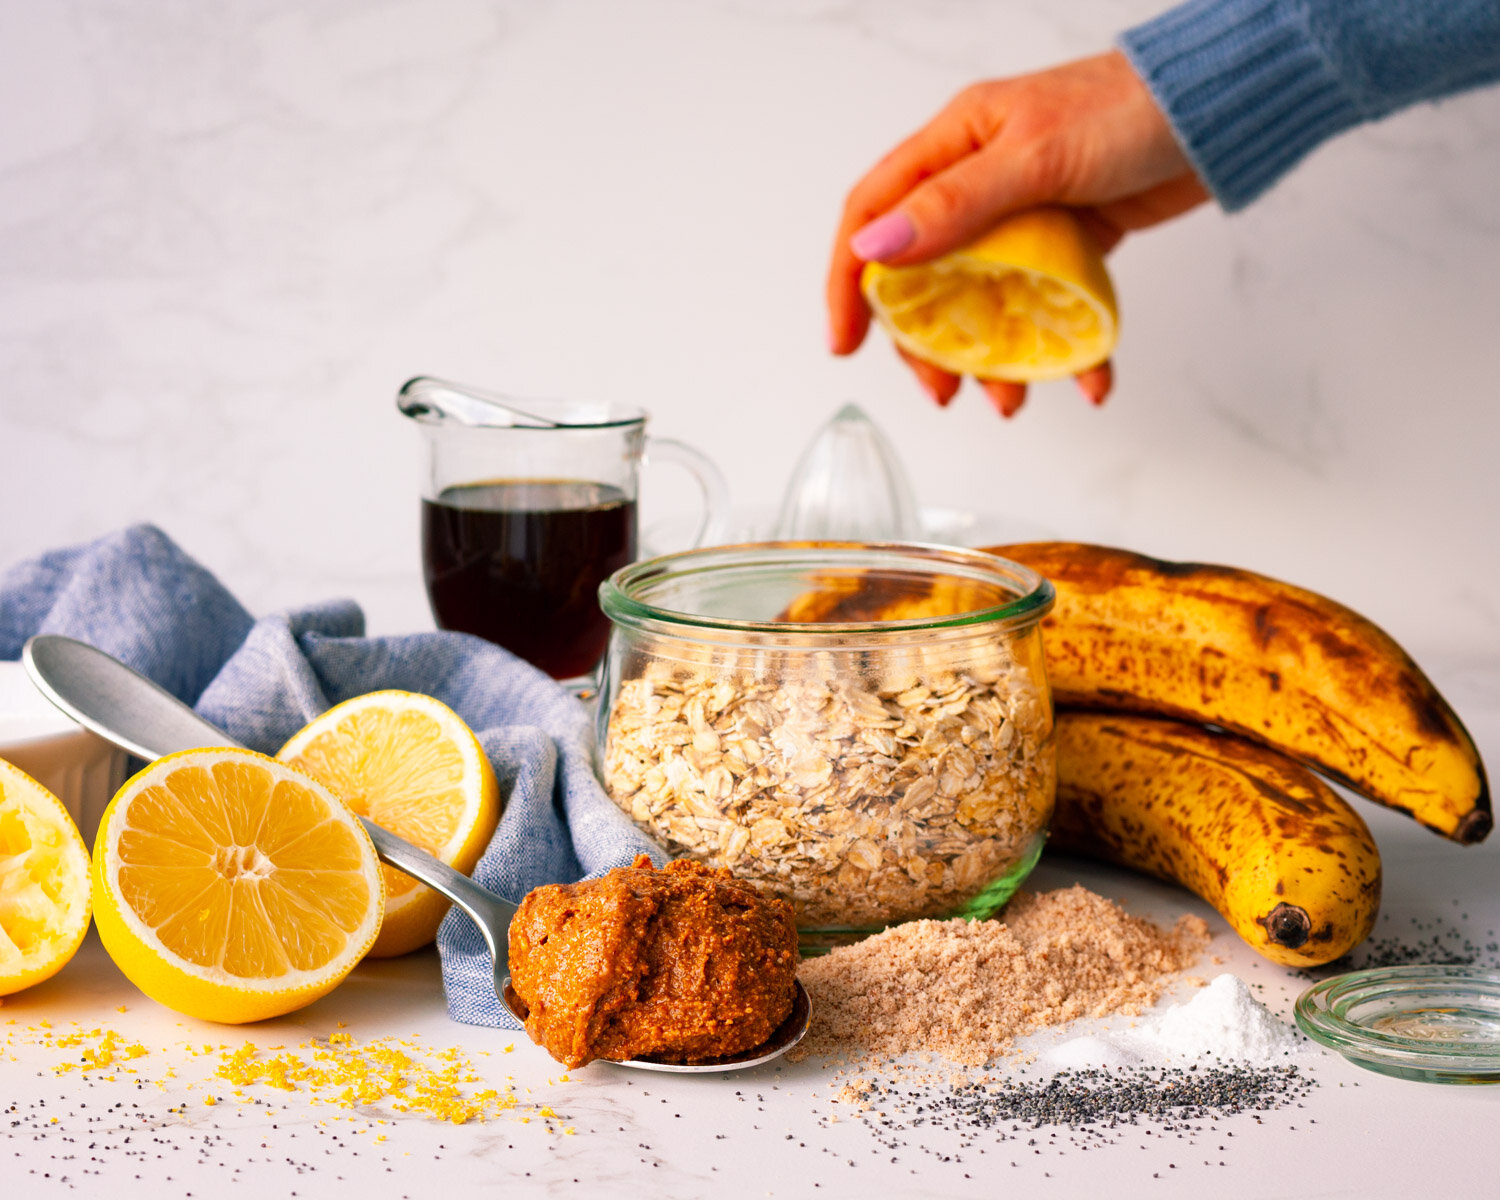
o 1¼ cup (120 grams) of regular rolled oats
o ¾ cup (70 grams) of regular rolled oats blended into flour
o ½ teaspoon of baking soda
o ¾ teaspoon of fine sea salt
Wet Ingredients:
o 1½ tablespoons of flax meal whisked with 3 tablespoons of water.
o ½ cup of maple syrup (plus more for brushing the tops)
o ½ cup of peanut butter
o 1 teaspoon of vanilla

Mix Ins:
o ¼ cup (37 grams) of raisins
o ¼ cup (37 grams) of raw pumpkin seeds
o ¼ cup (30 grams) of cacao nibs
o 15 almonds for topping
Makes 15 cookies (3 tablespoons each) Click on the ingredients in bold to see what I use in this recipe.
Method for Making Oatmeal Breakfast Cookies

Steps 1-5:
1. Preheat oven to 350 F (180 C) and line 1-2 baking sheets with parchment paper.
2. Make your flax “egg” by whisking the flax meal (which is ground flaxseed) with water in a small bowl until it starts to gel and become creamy. You can use a fork, a small whisk, or a milk frother. Set aside to thicken.
3. Create the oat flour by blending ¾ cup of rolled oats on high speed until powdery. The texture will be more coarse than regular flour and that’s okay.
4. Add the oat flour, rolled oats, baking soda, and salt to a large mixing bowl and give it a stir to combine the ingredients.
5. In a small saucepan over medium heat, whisk the maple syrup, peanut butter, and vanilla until melted and smooth. If you’re using crunchy peanut butter, there will still be some lumps. This will take a few minutes.

Steps 6-7:
6. Pour the warm peanut butter mixture over the dry ingredients. Add the flax “egg” and mix until well incorporated. The dough will become quite thick, stiff, and sticky.
7. Stir in the raisins, pumpkin seeds, and cacao nibs until evenly mixed.
Step 8:
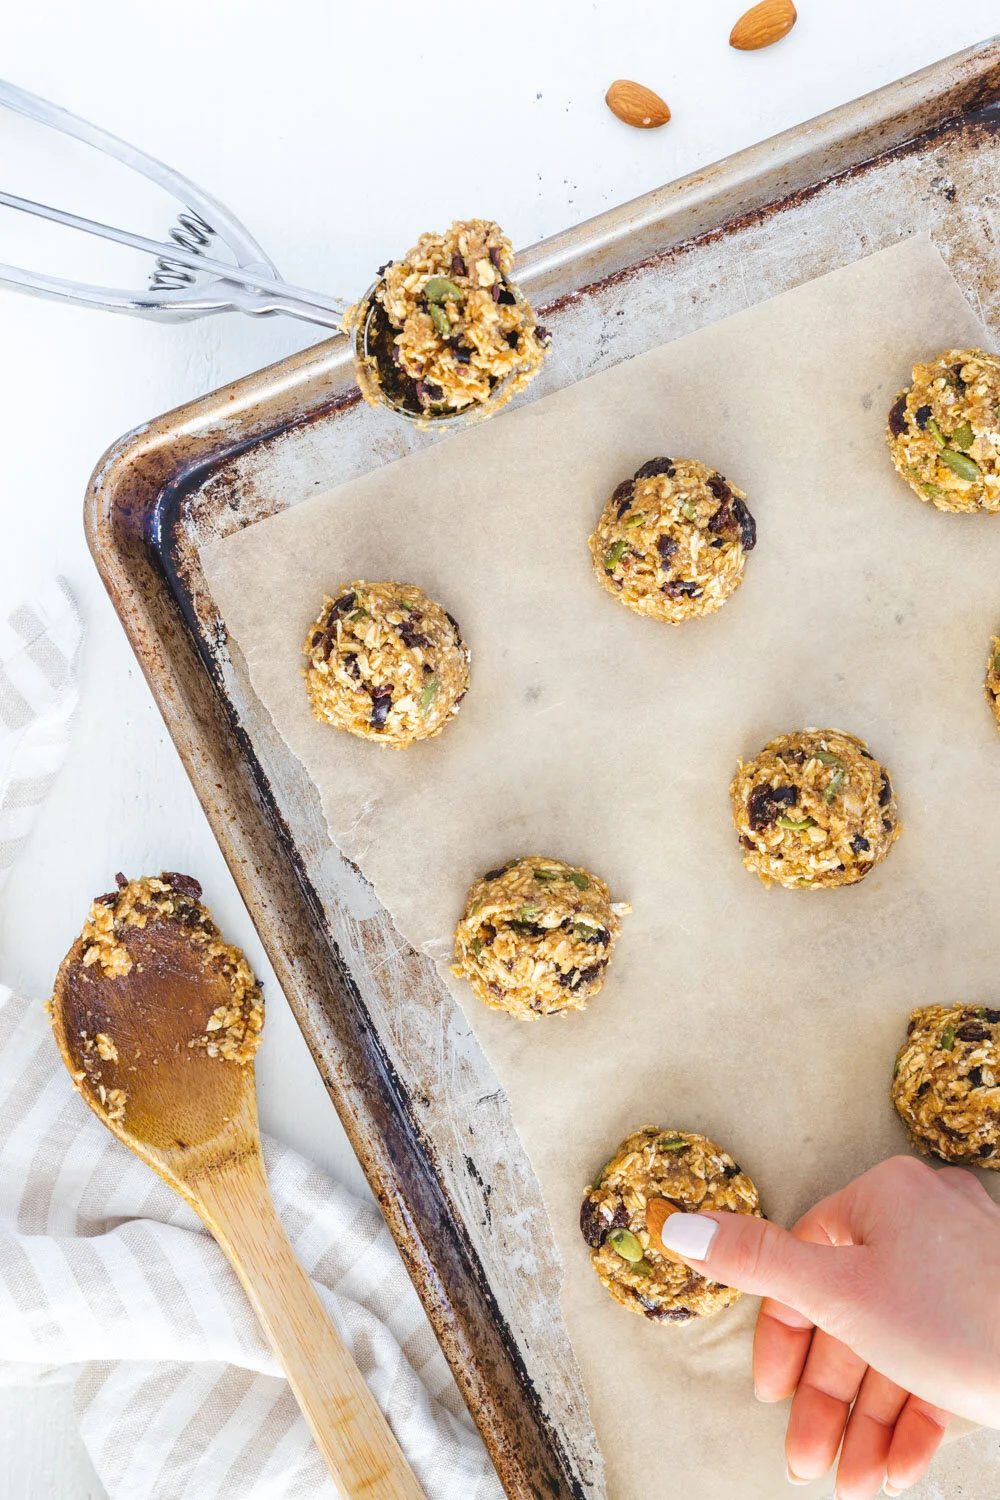
8. Using a 3-tablespoon ice cream scoop, (or your hands) make 16 evenly sized cookies. Pack the dough firmly into the scoop or roll into a ball with your hands. This will help keep the cookies hold their shape as they bake. Pat into a cookie-shaped disk and press an almond into the top. Brush the tops with maple syrup (optional) for a pretty glazed look.

Step 9:
9. Bake on prepared cookie sheets for 10 minutes. After 5 minutes, transfer to a cooling rack. When cool, store in an airtight container. Cookies will firm up as they cool down.
Enjoy as a healthy grab-and-go breakfast, or an energizing snack. Super delicious paired with a green smoothie too!

Oatmeal Breakfast Cookies (oil-free)
Looking for more healthy breakfast ideas made with rolled oats? Try these delicious recipes!

Vegan Oatmeal Breakfast Cookies
Printable Recipe Card:
")
Oatmeal Breakfast Cookies (gluten-free and vegan)
Ingredients
Instructions
- Preheat oven to 350 F (180 C) and line 1-2 baking sheets with parchment paper.
- Make your flax “egg” by whisking the flax meal (which is ground flaxseed) with water in a small bowl until it starts to gel and become creamy. You can use a fork, a small whisk, or a milk frother. Set aside to thicken.
- Create the oat flour by blending ¾ cup of rolled oats on high speed until powdery. The texture will be more coarse than regular flour and that’s okay.
- Add the oat flour, rolled oats, baking soda, and salt to a large mixing bowl and give it a stir to combine the ingredients.
- In a small saucepan over medium heat, whisk the maple syrup, peanut butter, and vanilla until melted and smooth. If you’re using crunchy peanut butter, there will still be some lumps. This will take a few minutes.
- Pour the warm peanut butter mixture over the dry ingredients. Add the flax “egg” and mix until well incorporated. The dough will become quite thick, stiff, and sticky.
- Stir in the raisins, pumpkin seeds, and cacao nibs until evenly mixed.
- Using a 3-tablespoon ice cream scoop, (or your hands) make 16 evenly sized cookies. Pack the dough firmly into the scoop or roll into a ball with your hands. This will help keep the cookies hold their shape as they bake. Pat into a cookie-shaped disk and press an almond into the top. Brush the tops with maple syrup (optional) for a pretty glazed look.
- Bake on prepared cookie sheets for 10 minutes. After 5 minutes, transfer to a cooling rack. When cool, store in an airtight container. Cookies will firm up as they cool down.
Nutrition Facts
Calories
159.54Fat (grams)
7.40Sat. Fat (grams)
1.83Carbs (grams)
20.42Fiber (grams)
2.59Net carbs
17.83Sugar (grams)
8.85Protein (grams)
4.32Sodium (milligrams)
198.39Cholesterol (grams)
0.05Nutritional information is provided as a courtesy and is an estimate only. This information comes from online calculators.


")


")


")


")