
Orange Tahini Banana Bread
Orange Tahini Banana Bread (GF bread you can make in a blender)
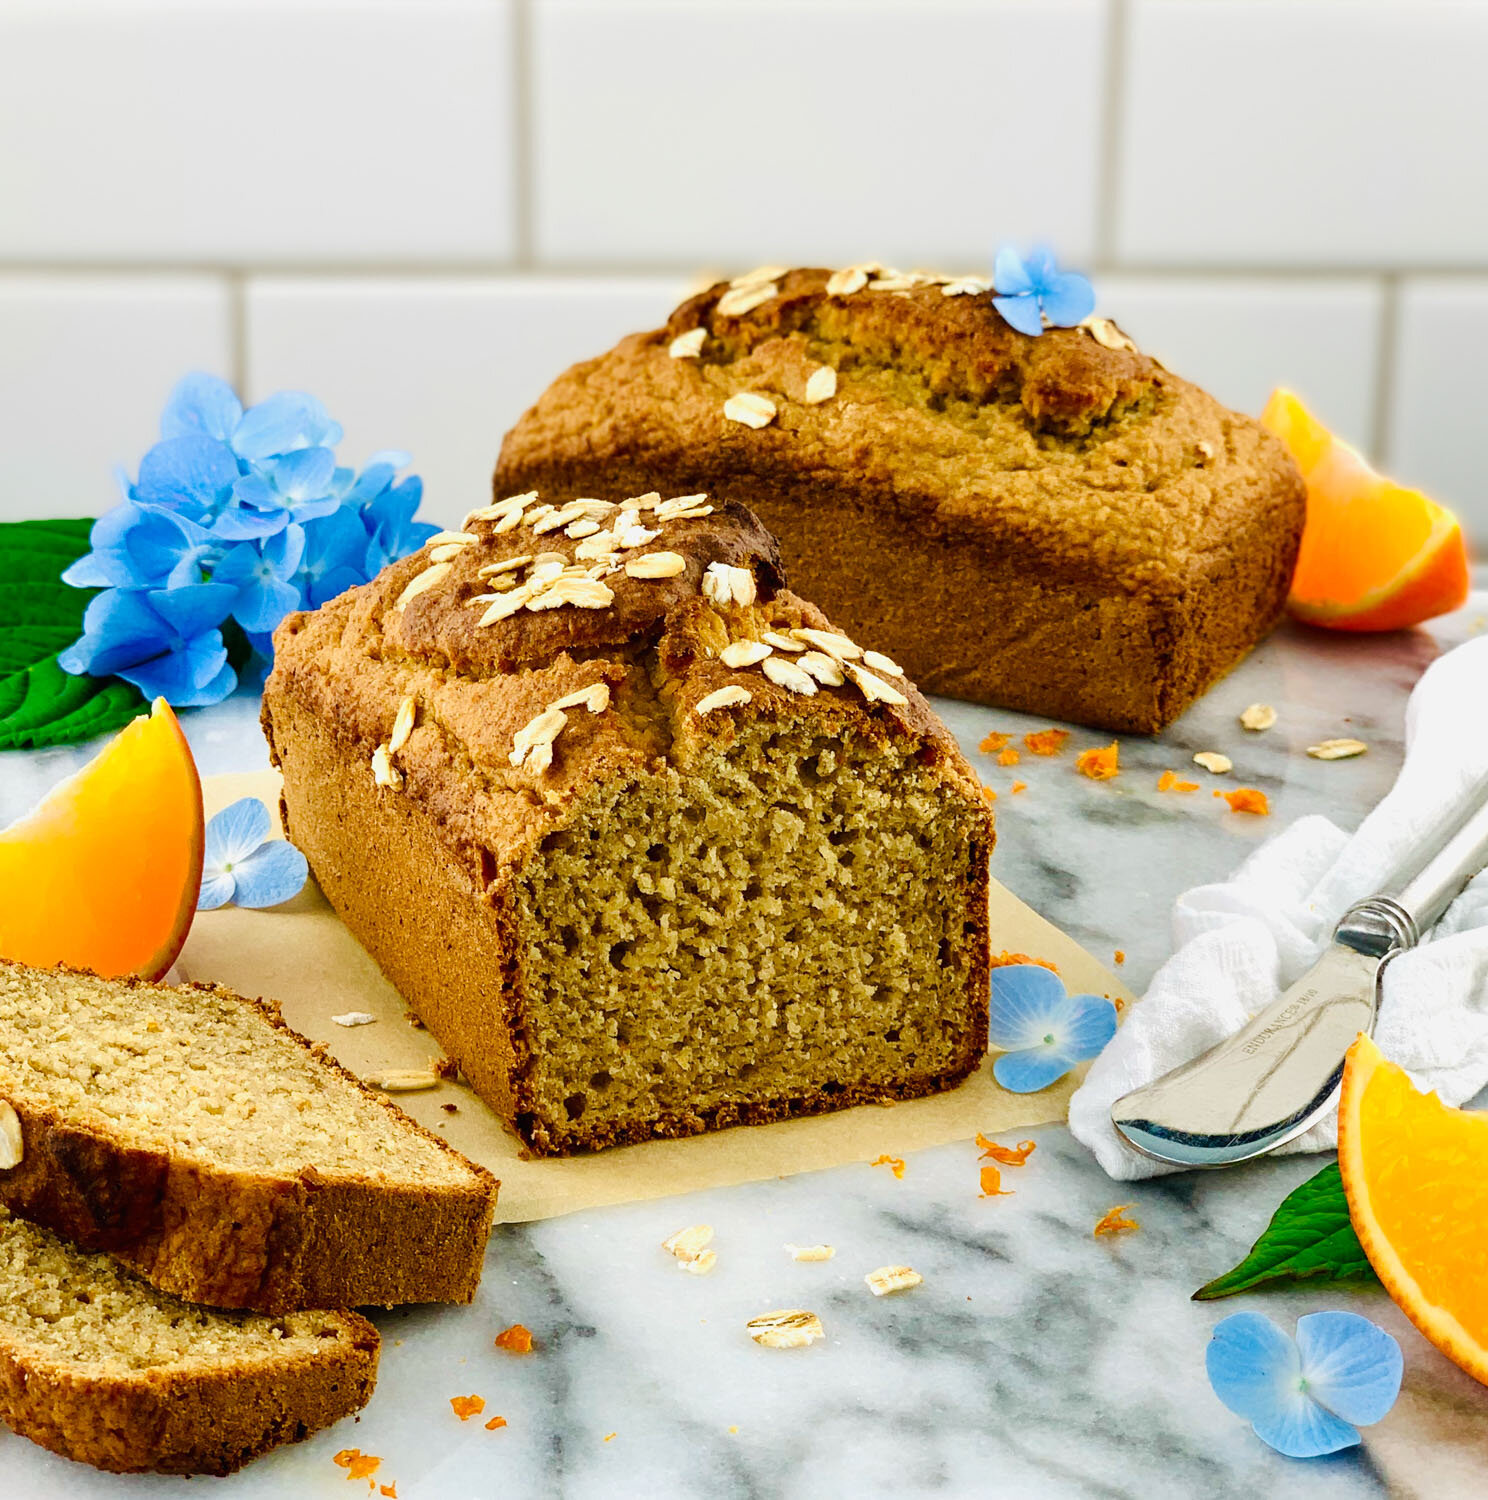
Orange Tahini Banana Bread (GF bread you can make in a blender)
When I stumbled across the idea of blender bread, I had to stop for a moment of awe and gratitude. I love blending smoothie bowls and nice cream…but bread? This was too good to be true! Most quick bread recipes call for oil, flour, and refined sugar. So the quest began to create a non-gummy, vegan, gluten & oil free banana bread, sweetened with ripe bananas and maple or date syrup. The trick for achieving a moist, cakey texture, is to blend the dry ingredients first, which creates the flour. Then add the wet ingredients, give a stir with a spatula, and then blend for 10 seconds only. Blending for short amount of time prevents any gumminess. I like using mini loaves for this recipe which gives the bread its cute shape. The fun part is slathering the top with Easy Orange Tahini Maple Glaze!
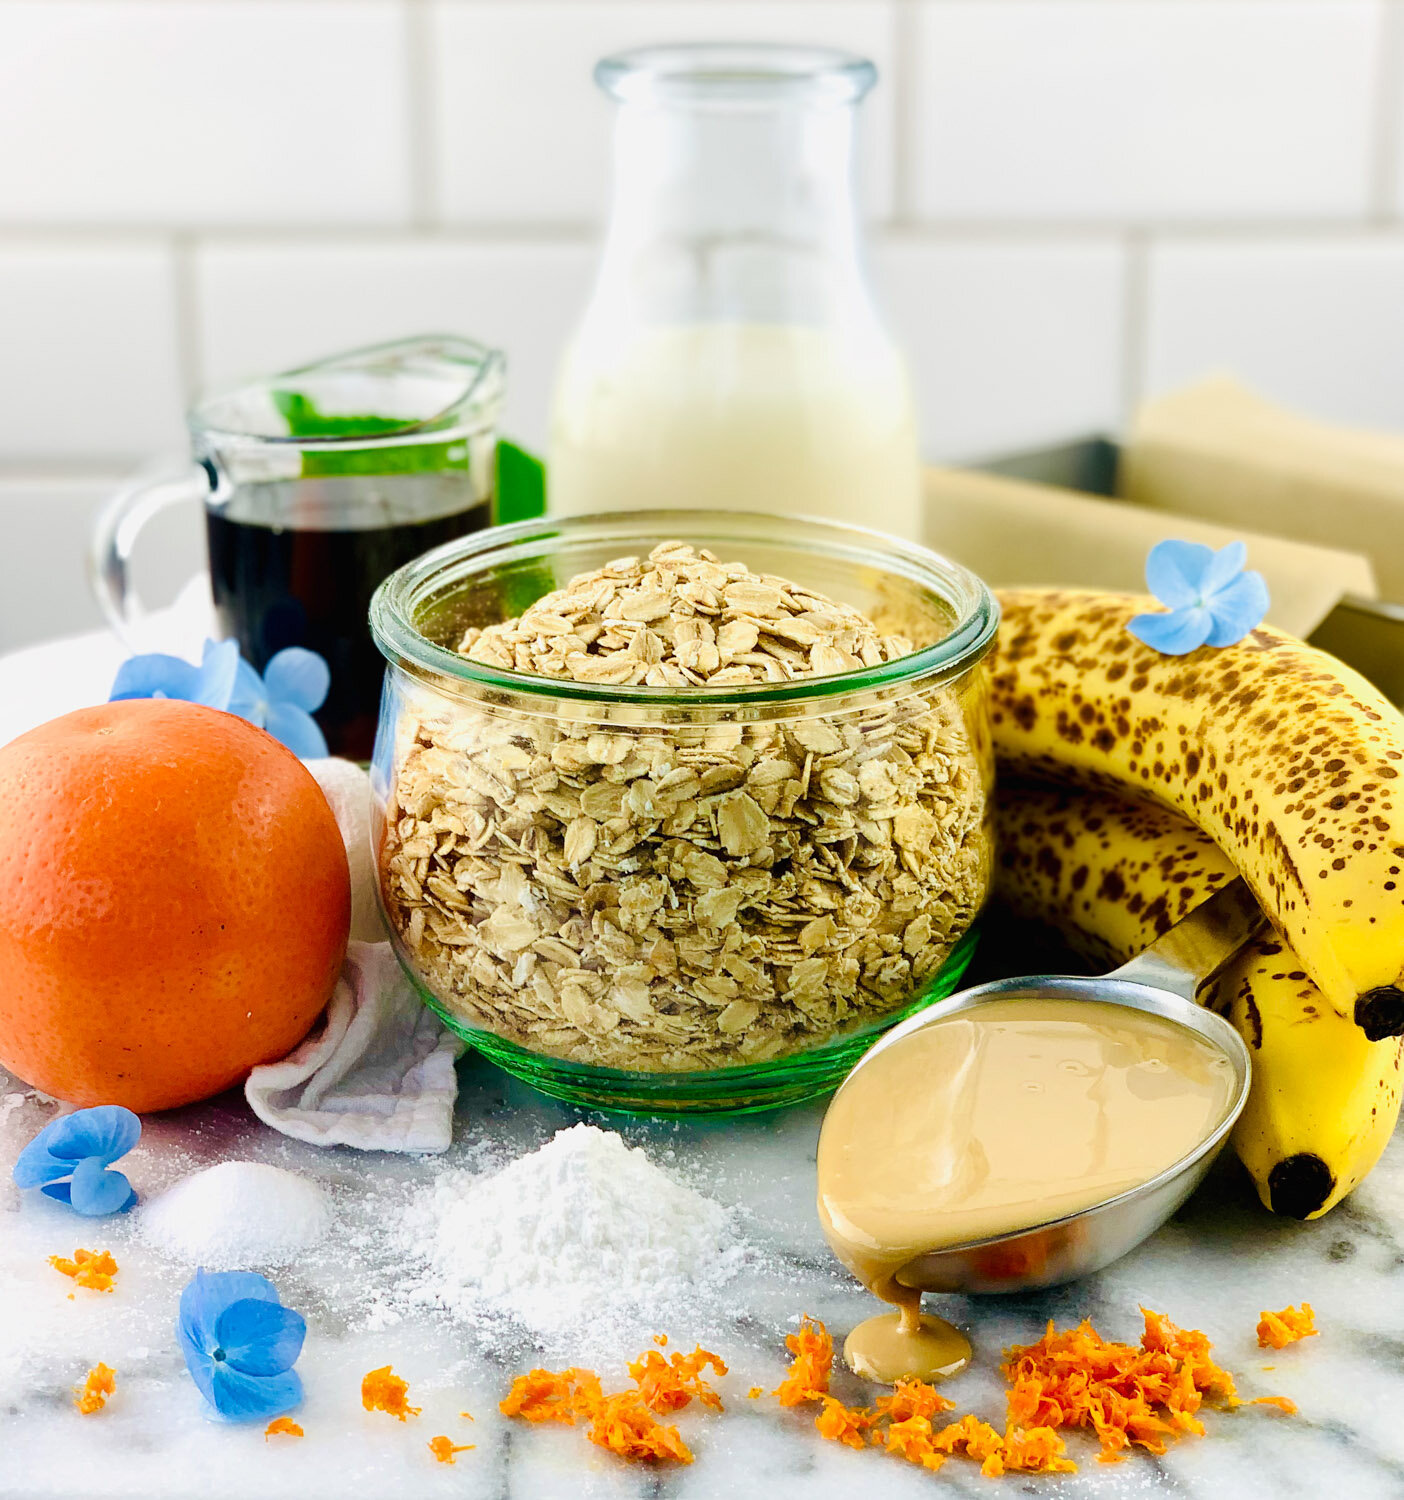
Ingredients
Dry Ingredients:
2 cups of regular rolled oats (186 grams) (gluten-free if needed)
2 teaspoons of baking powder
½ teaspoon of fine sea salt
Wet Ingredients:
1 cup of banana pulp (8 oz. about 2 medium very ripe banans)
¼ cup (2oz.) of almond or oat milk
¼ (2oz.) cup of tahini
1/3 cup (2.67 oz.) of maple syrup (use date syrup to make it fruit sweetened)
2 teaspoons of fresh orange zest
To learn more, click/tap on the ingredients in bold.

Easy Orange Tahini Maple Glaze
Easy Orange Tahini Maple Glaze:
3 tablespoons of tahini
2 tablespoons of freshly squeezed orange juice
1 tablespoon of maple syrup
A pinch of fine sea salt
Wisk all ingredients together in a small bowl and pour over cooled banana bread
Method for Making Orange Tahini Banana Bread

Orange Tahini Banana Bread, preparing your pans
375 F for 40 minutes: makes 2 mini loaves or 1 full sized loaf
1. First, pre-heat your oven to 375 F. Prepare 1 regular sized bread pan or 2 mini sized pans by lining the sides and bottom with parchment paper. You can do this by tearing off a sheet of parchment that is the same width of your pan. Then line the long sides and the bottom with a single piece, making handles that hang over the edge of the pan. If you are using non-stick pans, greasing them won’t be necessary, otherwise rub a small amount of oil on the non-parchment covered surfaces.

Orange Tahini Banana Bread, the batter
2. Next, add all of the dry ingredients; the oats, baking powder and salt, to a high-powered blender container. Securely attach the lid and blend on medium speed for 30 seconds or until the oats have turned into oat flour. Oat flour will be more course in texture than standard flour.
3. Use a fork to mash 2 very ripe medium bananas in a bowl or measuring cup. Add 1 cup of the banana pulp to the blender container, followed by the milk, tahini, maple syrup and orange zest. Adding to much wet ingredients can make your bread gummy, so if you have extra banana pulp just save it for another purpose. Give the whole mixture a stir with a spatula to help ensure even blending.
4. Securely attach the lid and blend on medium speed for 10 seconds. Oats become gummy when overmixed, so blend just until the ingredients are incorporated.

Orange Tahini Banana Bread, baked
5. Scoop the batter into the prepared bread pan(s) and sprinkle the top with some rolled oats. Place on the middle rack in the oven and bake for 40 minutes at 375 F. You’ll know they are done when a toothpick inserted comes out clean. Cool for 3 minutes only (to prevent steam from forming in the pan which can create gumminess). Then remove from pan(s) and remove the parchment paper, then transfer to a wire rack. Let cool before slicing for best texture.

Orange Tahini Banana Bread, cooling after baking
Slather the top with Easy Orange Tahini Maple Glaze and enjoy as a healthy breakfast, snack or dessert!

Orange Tahini Banana Bread with Easy Orange Tahini Maple Glaze
Printable Recipe Card:
")
Orange Tahini Banana Bread (GF bread you can make in a blender)
Ingredients
Instructions
- First, pre-heat your oven to 375 F. Prepare 1 regular sized bread pan or 2 mini sized pans by lining the sides and bottom with parchment paper. You can do this by tearing off a sheet of parchment that is the same width of your pan. Then line the long sides and the bottom with a single piece, making handles that hang over the edge of the pan. If you are using non-stick pans, greasing them won’t be necessary, otherwise rub a small amount of oil on the non-parchment covered surfaces.
- Next, add all of the dry ingredients; the oats, baking powder and salt, to a high-powered blender container. Securely attach the lid and blend on medium speed for 30 seconds or until the oats have turned into oat flour. Oat flour will be more course in texture than standard flour.
- Use a fork to mash 2 very ripe medium bananas in a bowl or measuring cup. Add 1 cup of the banana pulp to the blender container, followed by the milk, tahini, maple syrup and orange zest. Adding to much wet ingredients can make your bread gummy, so if you have extra banana pulp just save it for another purpose. Give the whole mixture a stir with a spatula to help ensure even blending.
- Securely attach the lid and blend on medium speed for 10 seconds. Oats become gummy when overmixed, so blend just until the ingredients are incorporated.
- Scoop the batter into the prepared bread pan(s) and sprinkle the top with some rolled oats. Place on the middle rack in the oven and bake for 40 minutes at 375 F. You’ll know they are done when a toothpick inserted comes out clean. Cool for 3 minutes only (to prevent steam from forming in the pan which can create gumminess). Then remove from pan(s) and remove the parchment paper, then transfer to a wire rack. Let cool before slicing for best texture.
- Slather the top with Easy Orange Tahini Maple Glaze and enjoy as a healthy breakfast, snack or dessert!
Calories
138.59Fat (grams)
5.49Sat. Fat (grams)
0.80Carbs (grams)
20.50Fiber (grams)
2.23Net carbs
18.27Sugar (grams)
7.12Protein (grams)
3.46Sodium (milligrams)
185.52Cholesterol (grams)
0.00


")


")


")